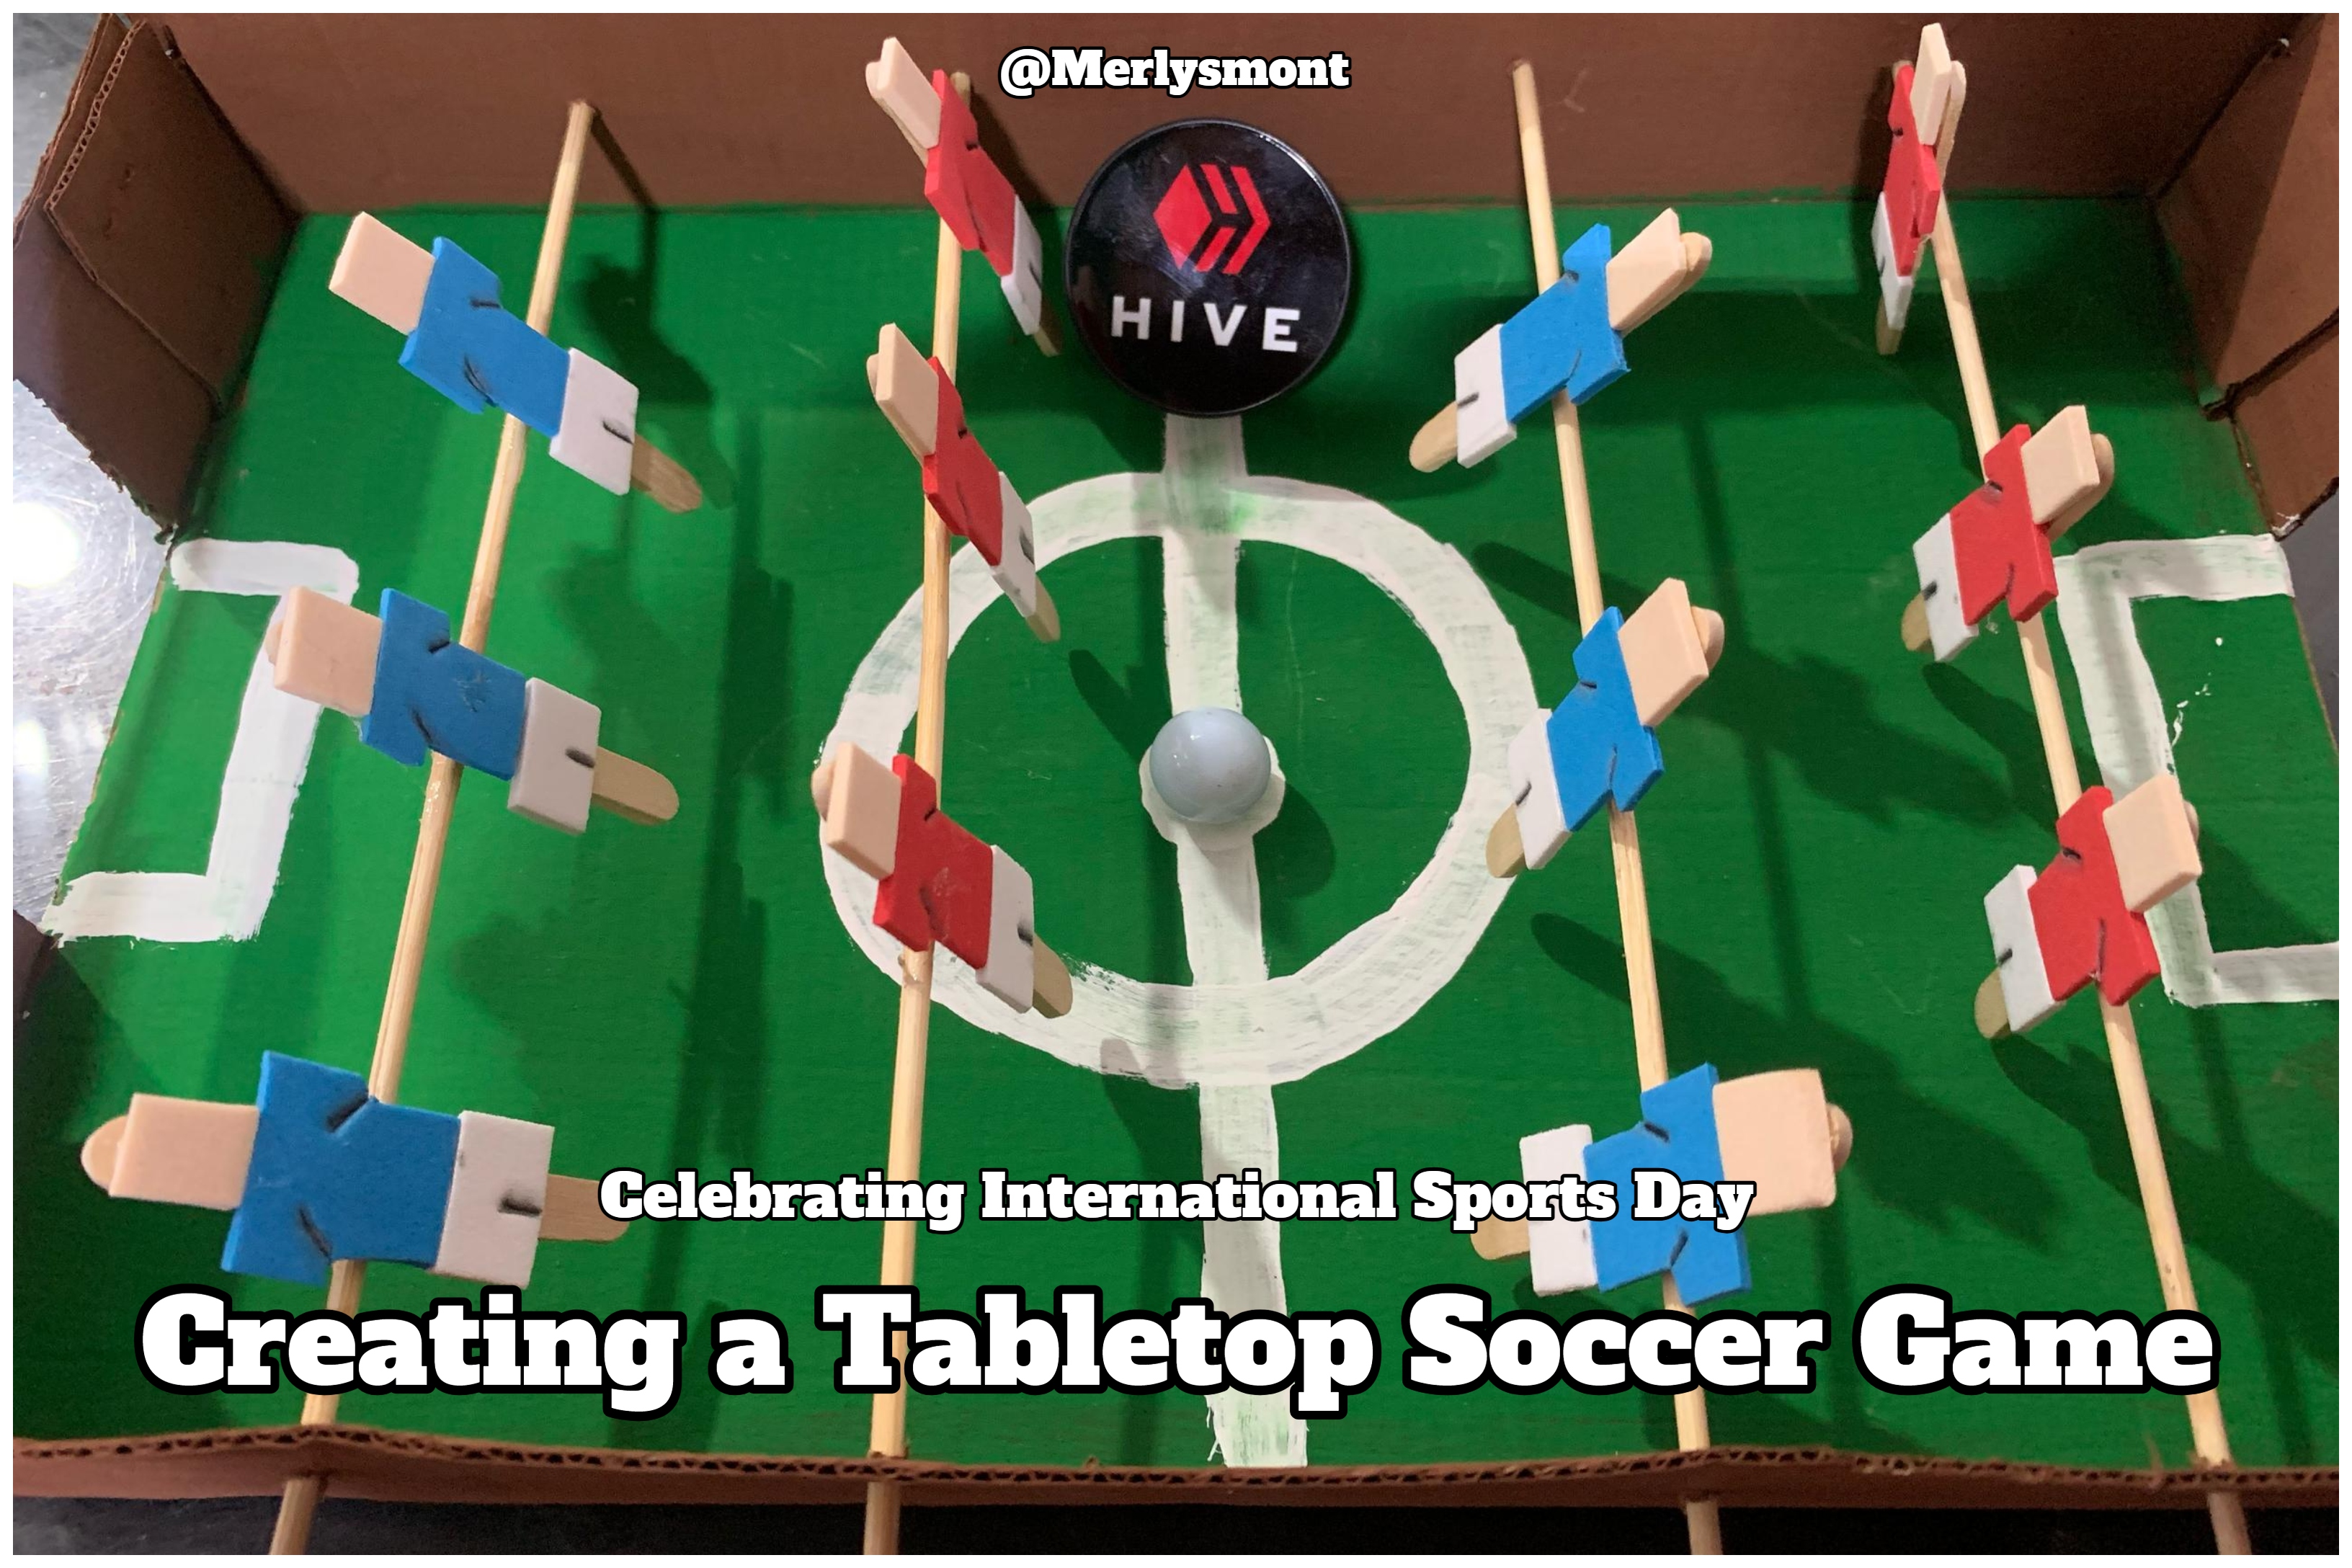
Celebrating International Sports Day: Creating a Tabletop Soccer Game!🏓⚽
.jpg)
Hello, DIYHub friends! 🌟 This April, we will be celebrating International Sports Day, an event that reminds us of the importance of sports as a tool to promote peace, inclusion, and teamwork. To honor this significant date, and as my first contribution to the contest proposed for this month (🎾April: Intern. Day of Sport for Development & Peace ☮️), I have decided to share with you a creative and fun DIY project: a tabletop soccer game made by us! 🏓⚽
Not only is this an entertaining activity to explore our creativity, but we will also have a game that we can share with family and friends. So come along, and I’ll show you how to make it—it's time to roll up our sleeves and celebrate the spirit of sports! ✌️
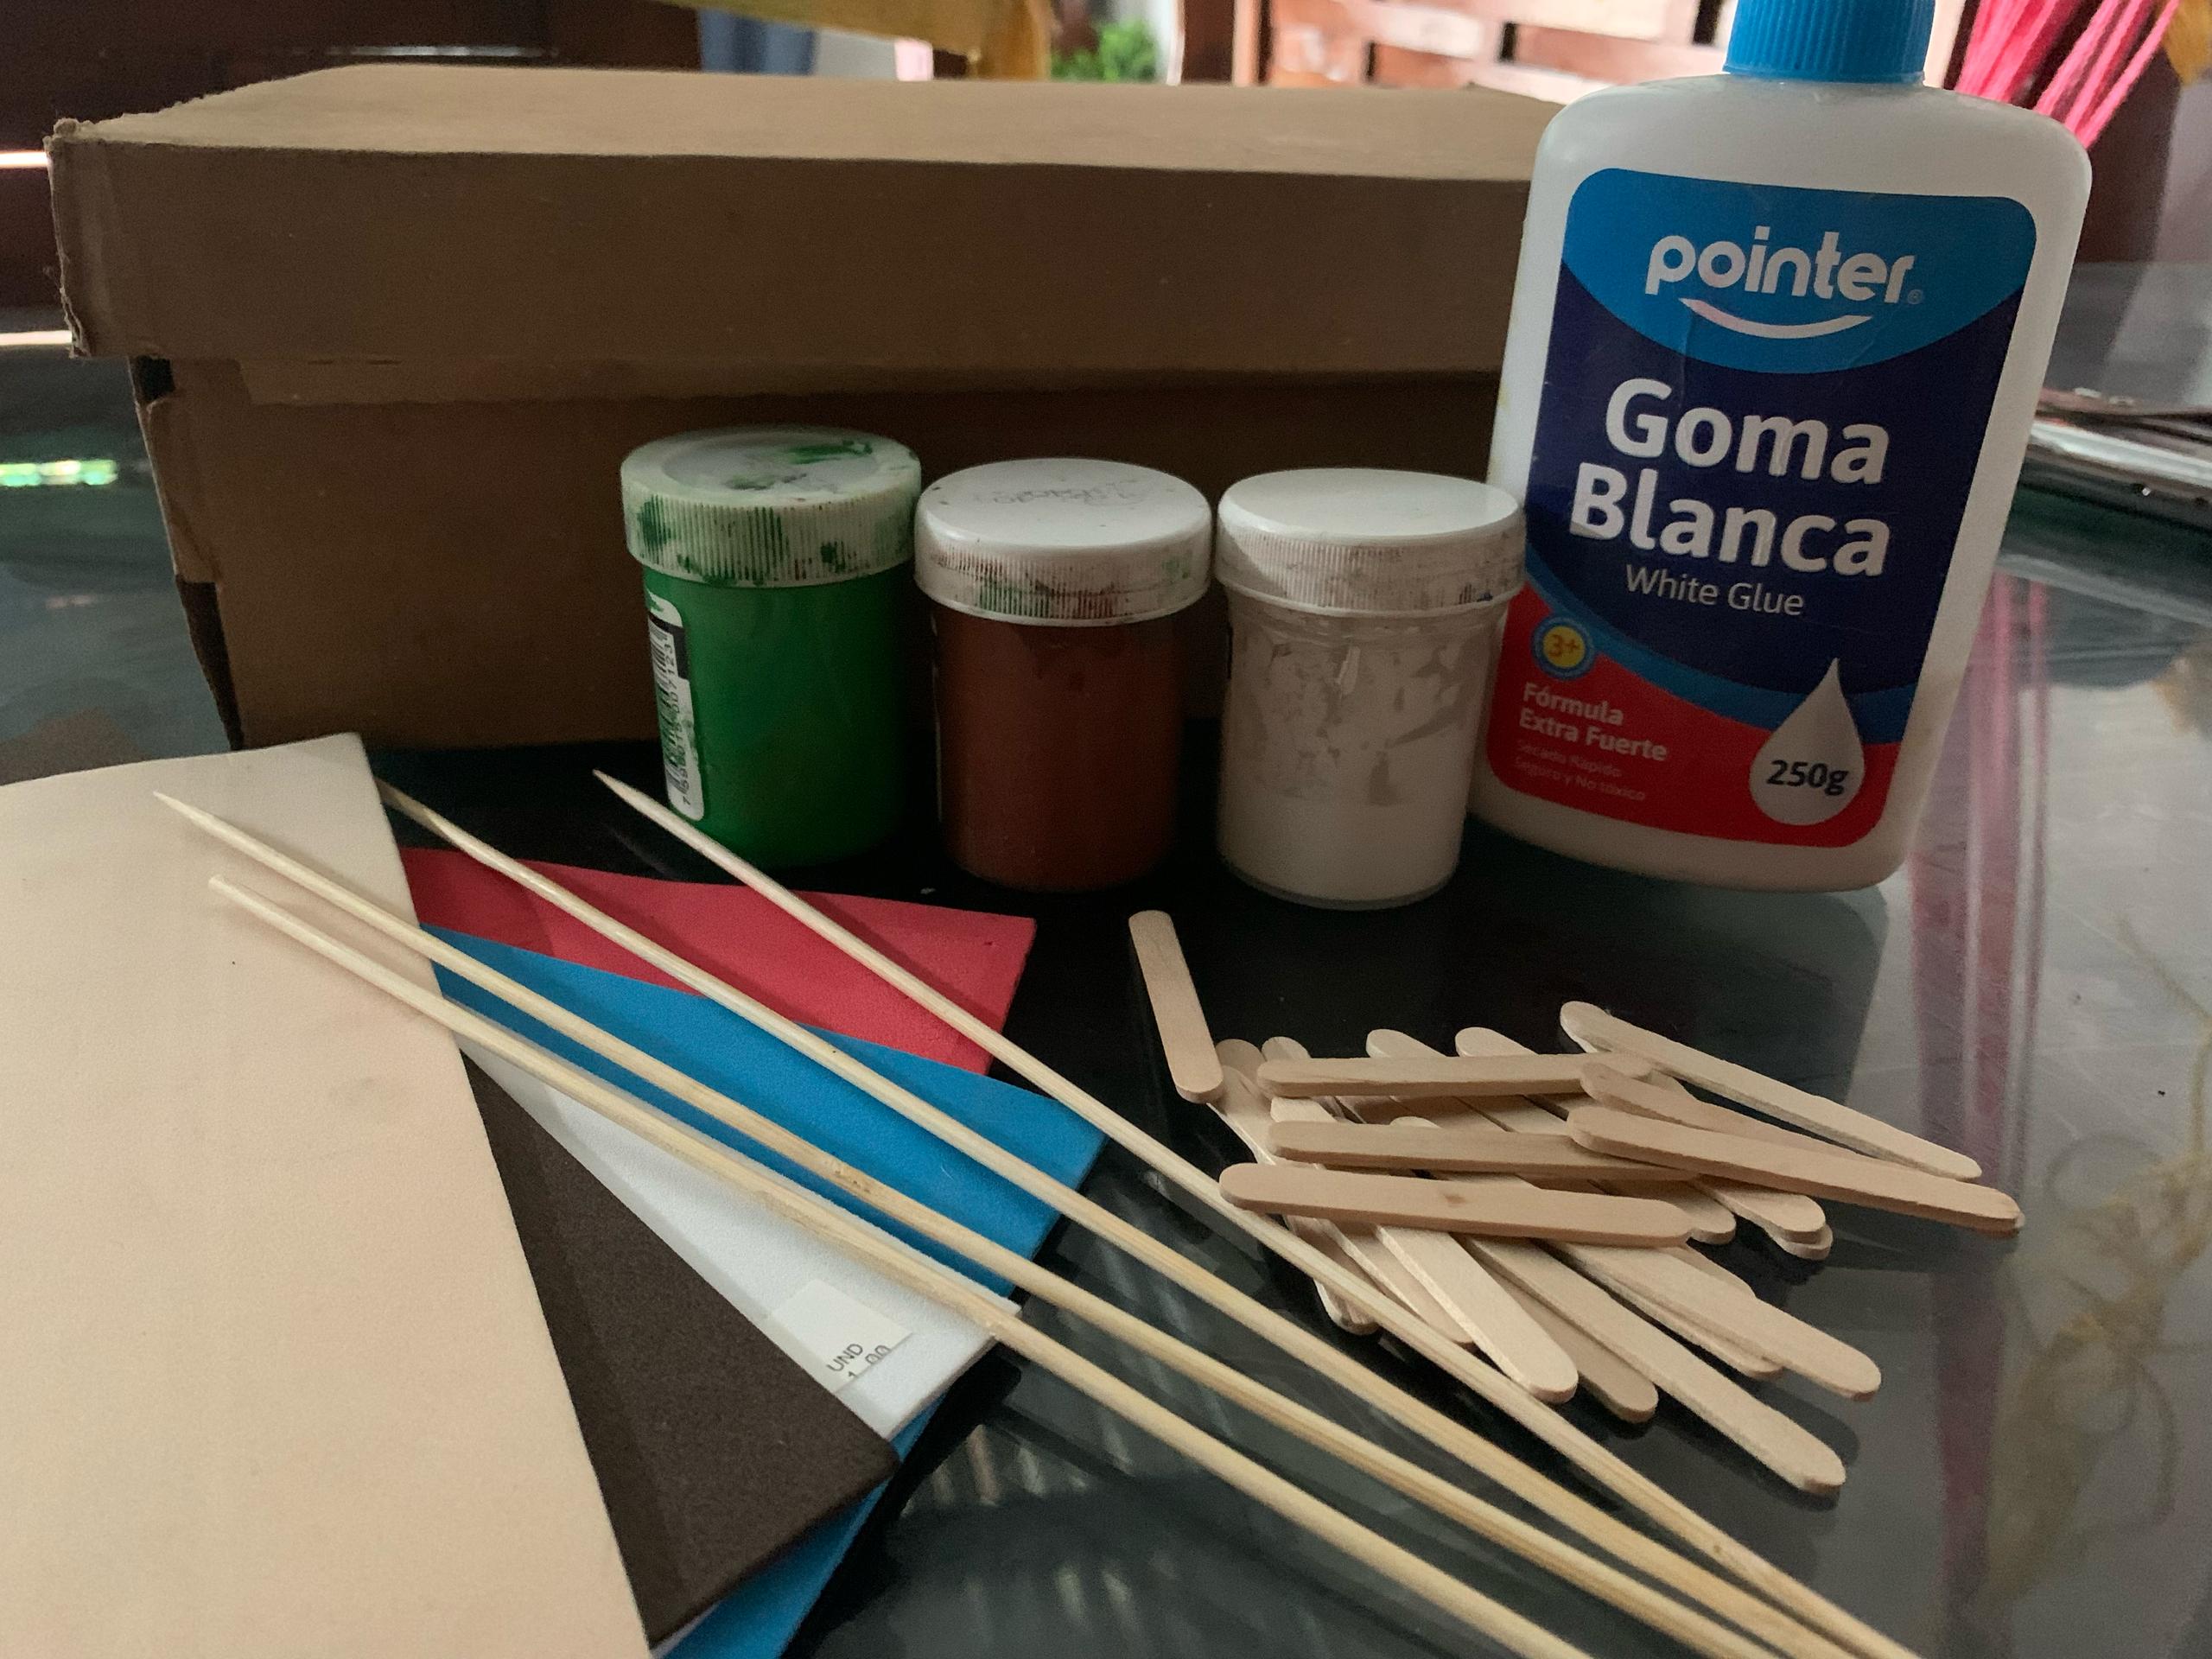
First, let me list the materials I used:
 |
|---|
| Materials |
🎖️ A cardboard box (like the one shoes come in)
Brown, white, and green paint
🎖️ 2 sheets of colored foam (in this case, blue and red), 1 sheet of white foam, and another sheet of skin-colored foam
🎖️ 12 mini popsicle sticks (available in school supply stores, or you can use 6 regular popsicle sticks cut in half)
🎖️ 4 skewers
🎖️ White school glue or liquid silicone
🎖️ Scissors or a craft knife and a ruler
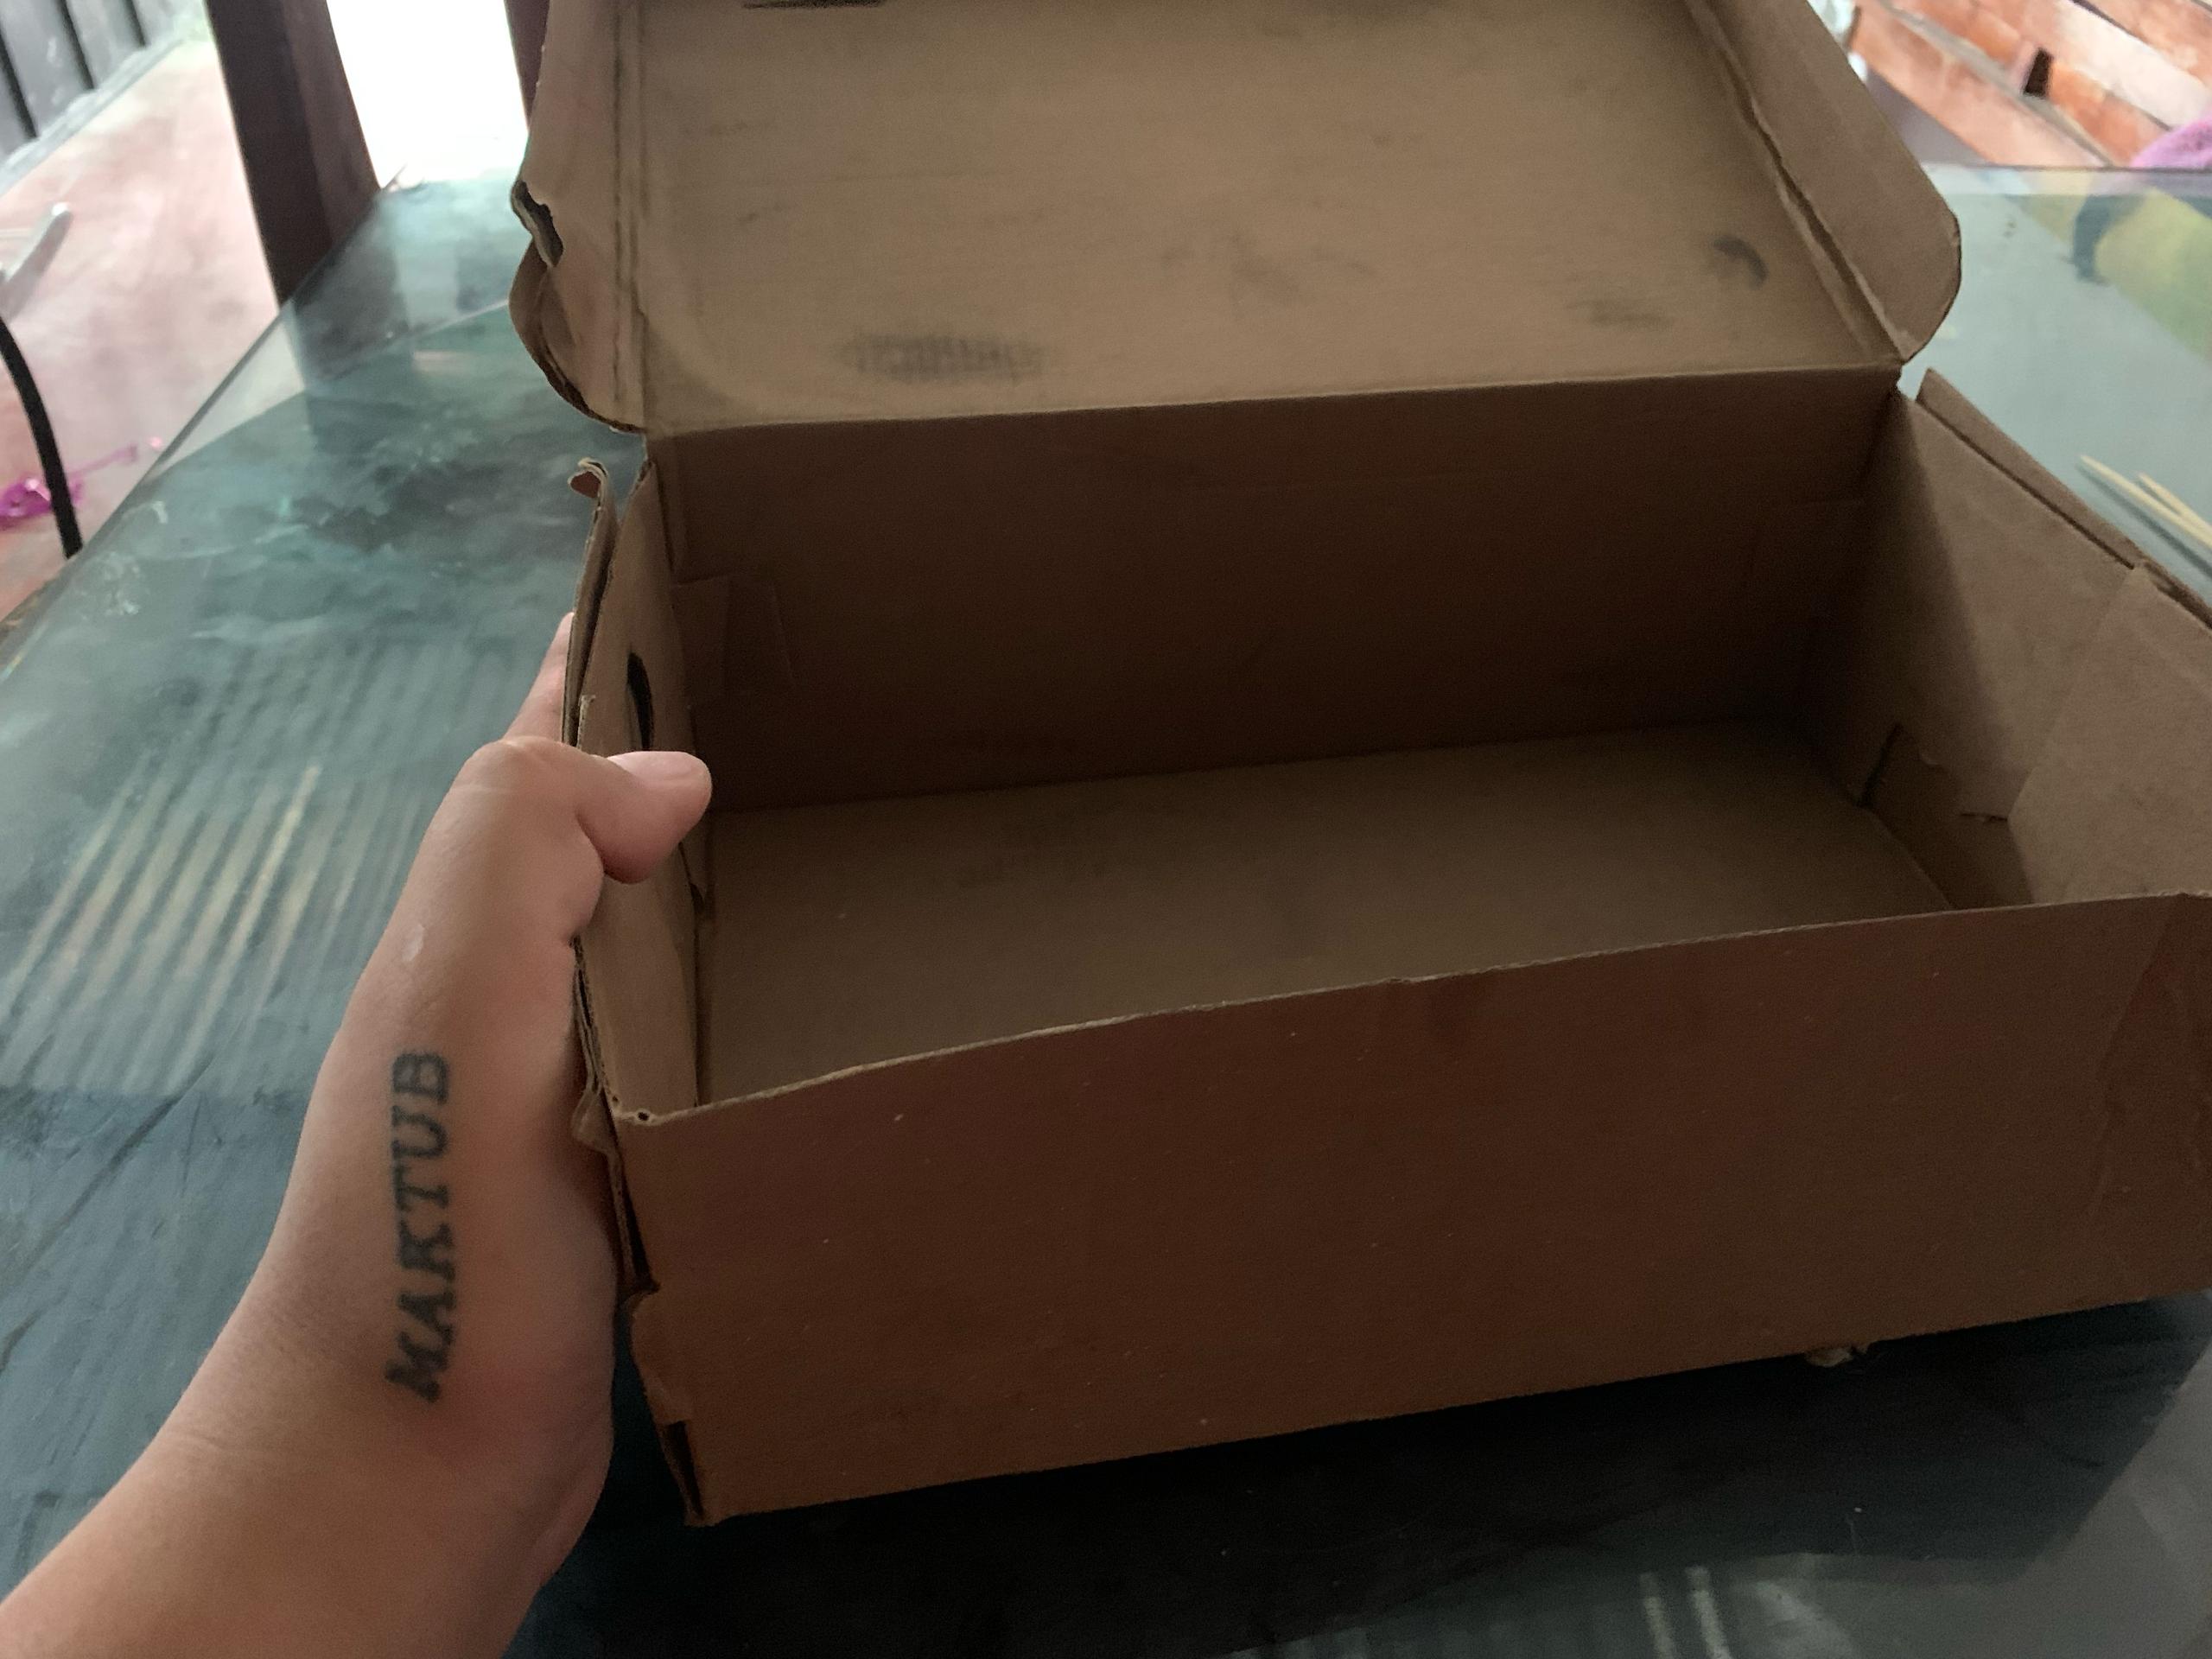
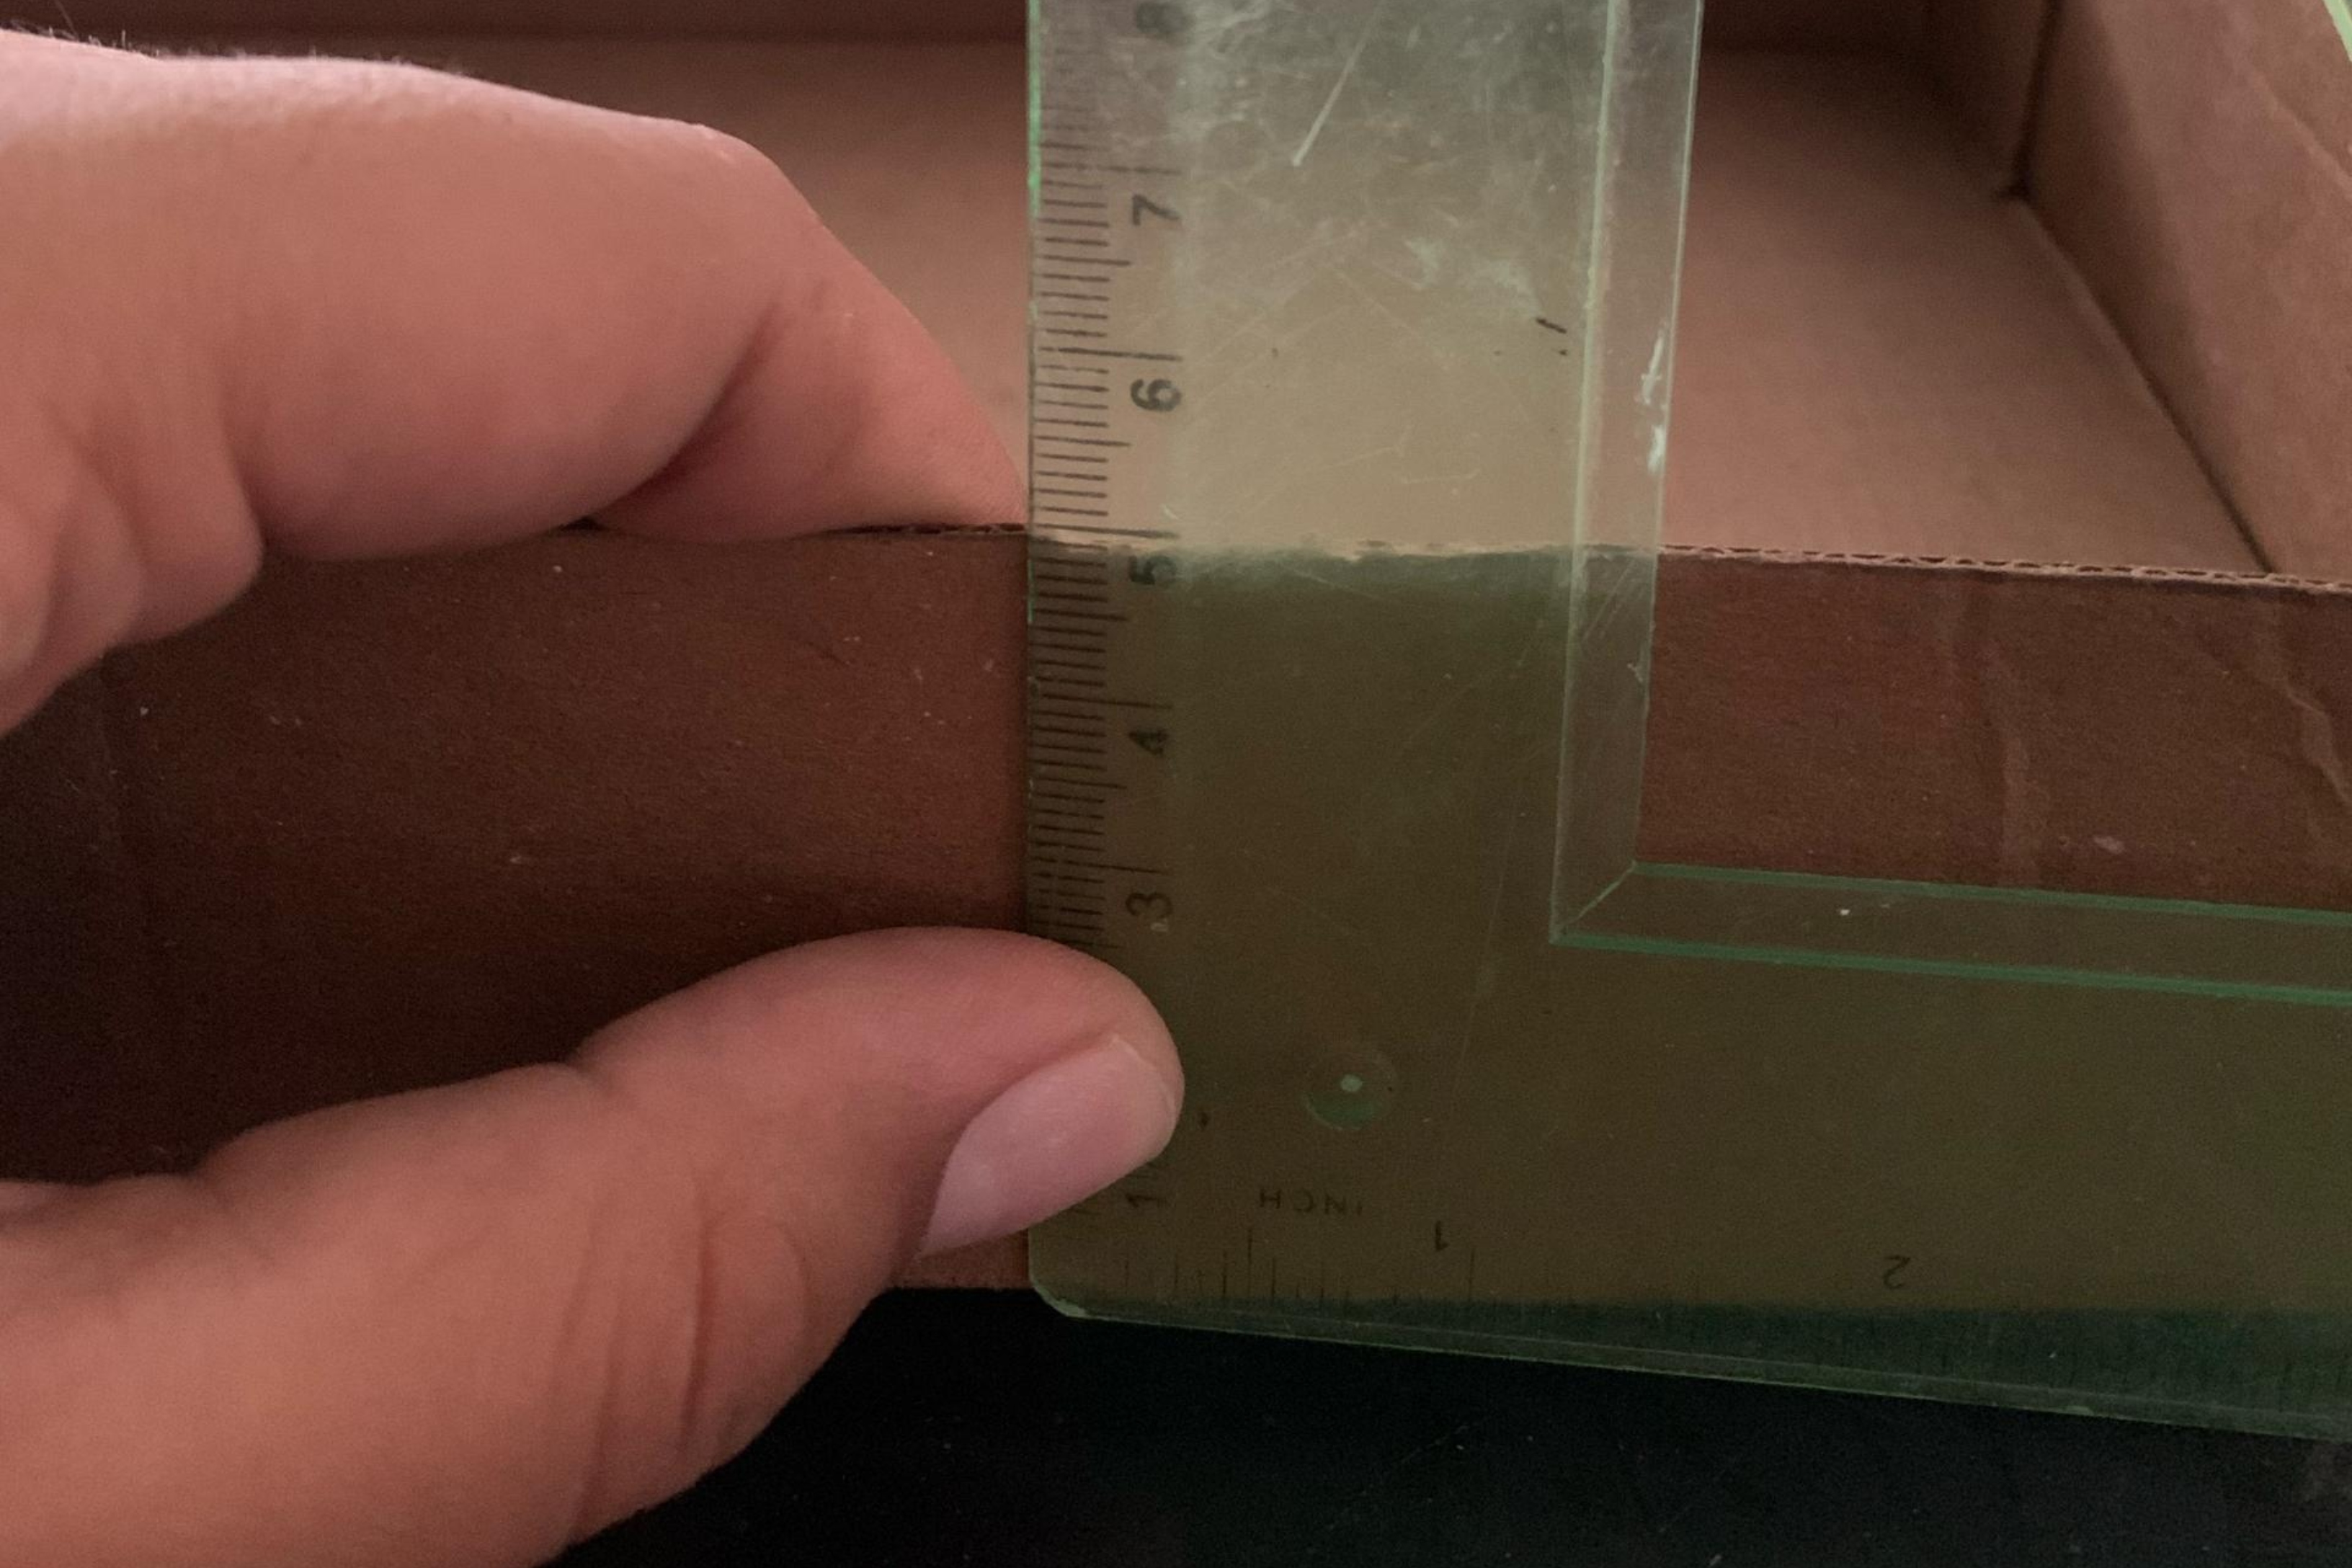
Now let’s build the soccer field!
 | .jpg) |
|---|---|
.jpeg) | 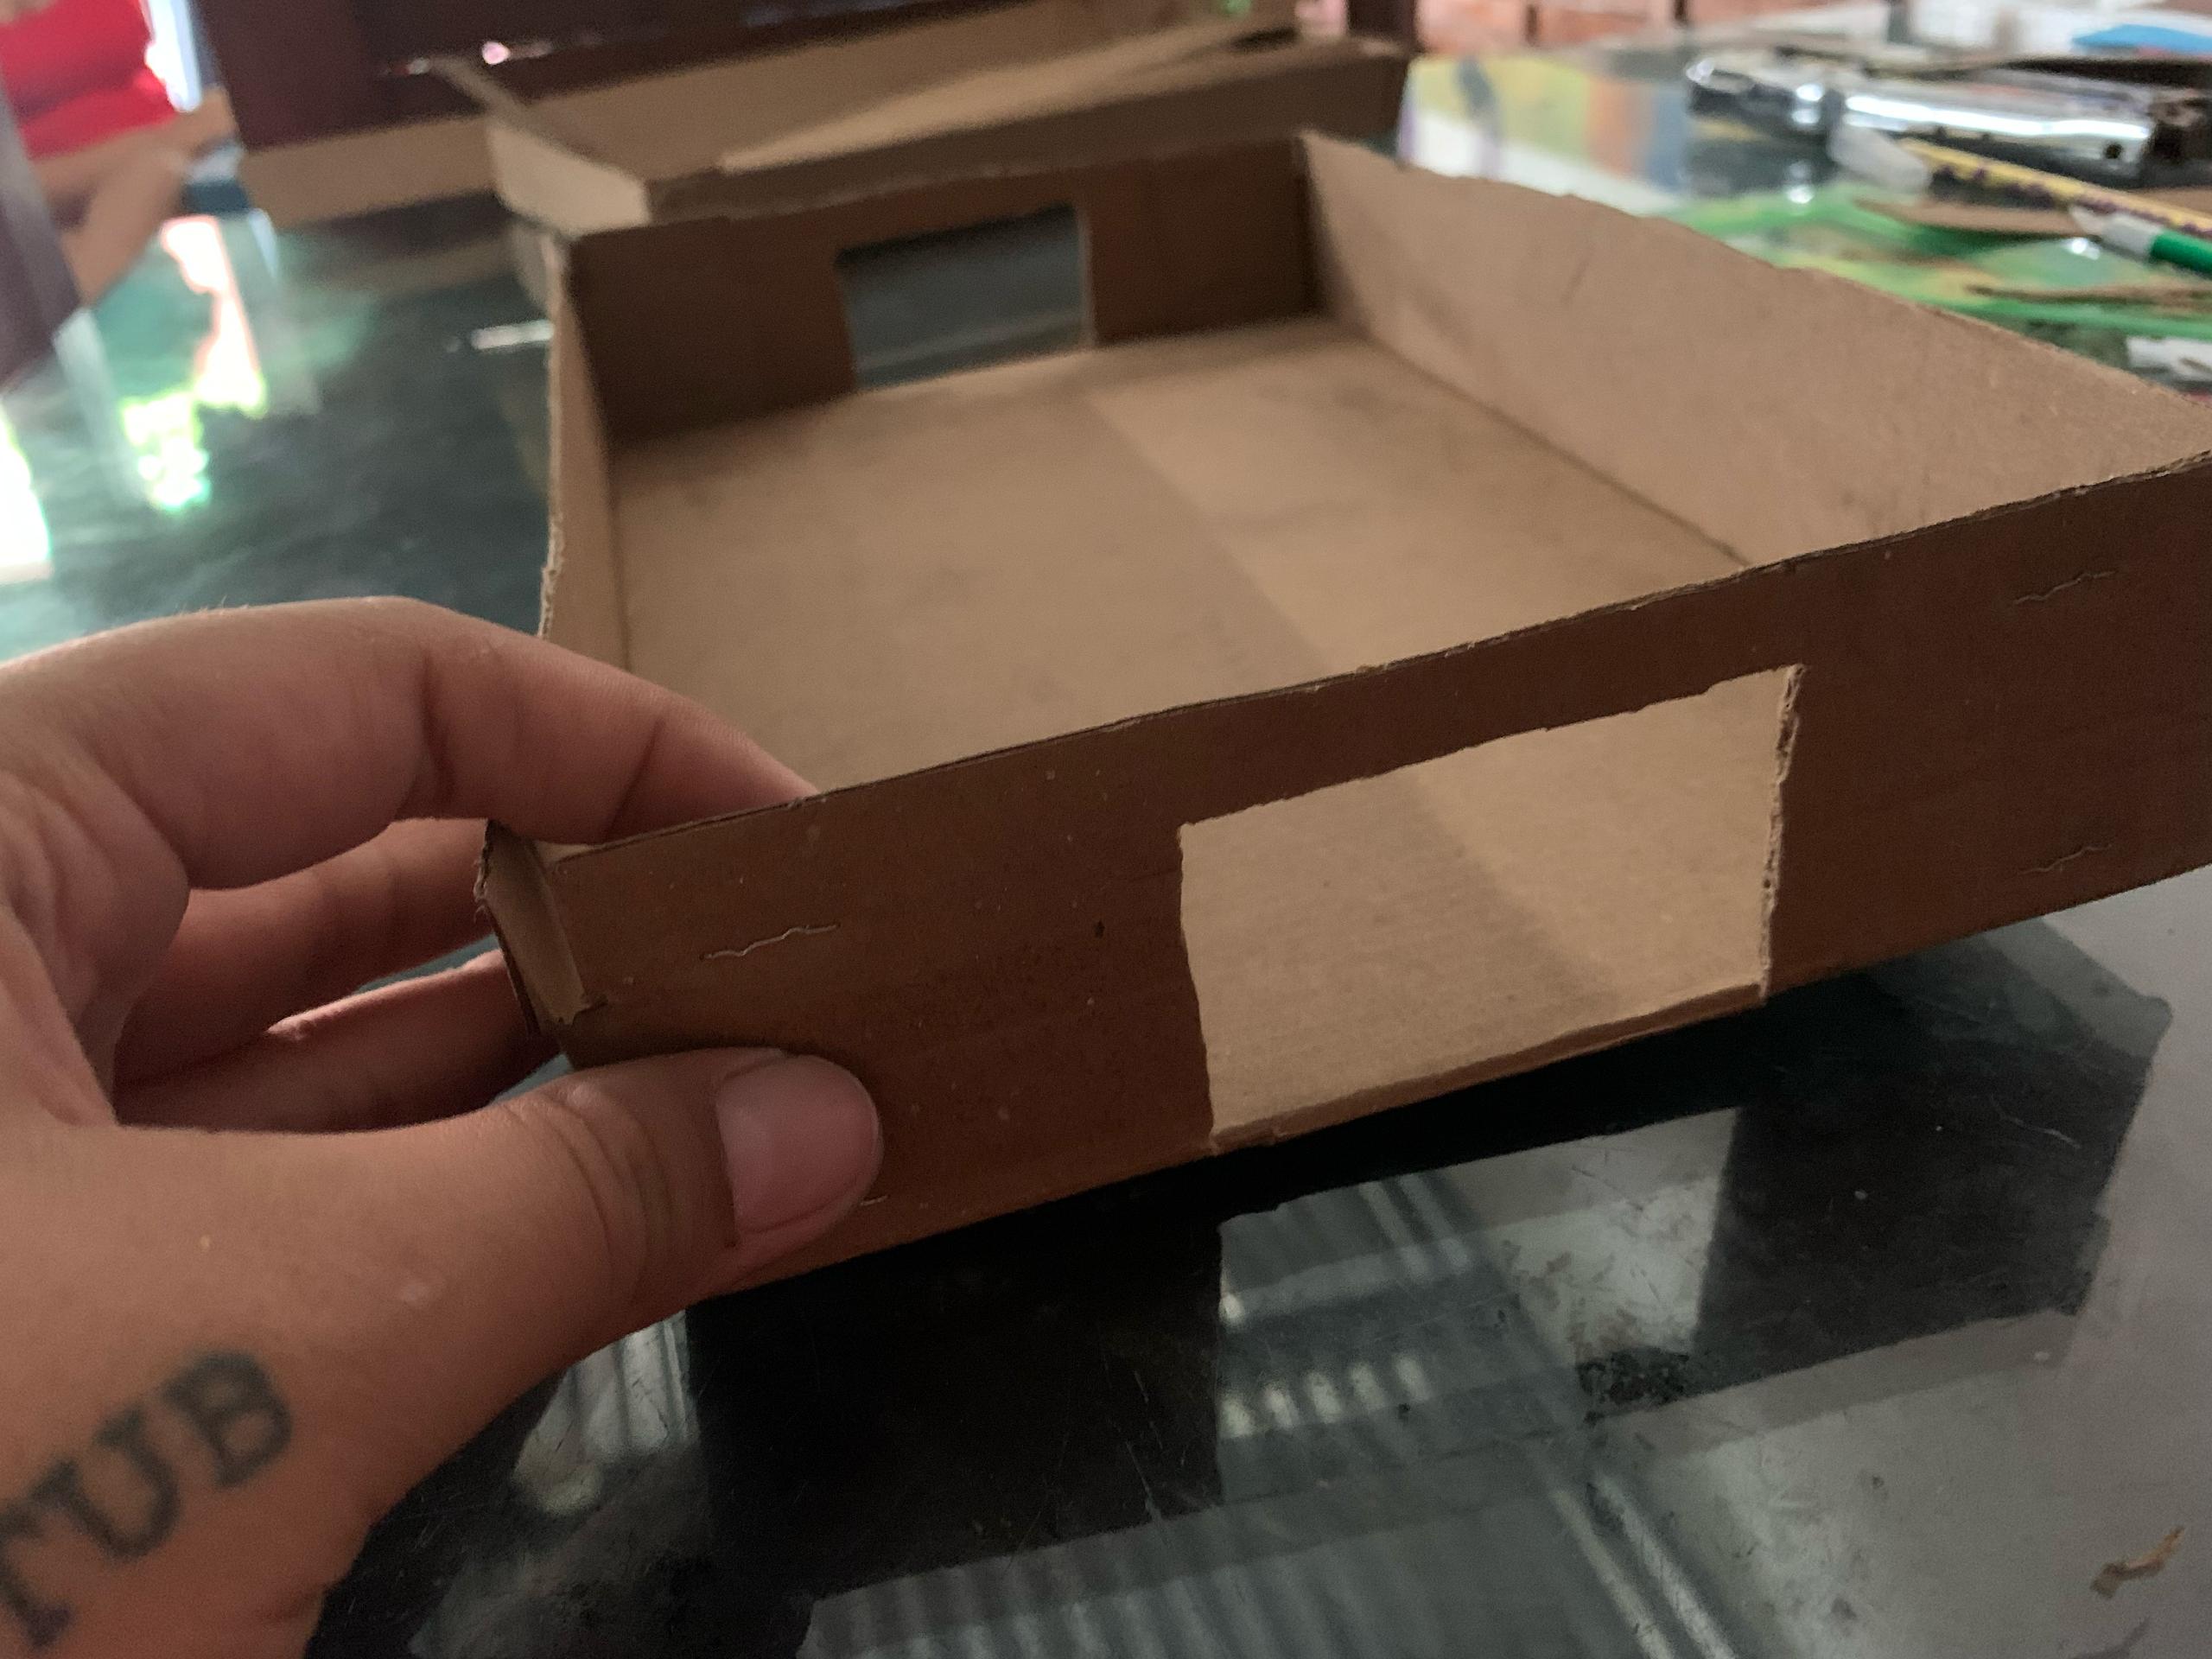 |
 | .jpg) |
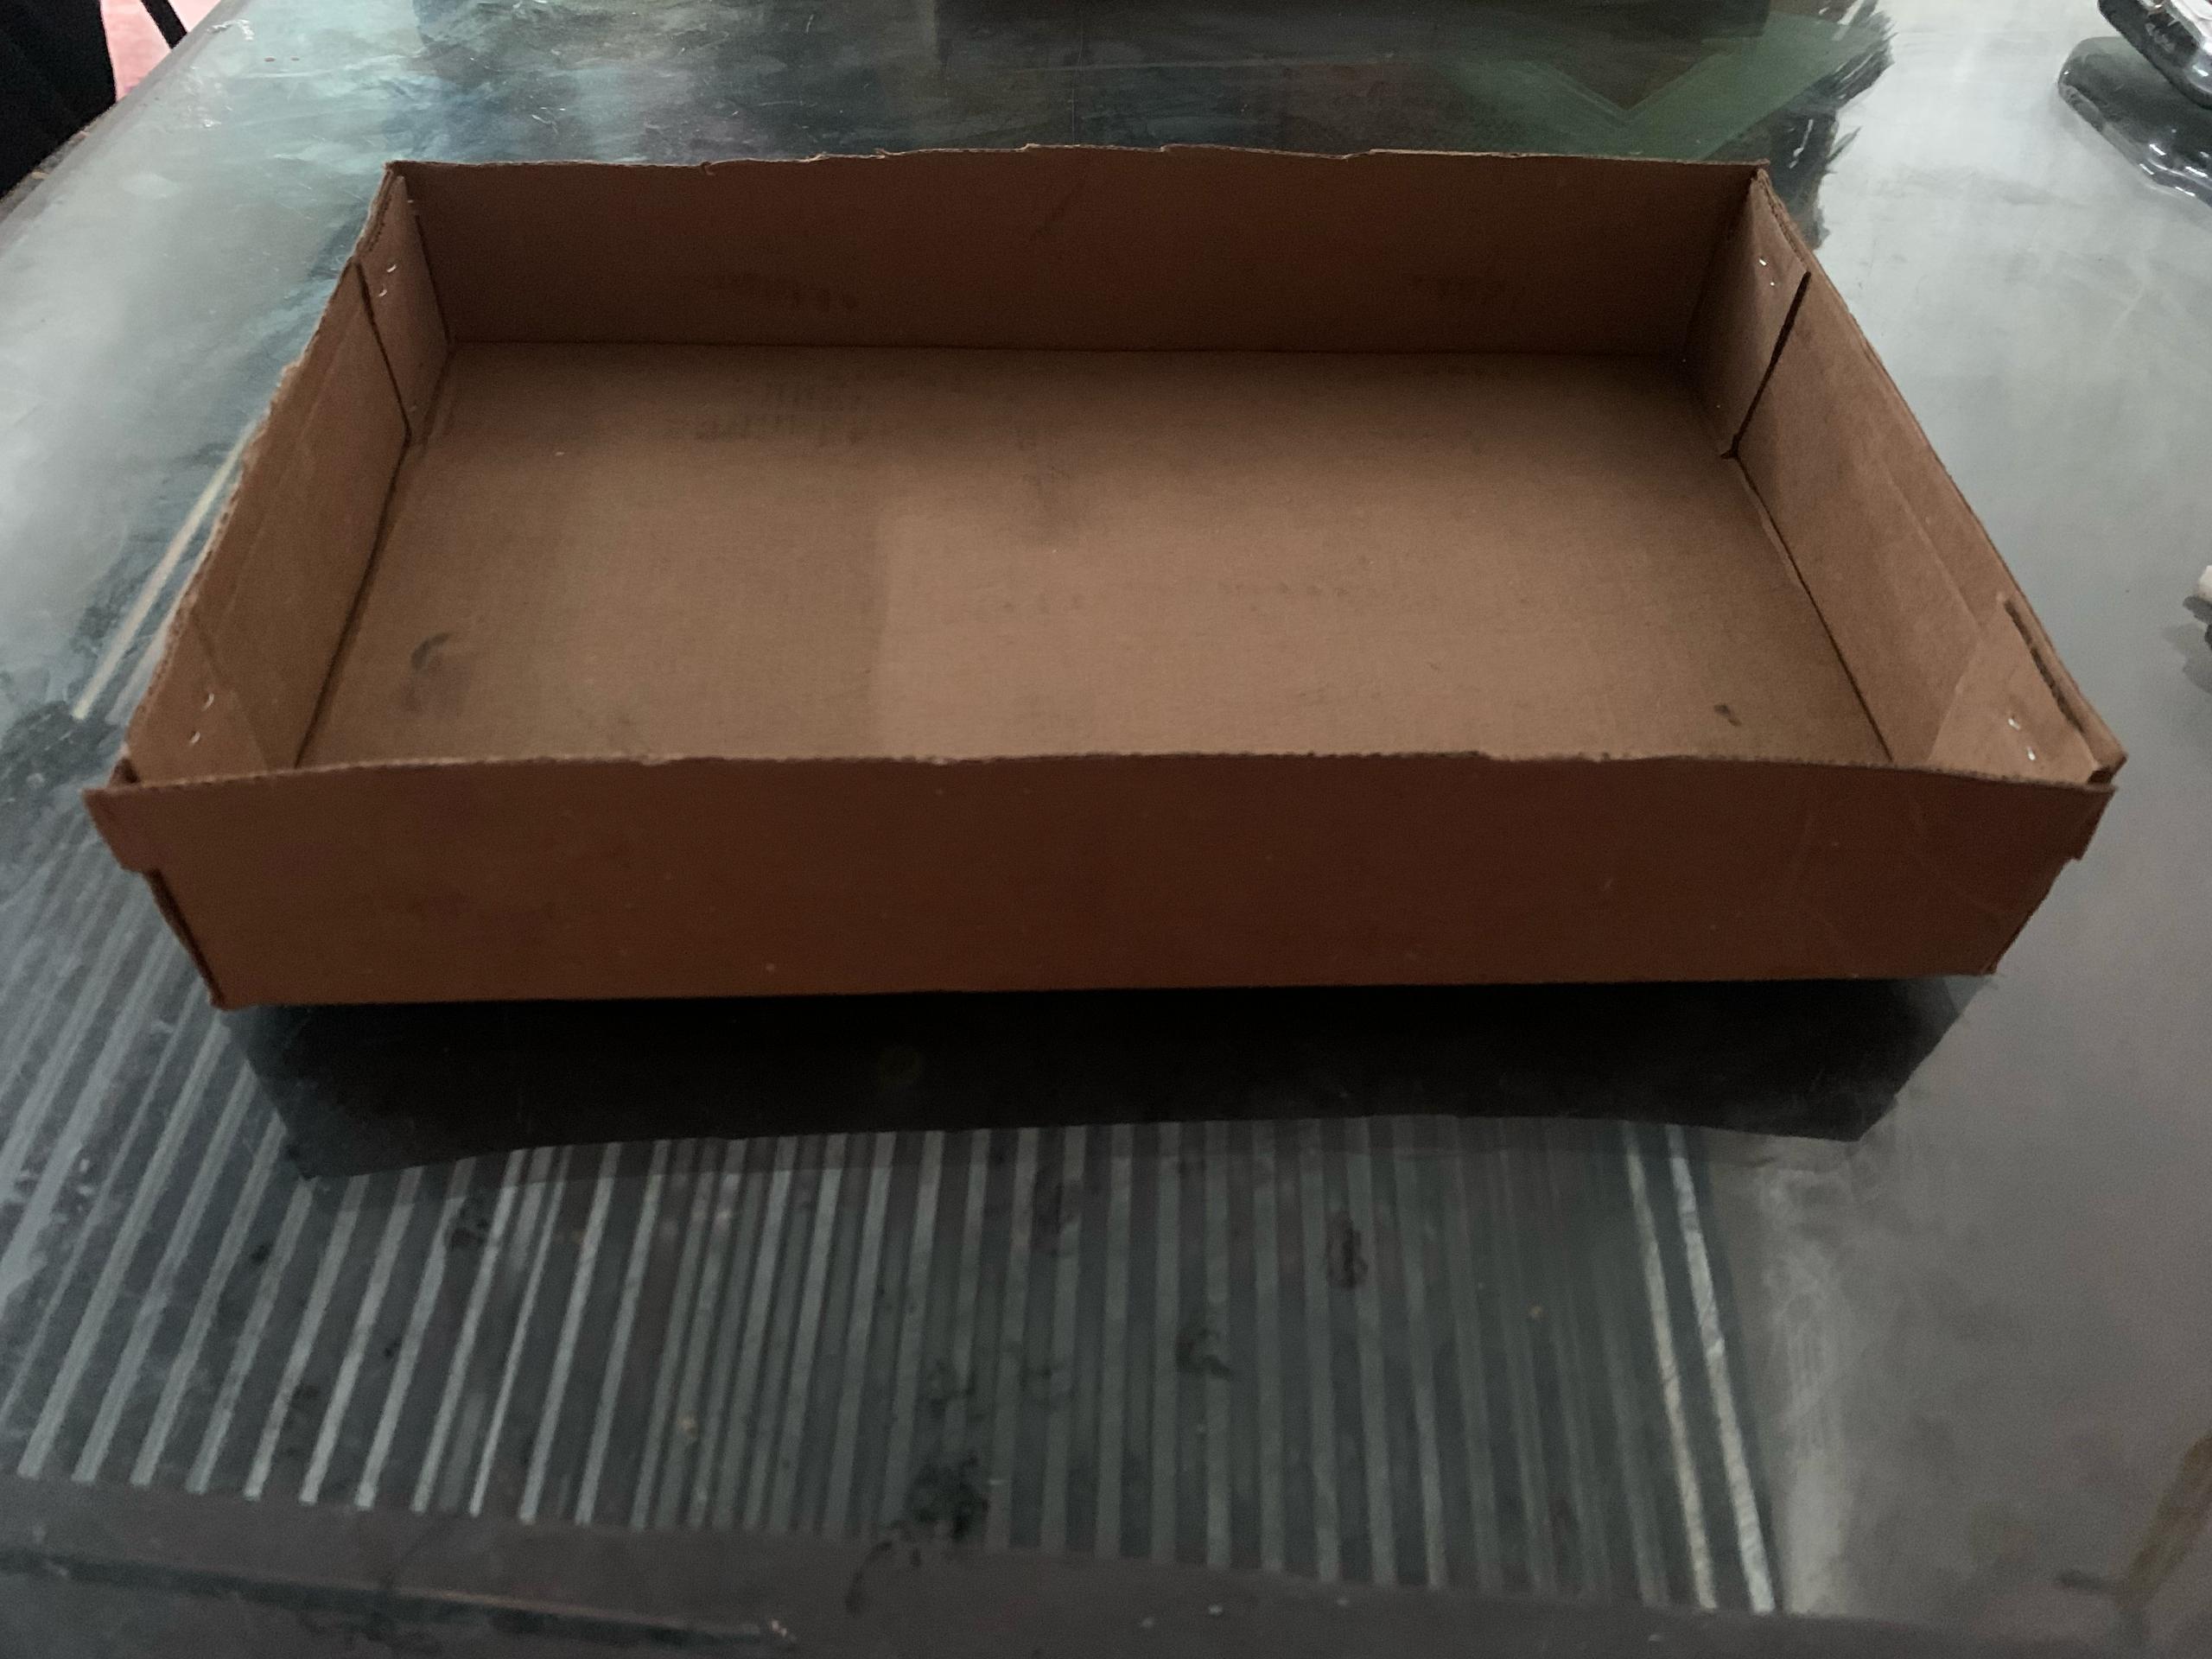
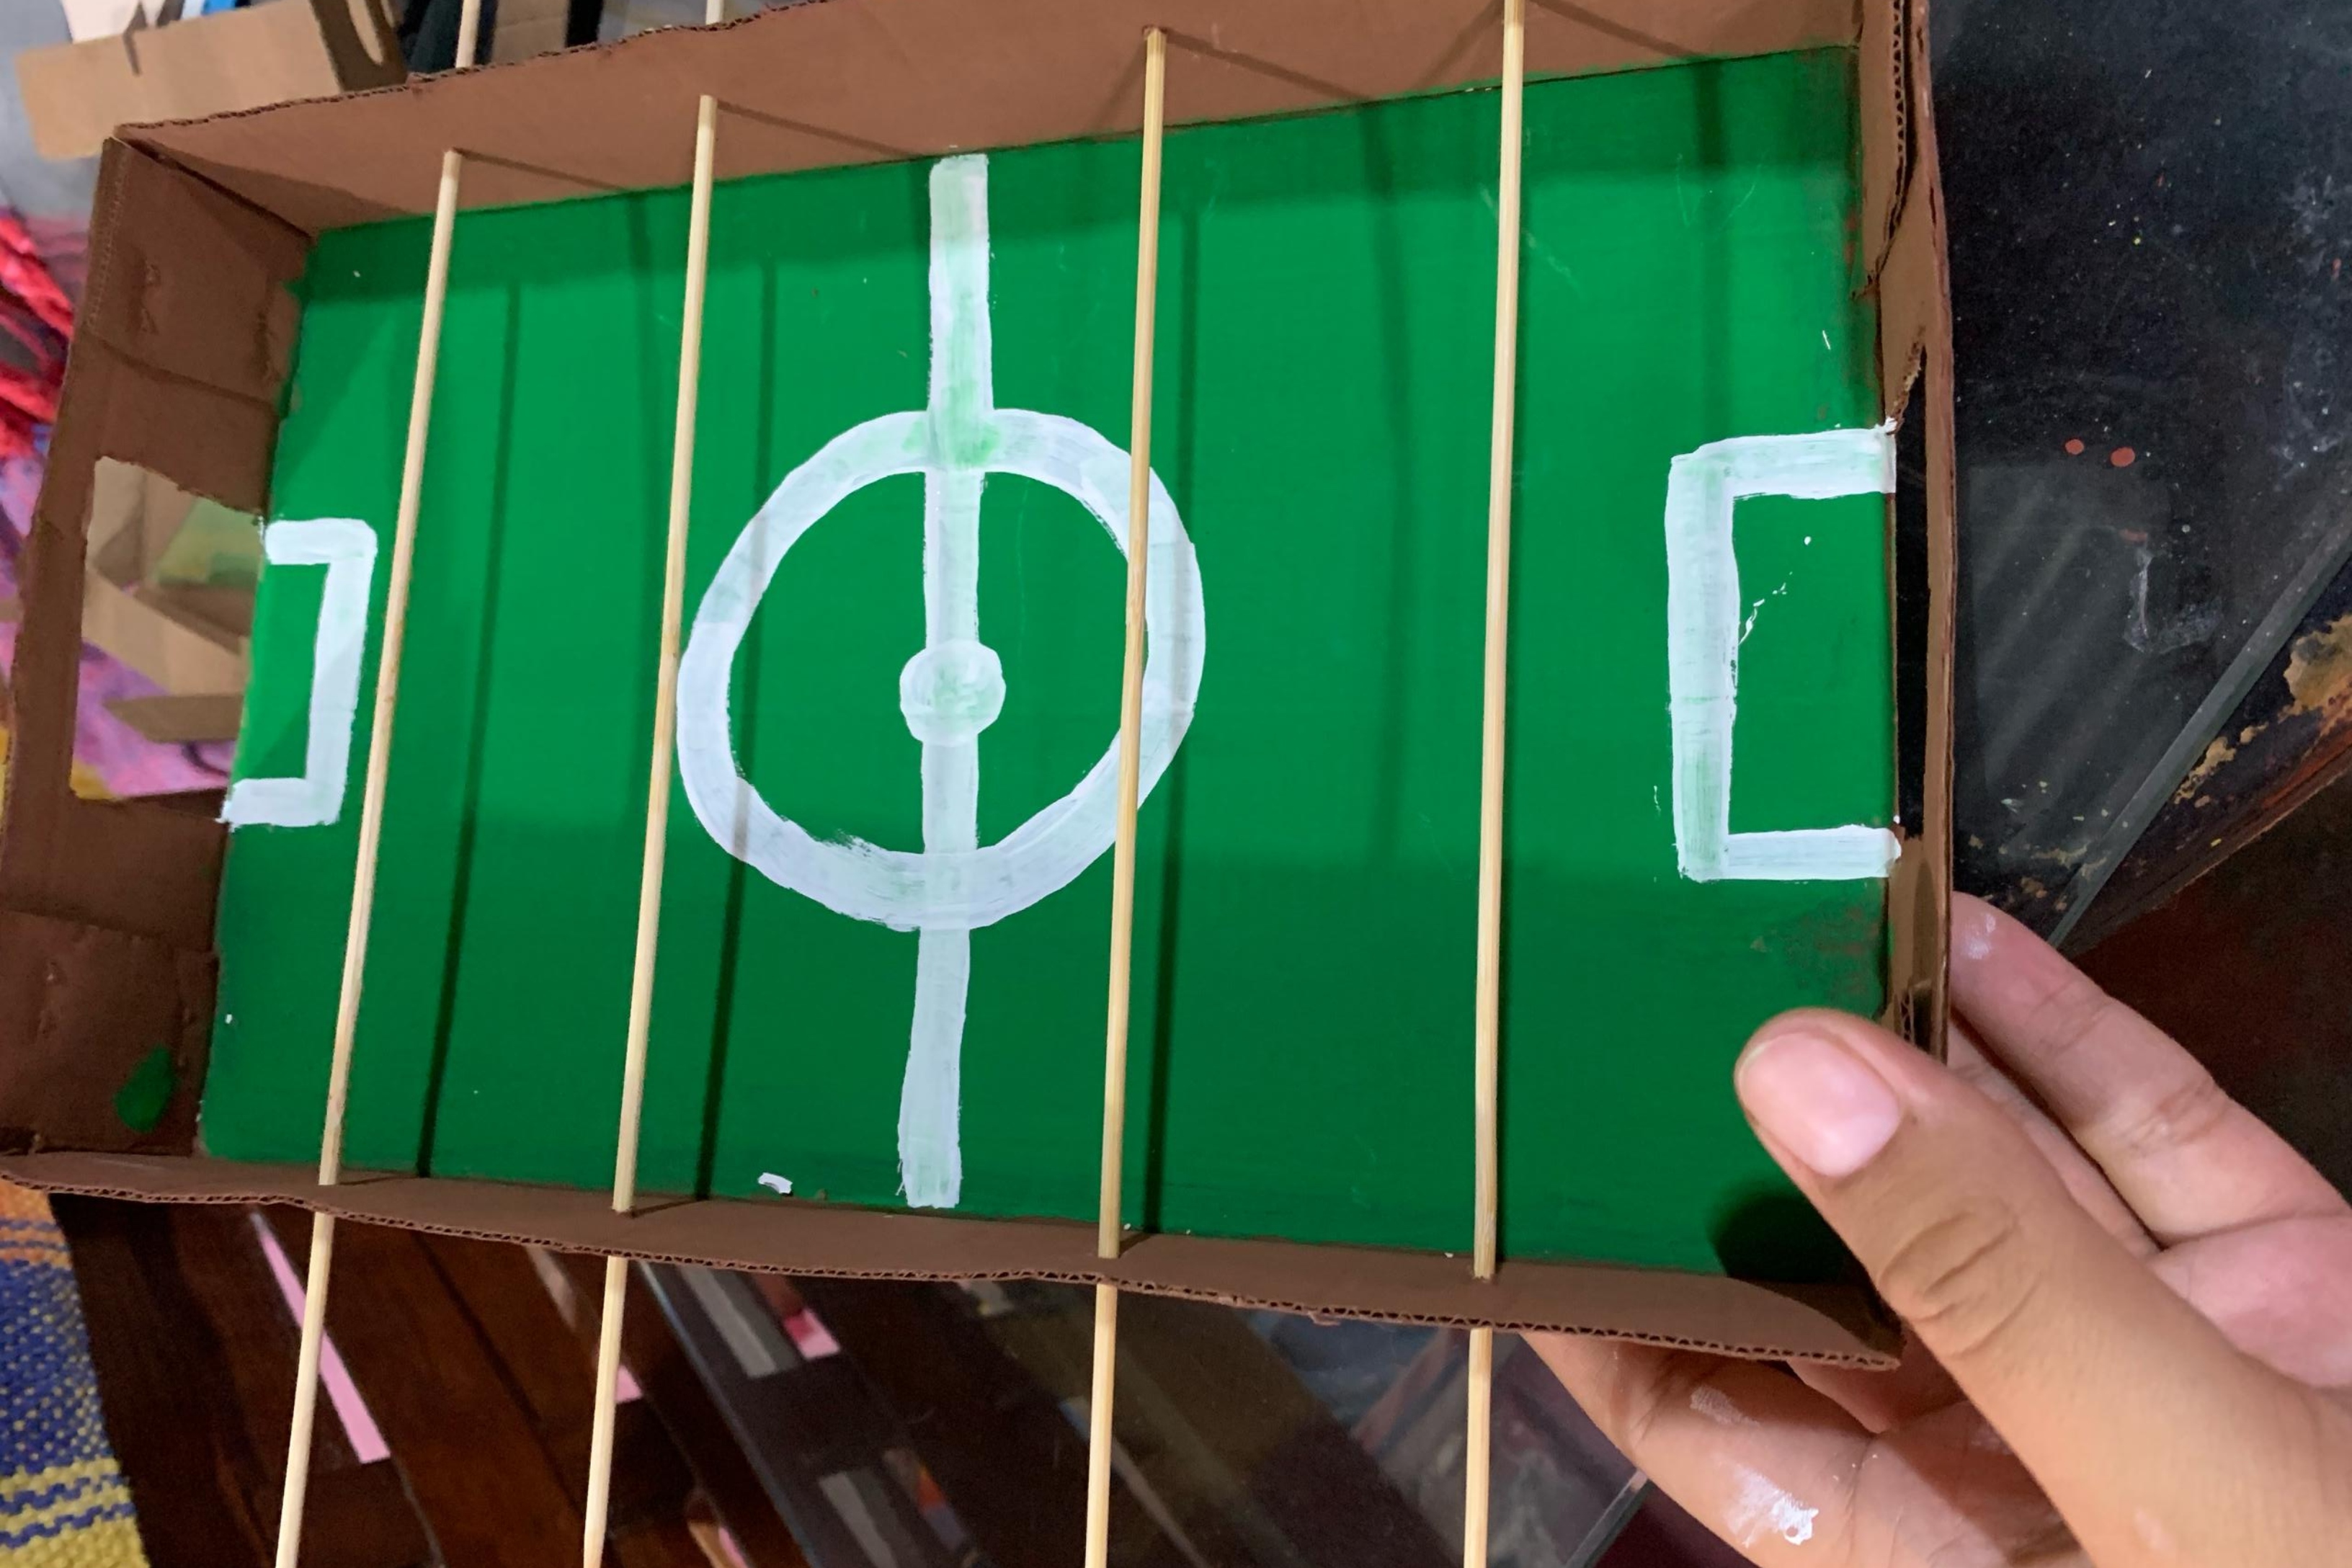
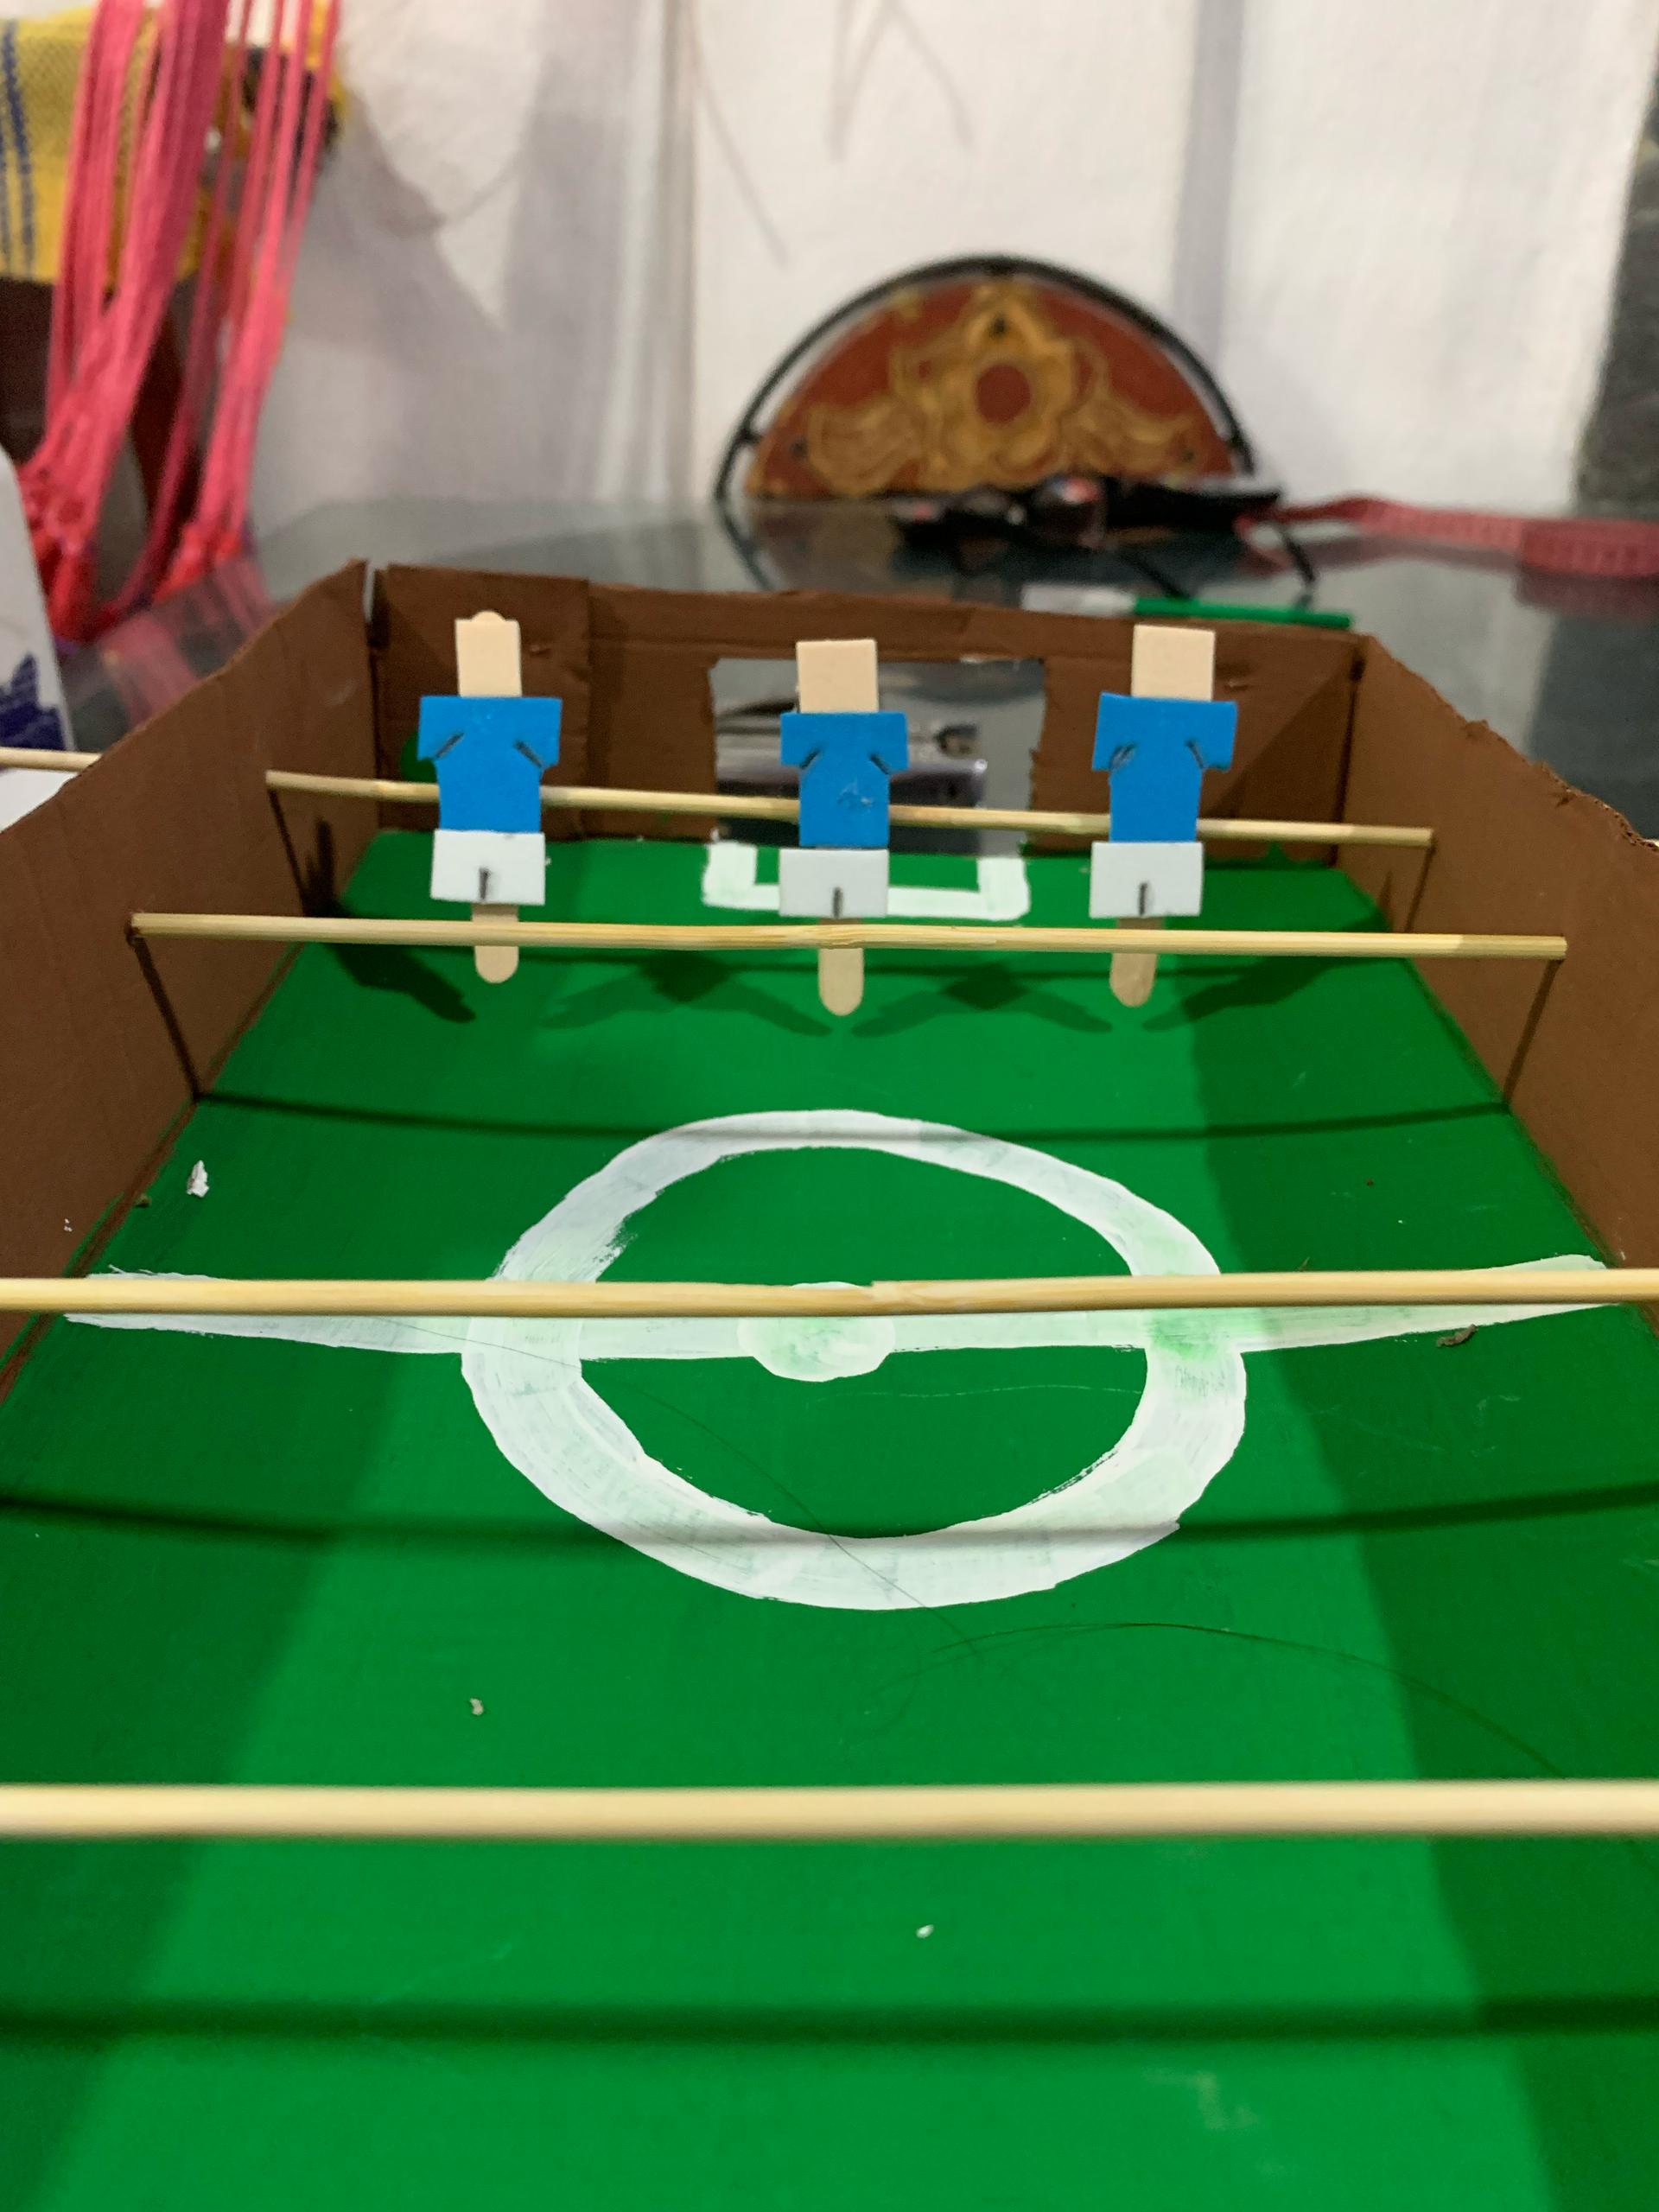
First, we’ll use the shoebox as the base for our tabletop soccer game. I started by marking a horizontal line 5 cm from the bottom on each of the box’s walls with a pencil and a ruler. I then cut along this line, resulting in a shorter box but with the same size. Next, I made a rectangular hole on each of the shorter sides of the box (6 cm wide and 3 cm high) to simulate the goals.
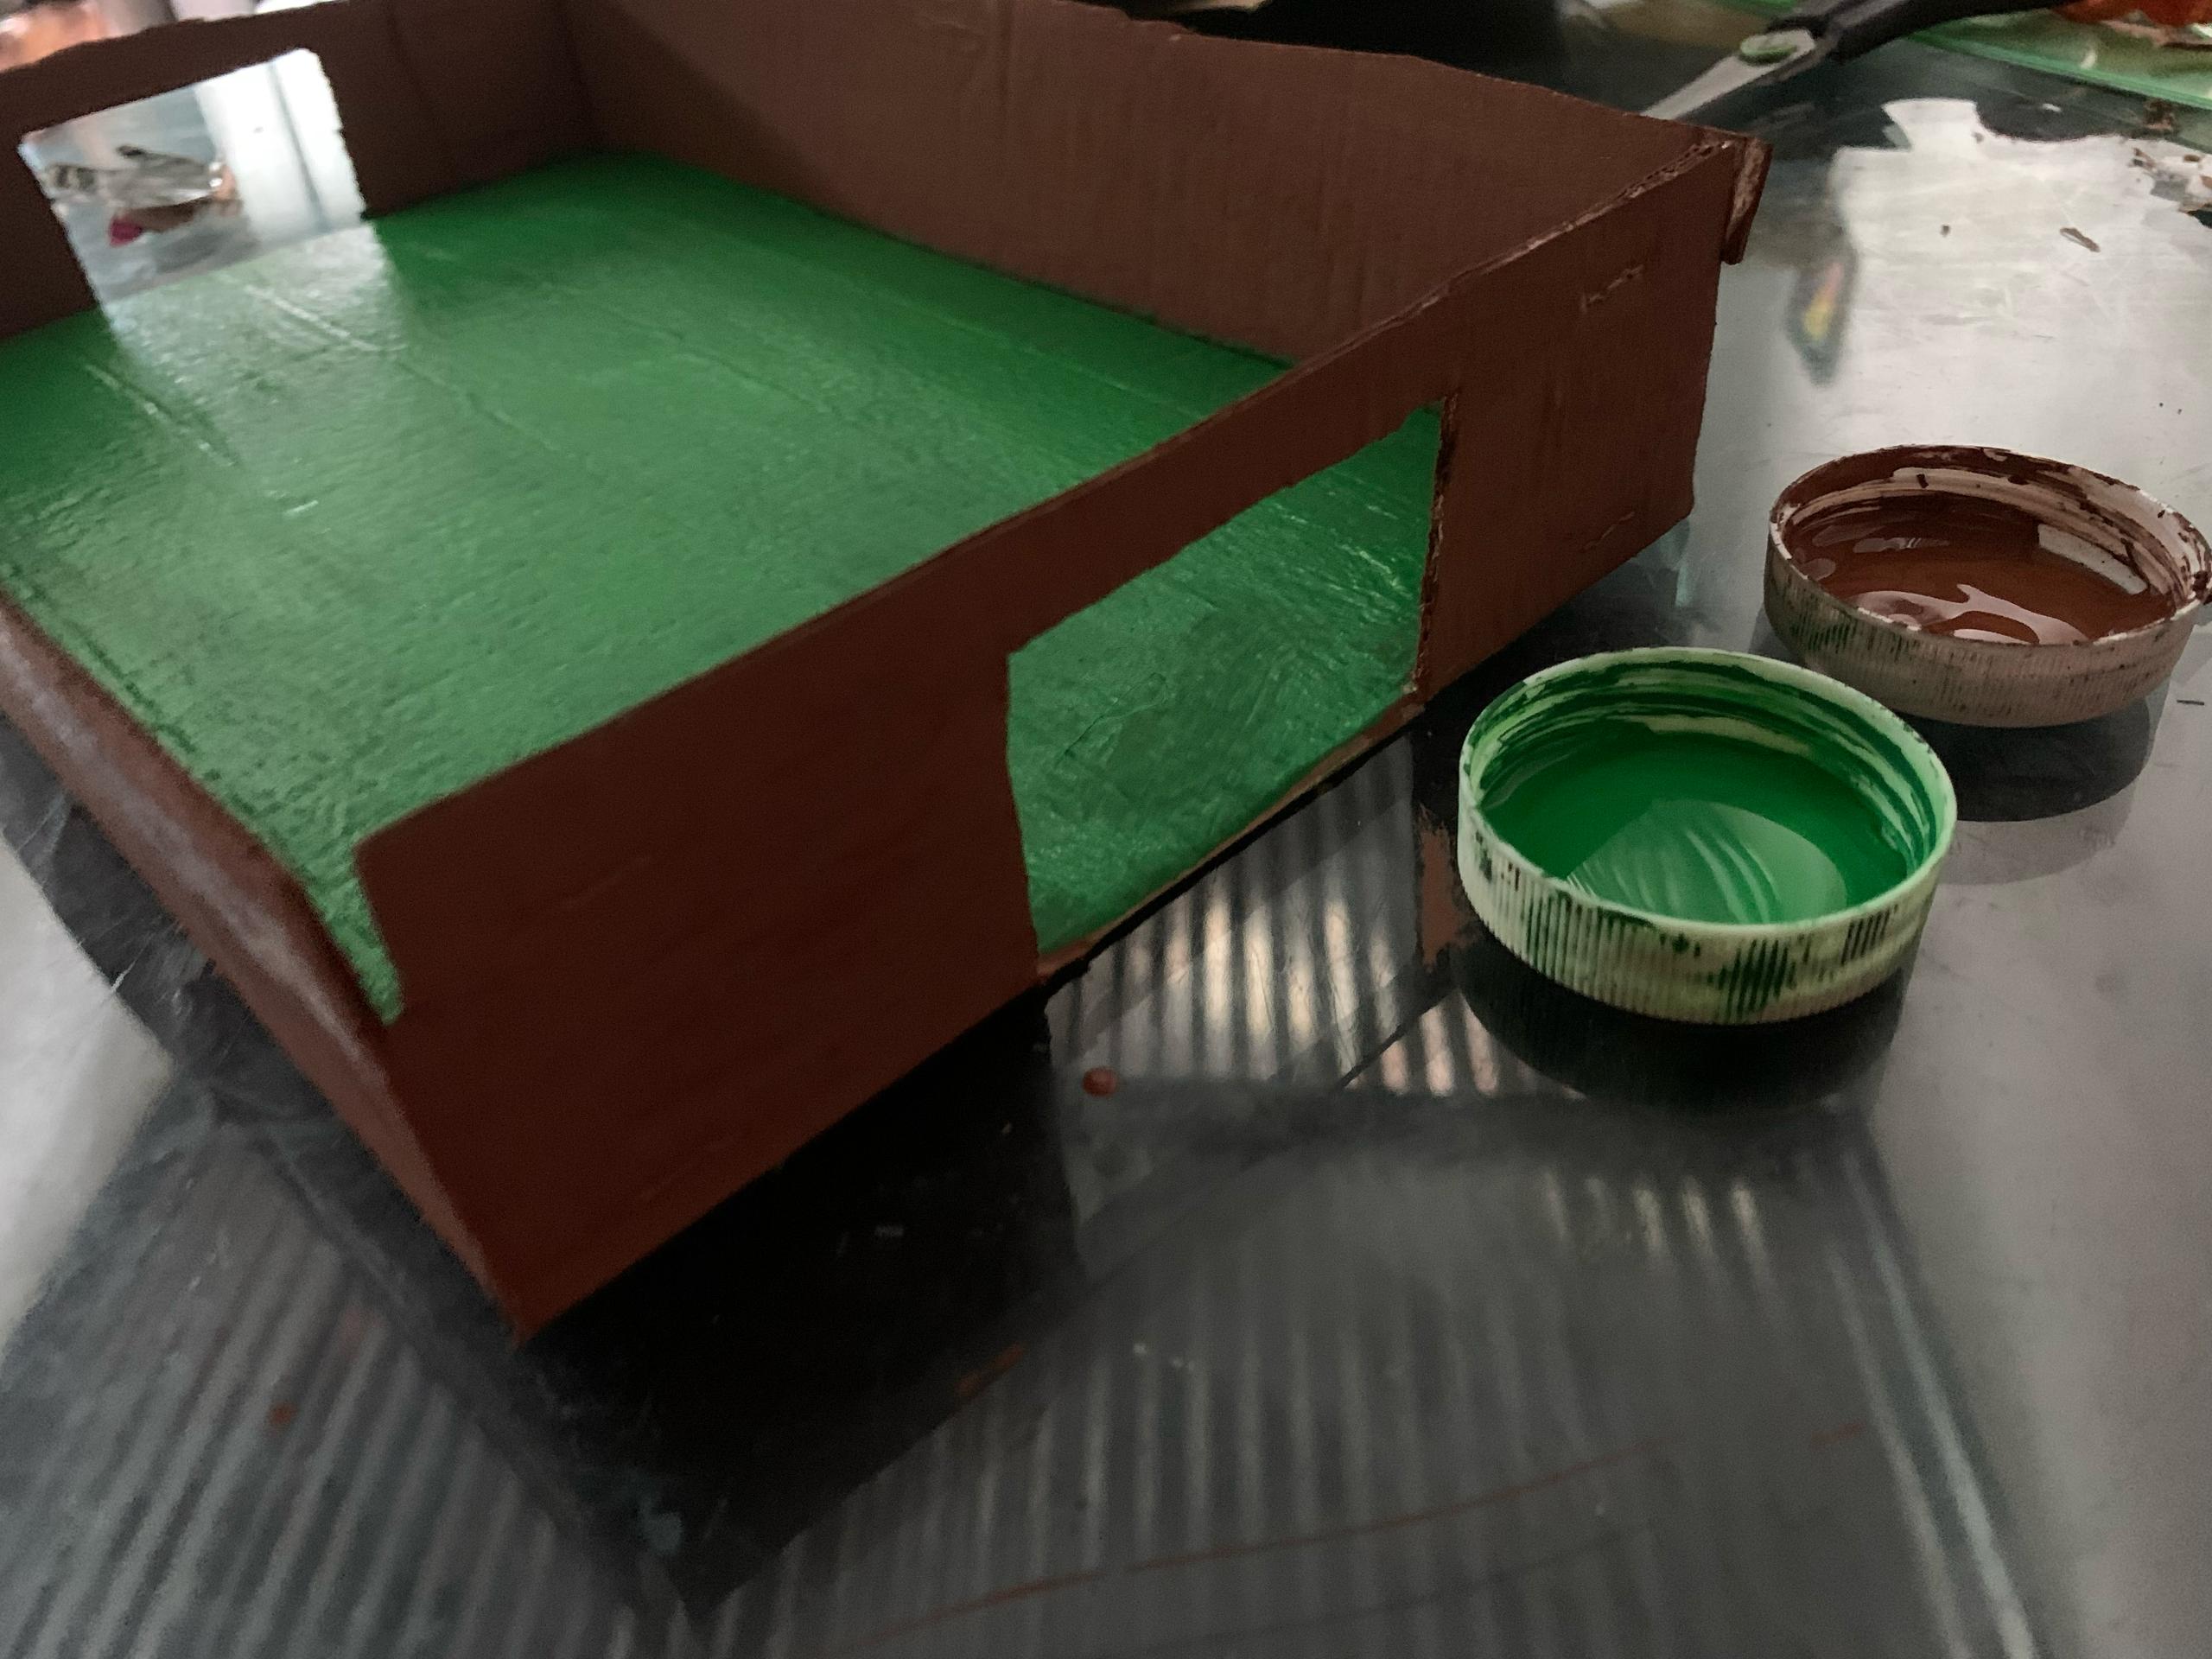
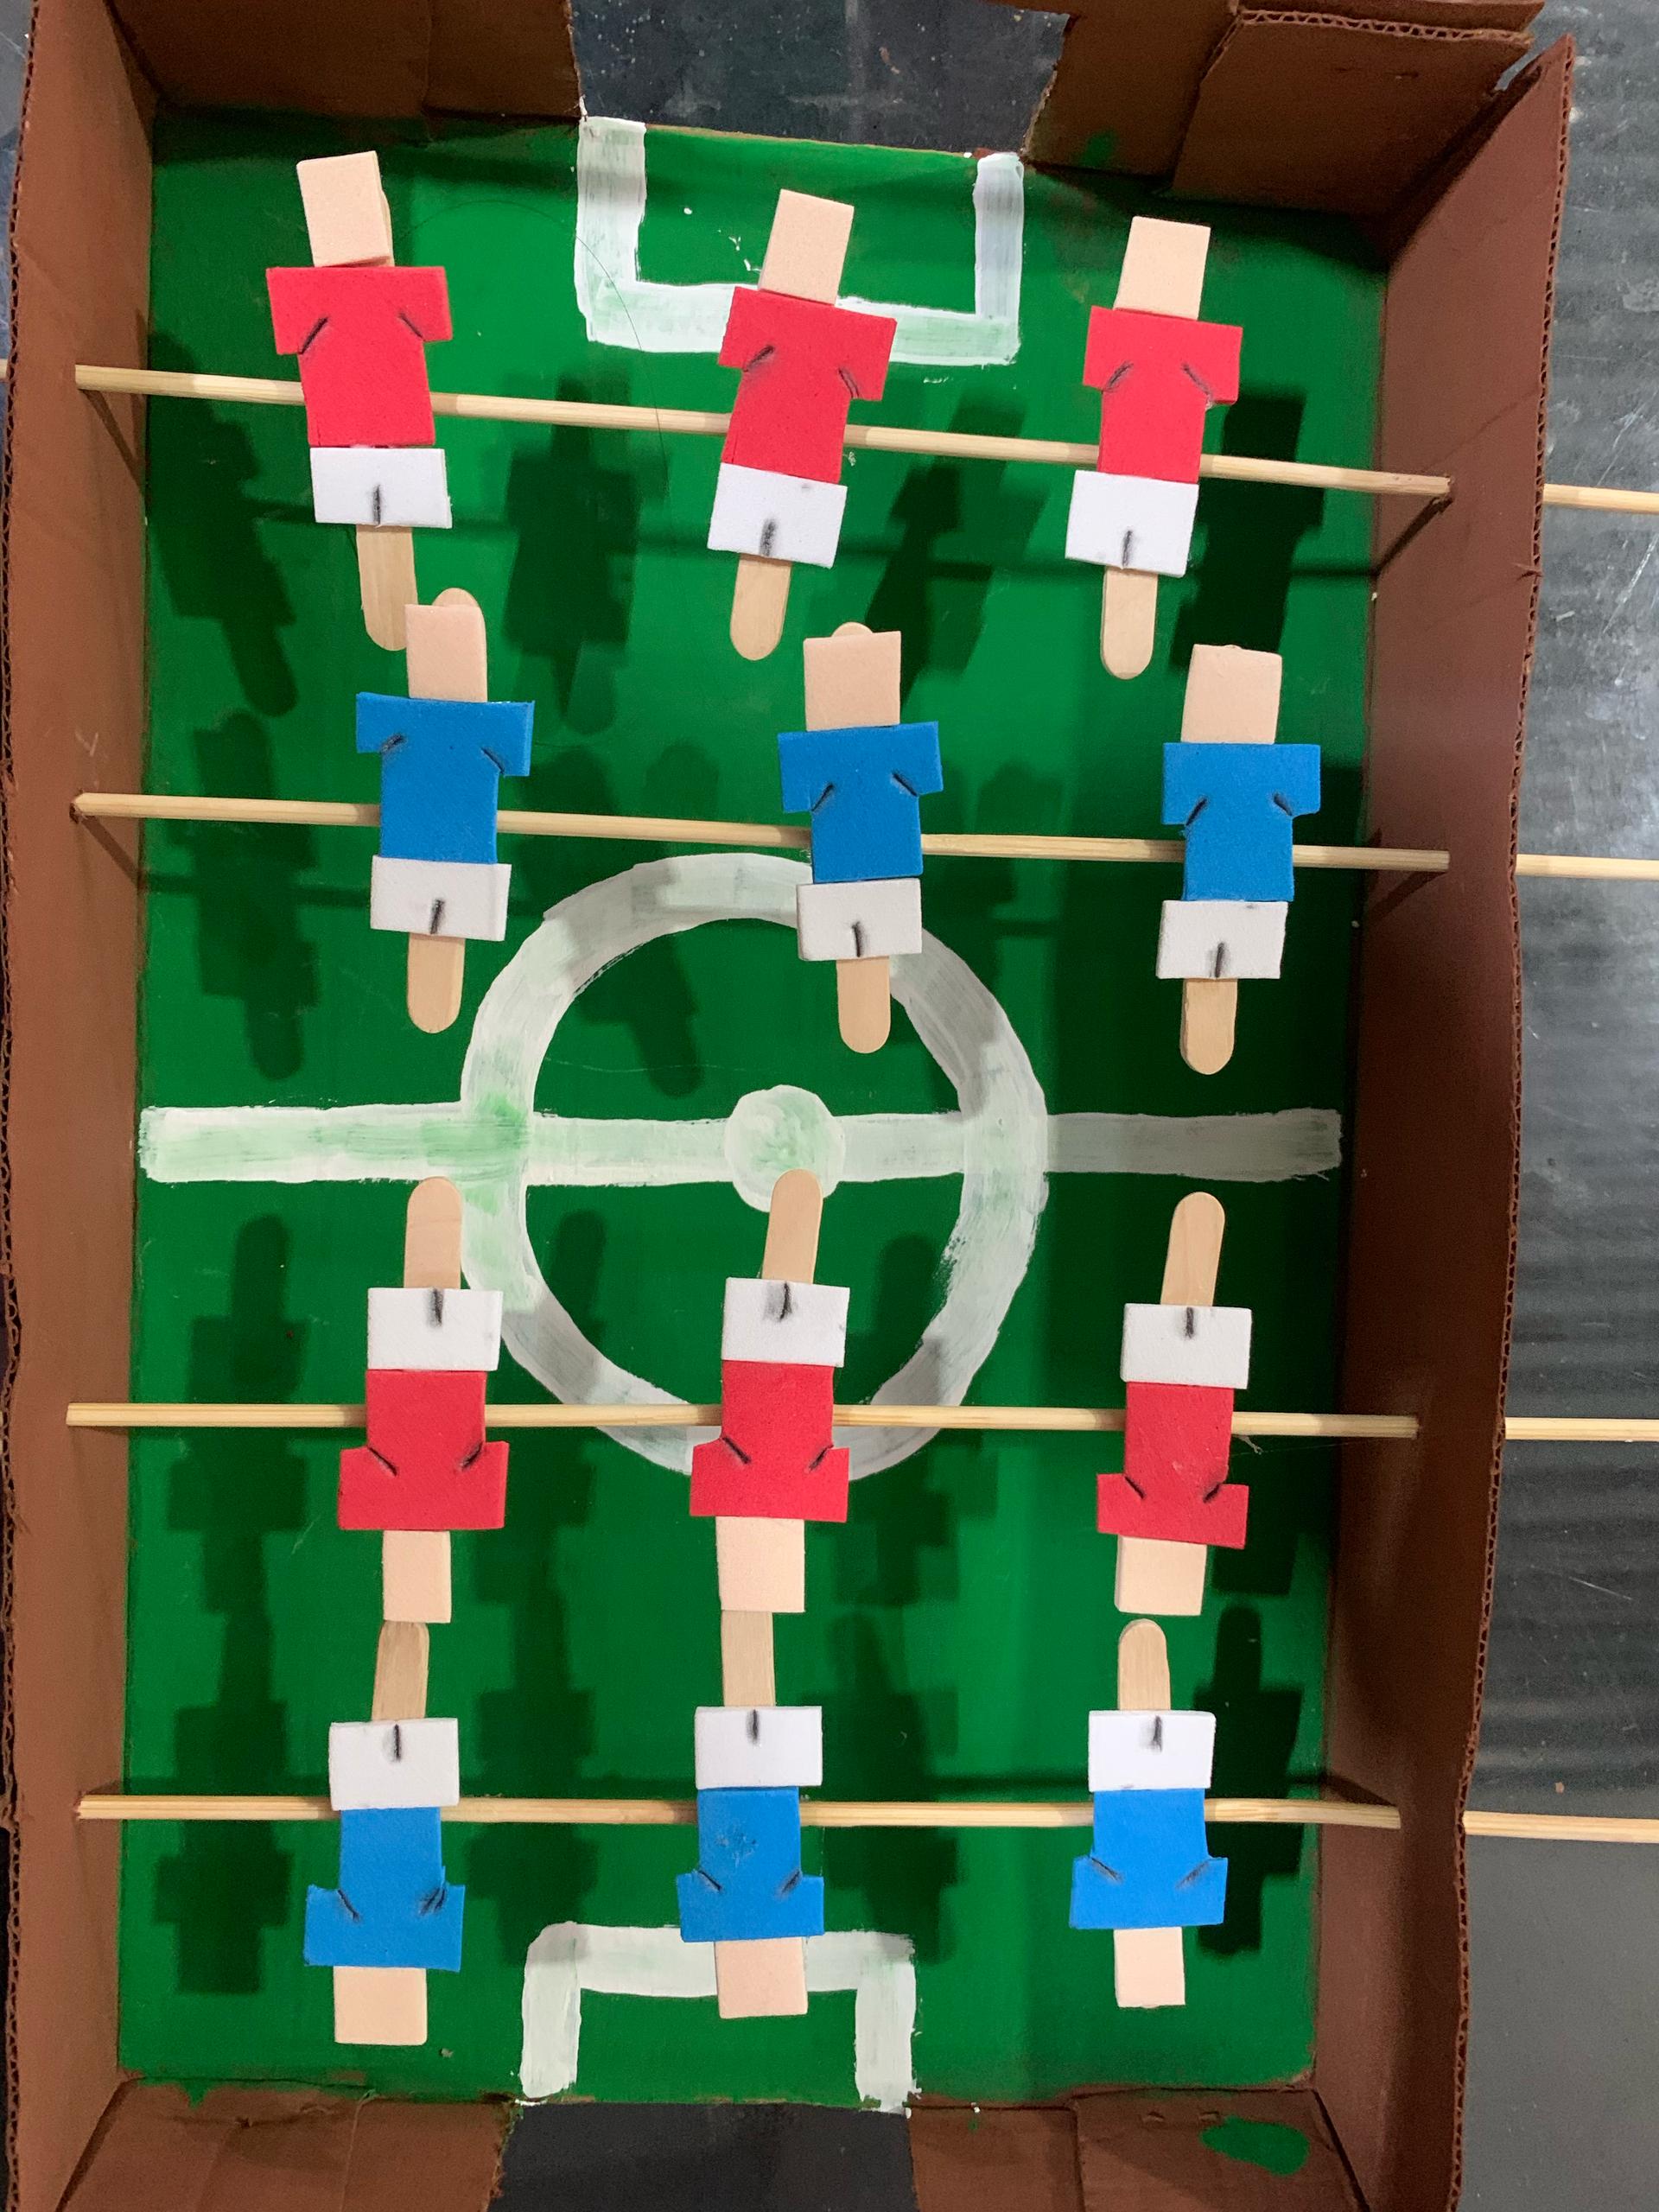
I painted the walls of the box brown, both inside and out, and the bottom inside green with white lines simulating the markings of a soccer field.
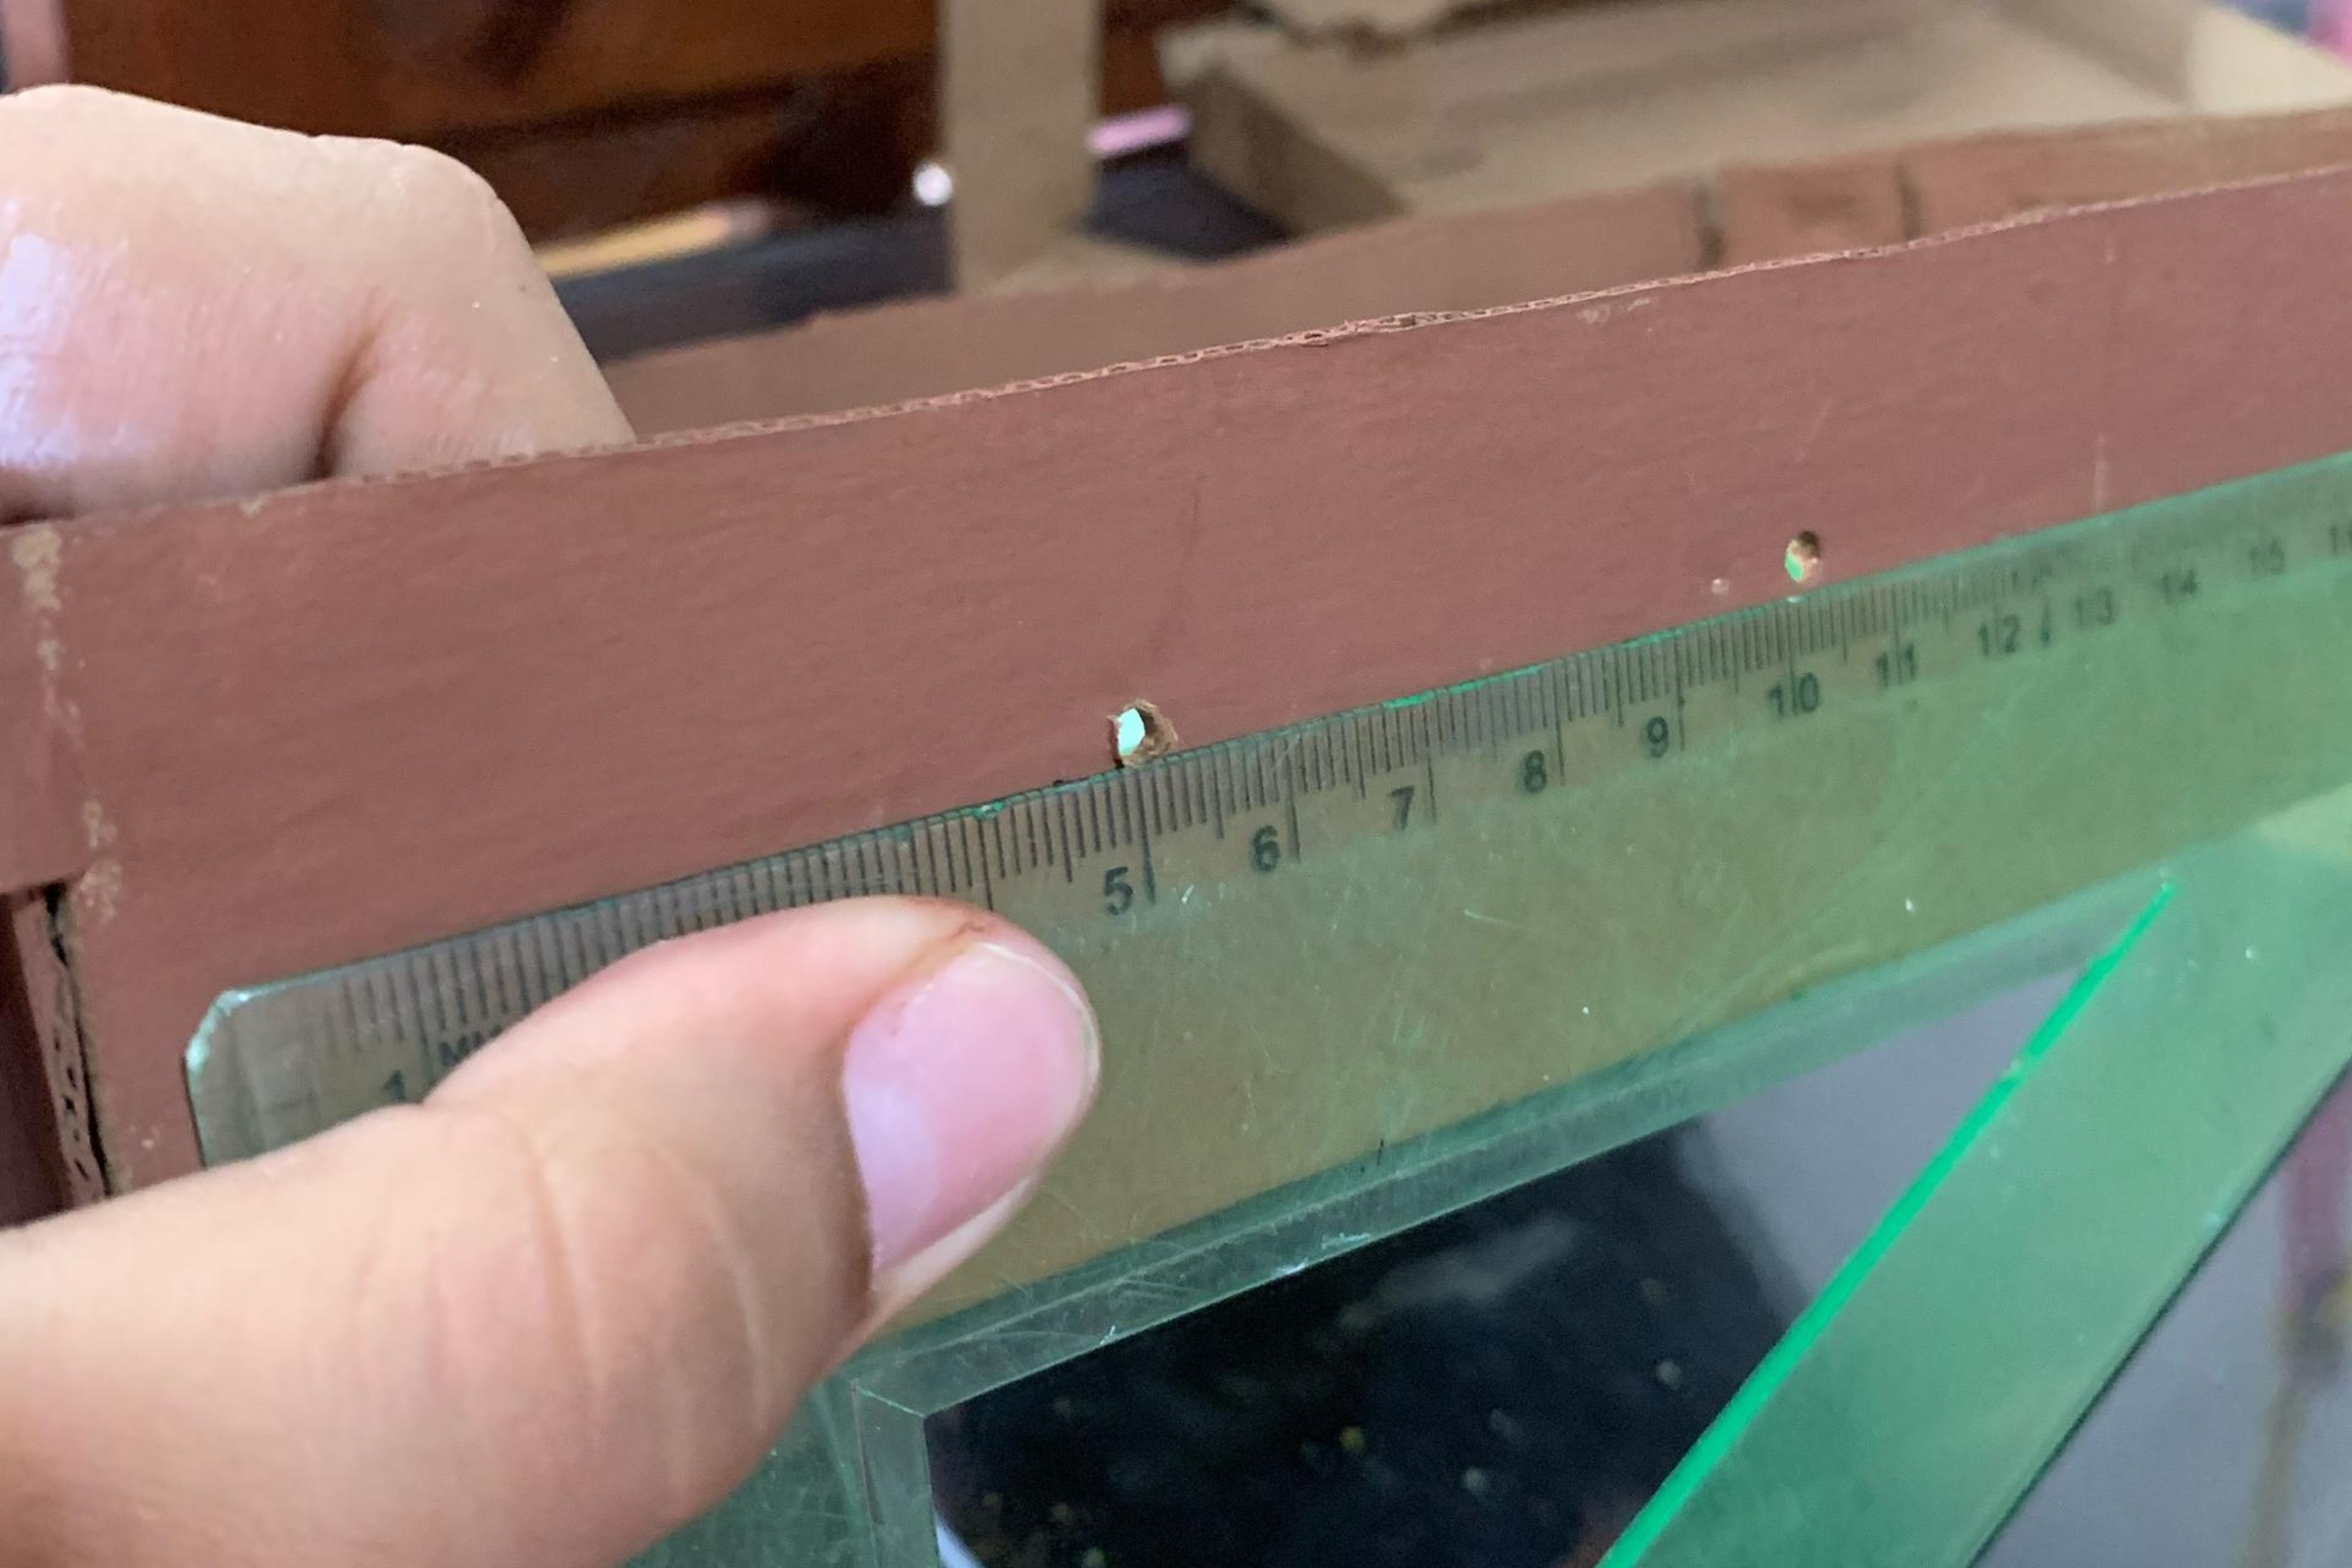
Then I made holes where the skewers would go to attach the players, leaving about 5 cm between each one on the longer sides of the box.
.jpg) |
|---|
To make the players:
.jpeg) | 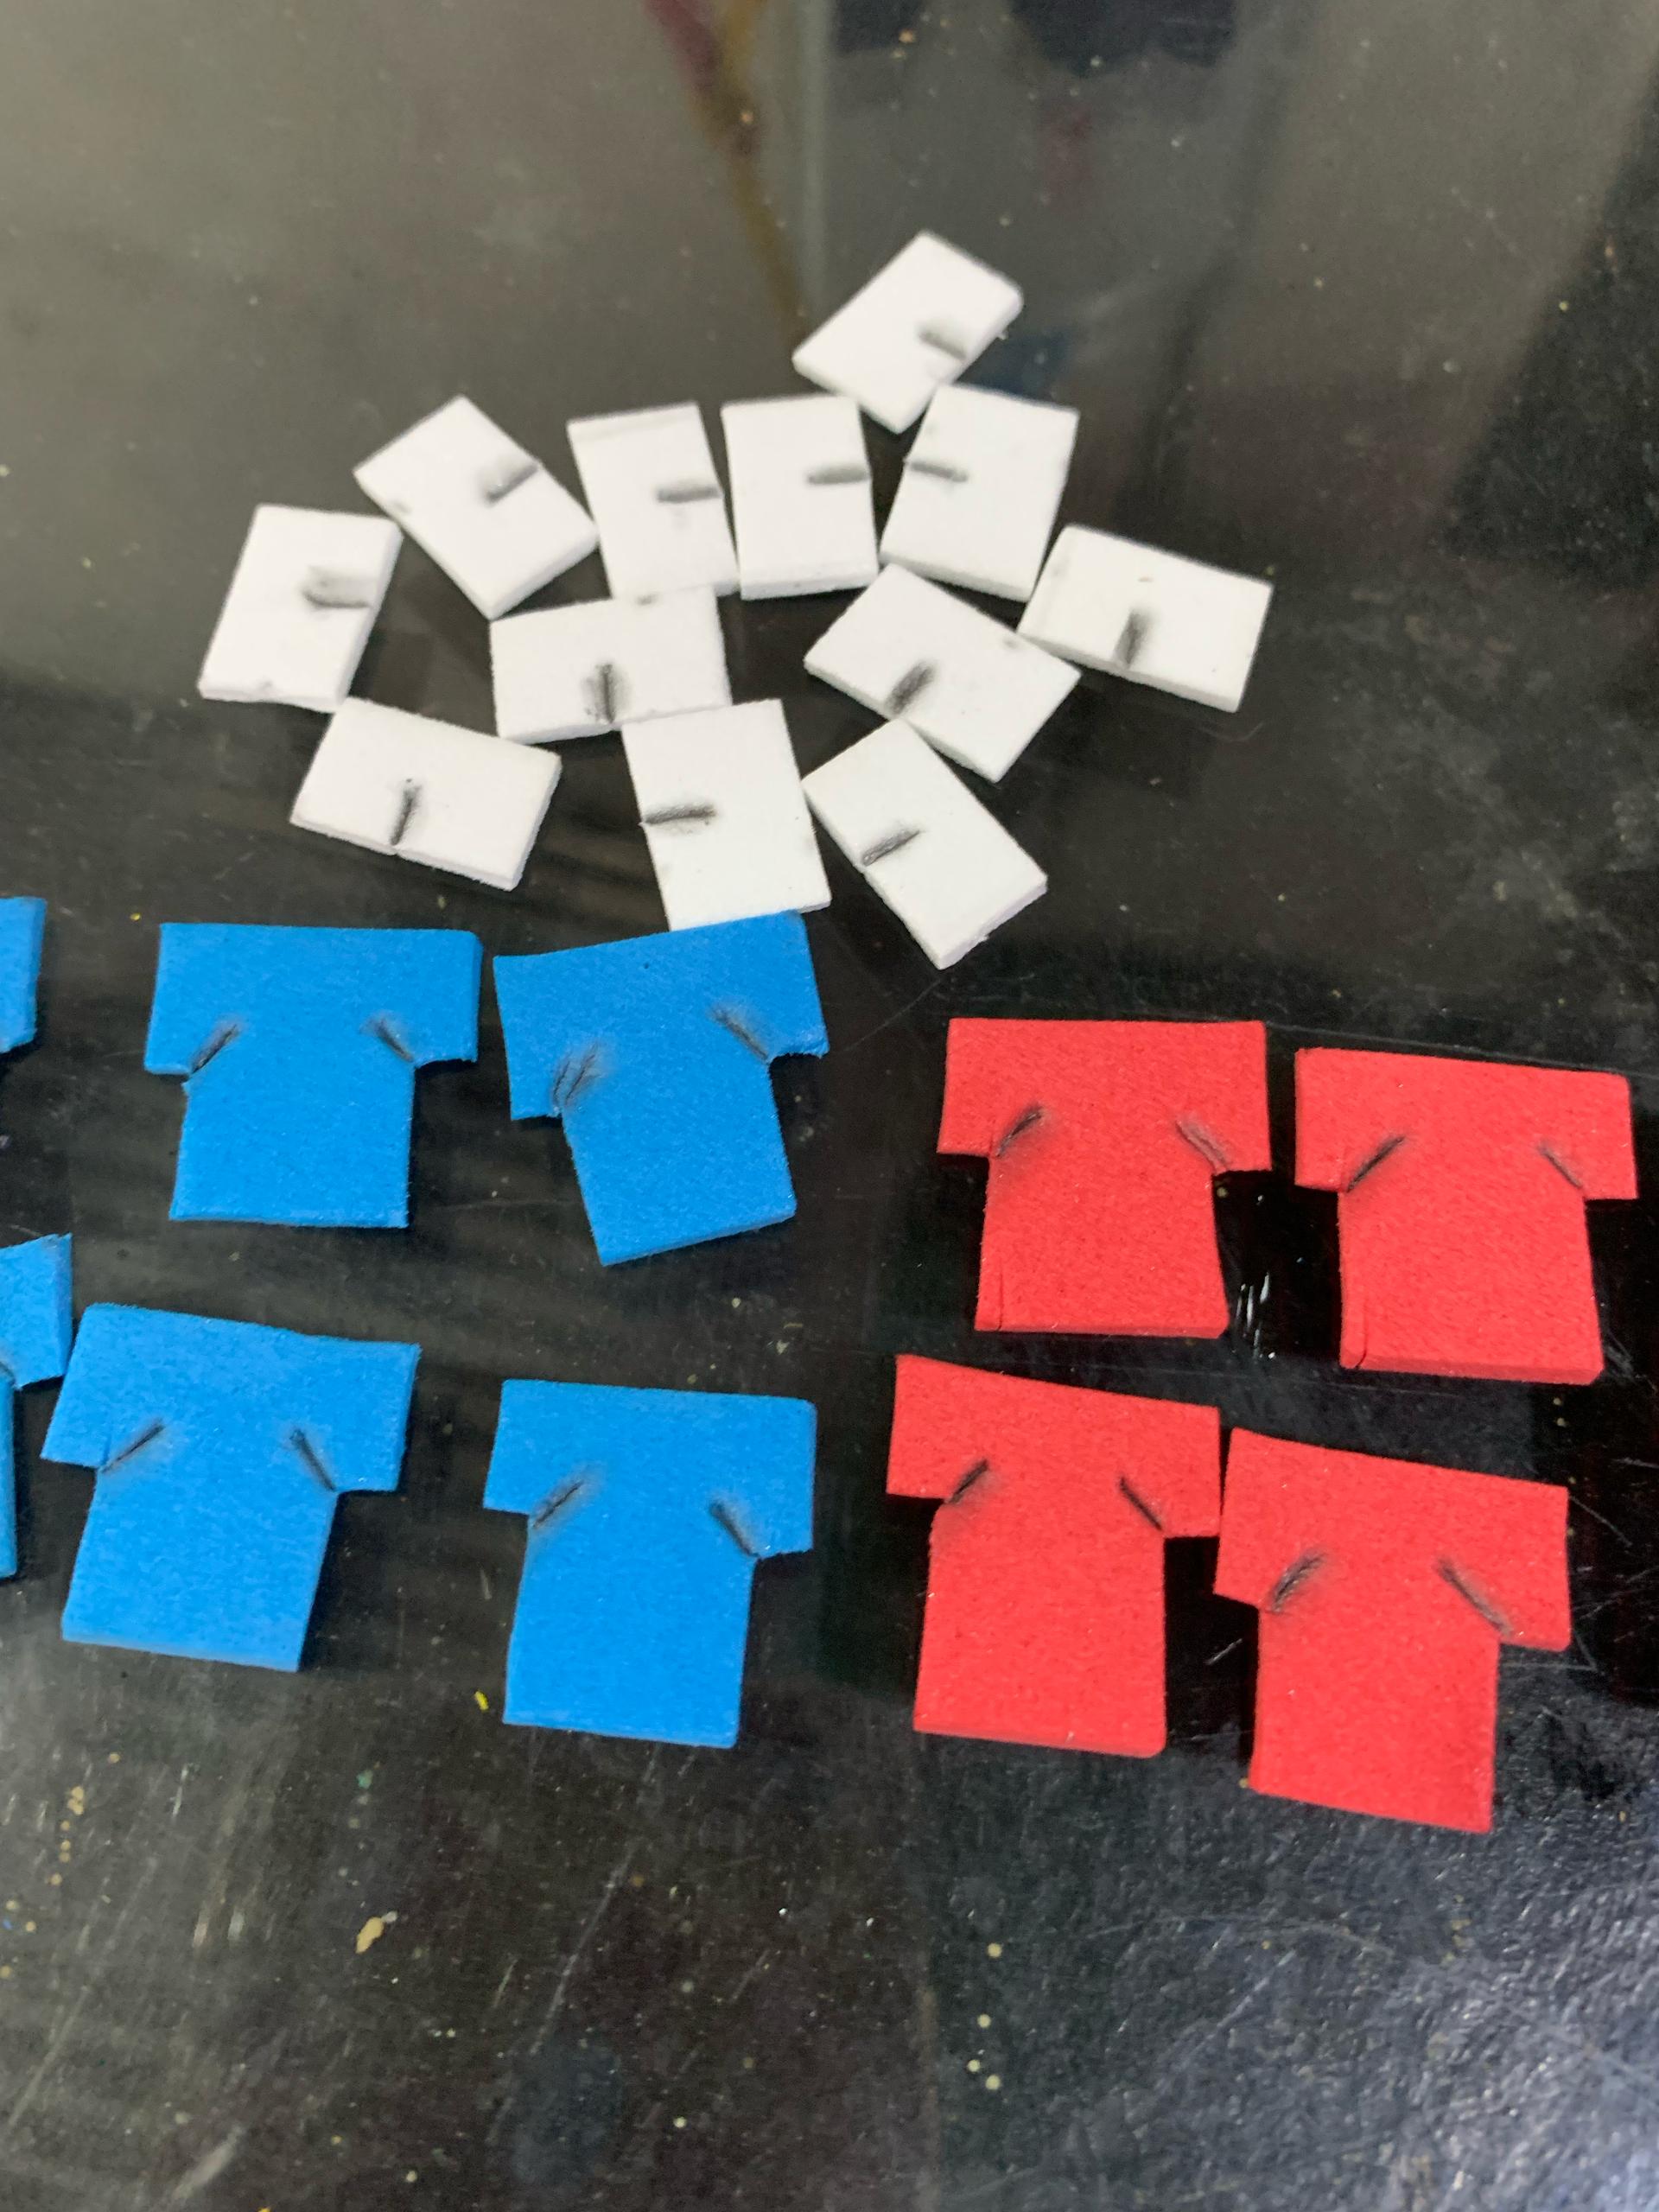 |
|---|---|
.jpeg) | 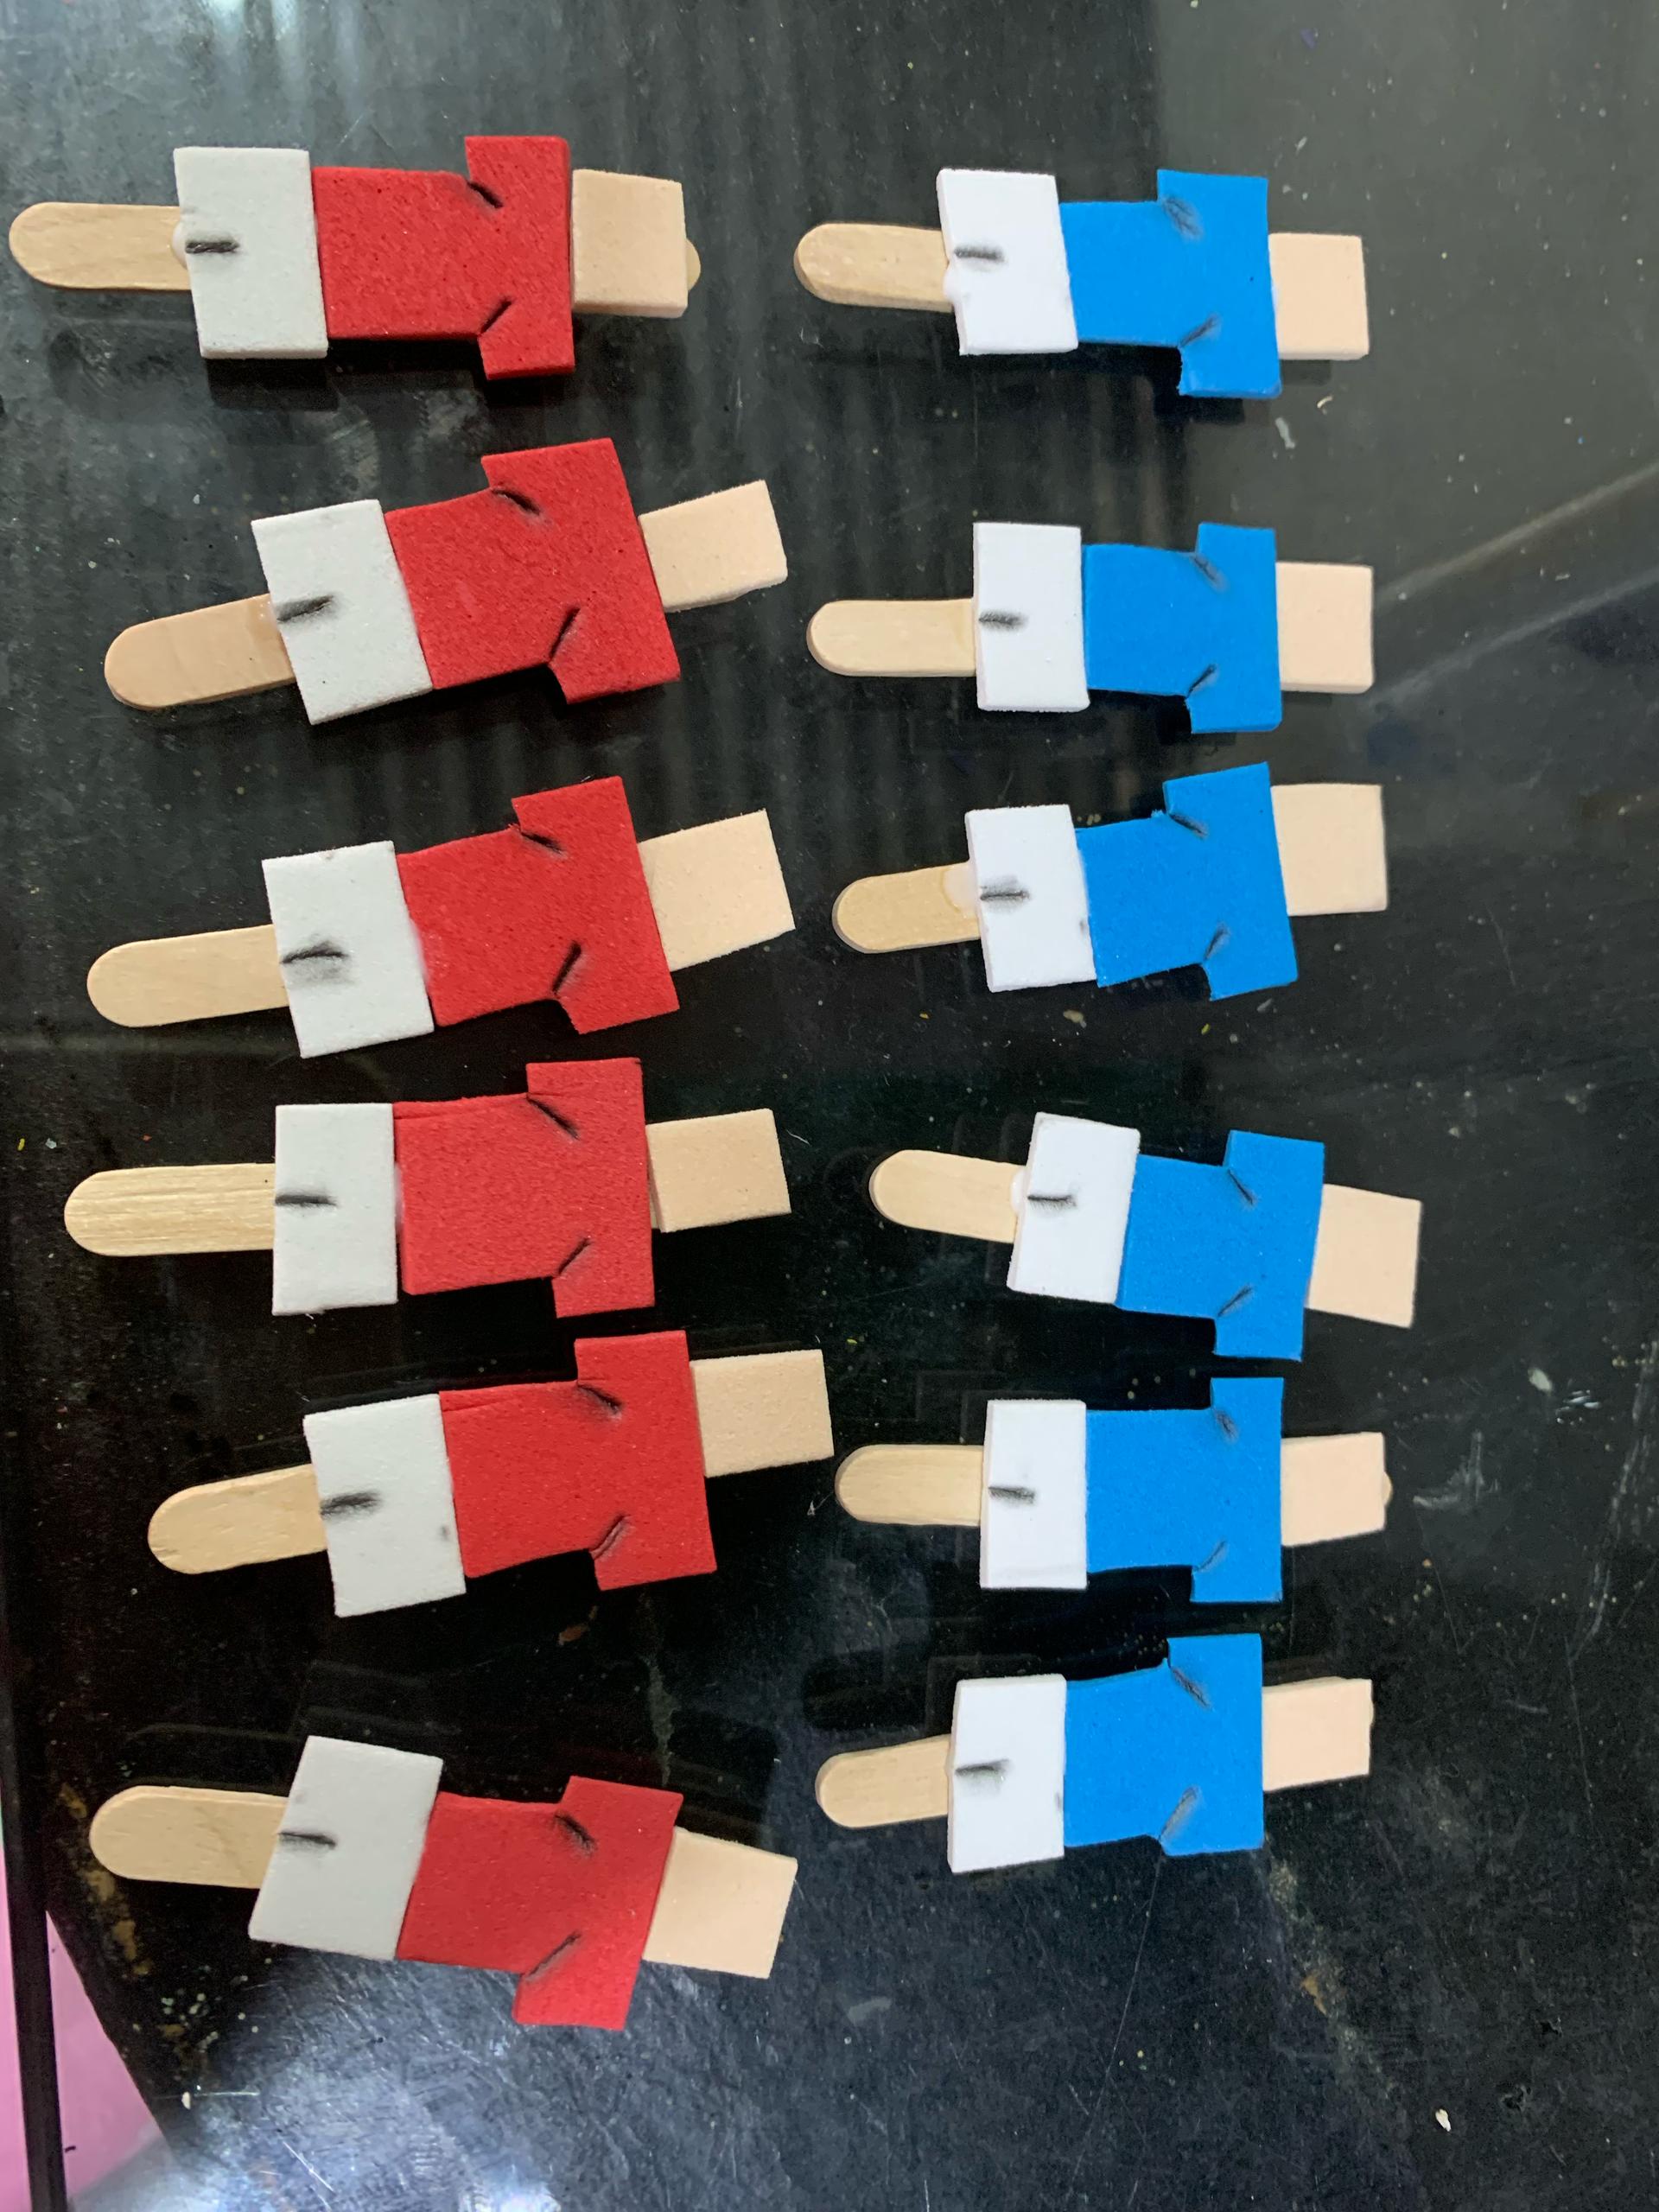.jpeg) |
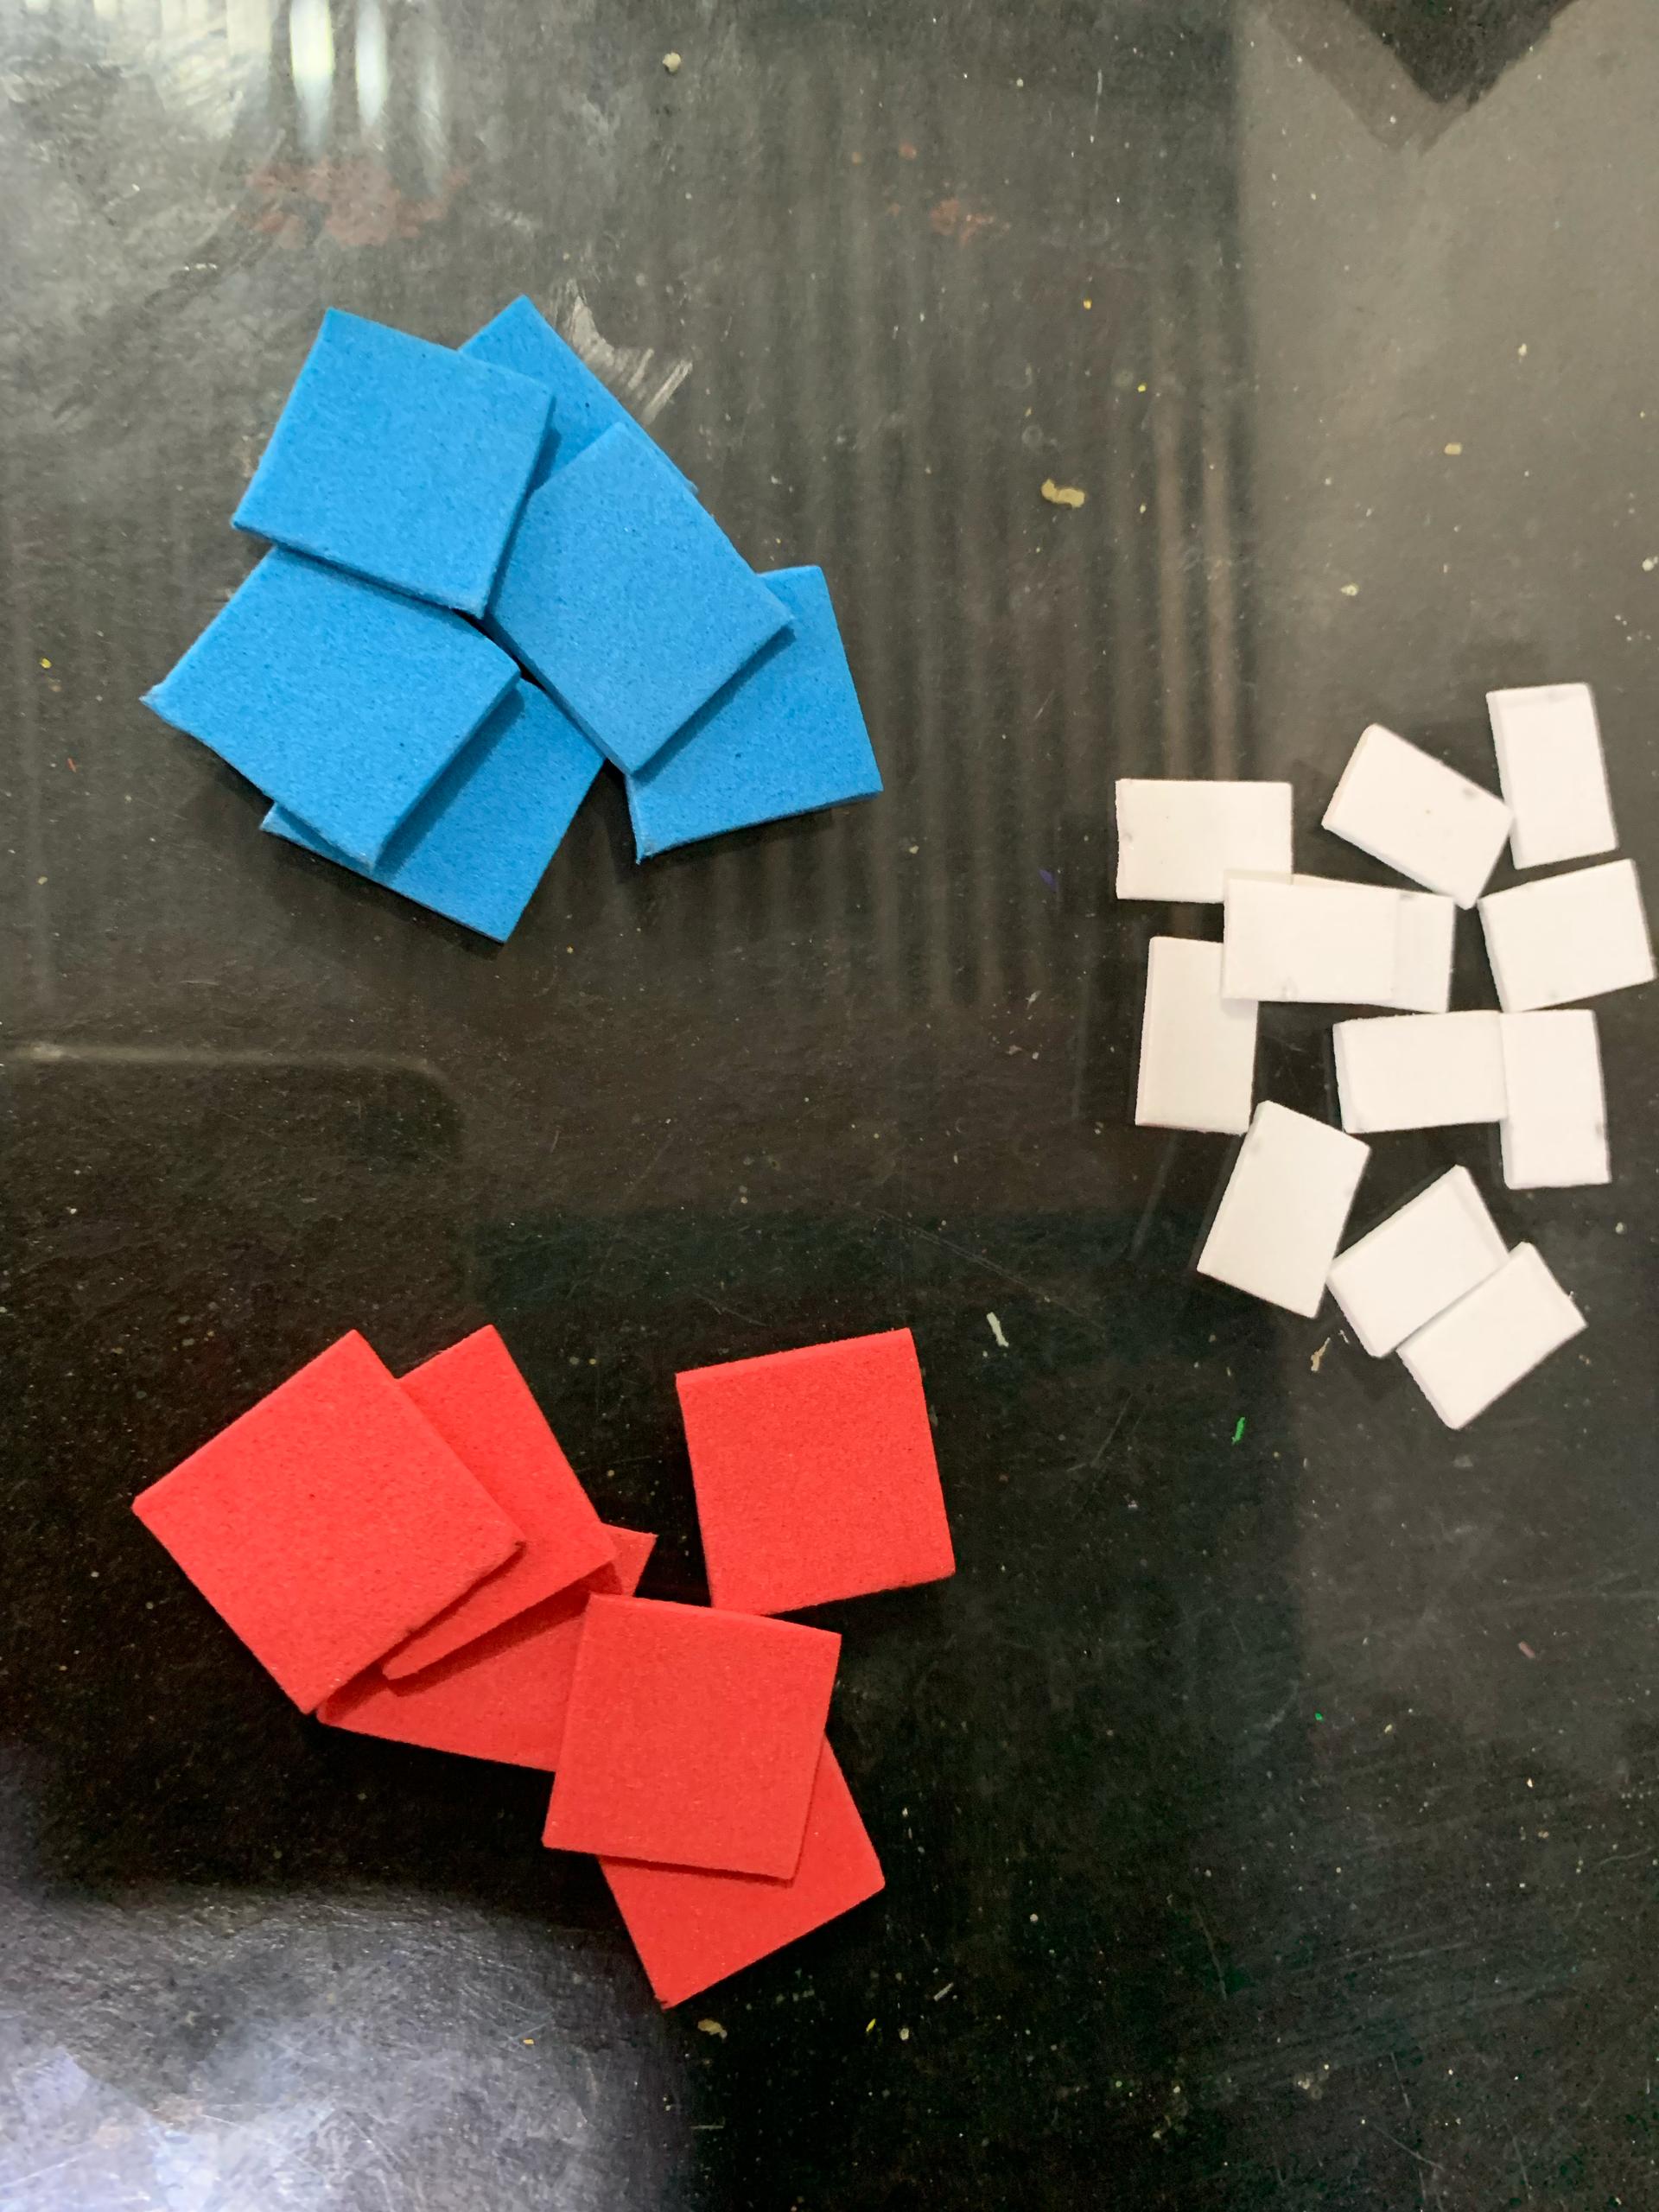
I started by cutting 12 squares of white foam measuring 1.5 cm wide and 1 cm high, 6 squares of red foam measuring 2x2 cm, 6 squares of blue foam also measuring 2x2 cm, and 12 squares of skin-colored foam of approximately 1x1 cm. I drew a small line with a pencil on the white squares in the middle, touching only one side, to simulate shorts. For the blue and red squares, I trimmed part of the sides to mimic the shape of a shirt and added some details with pencil.
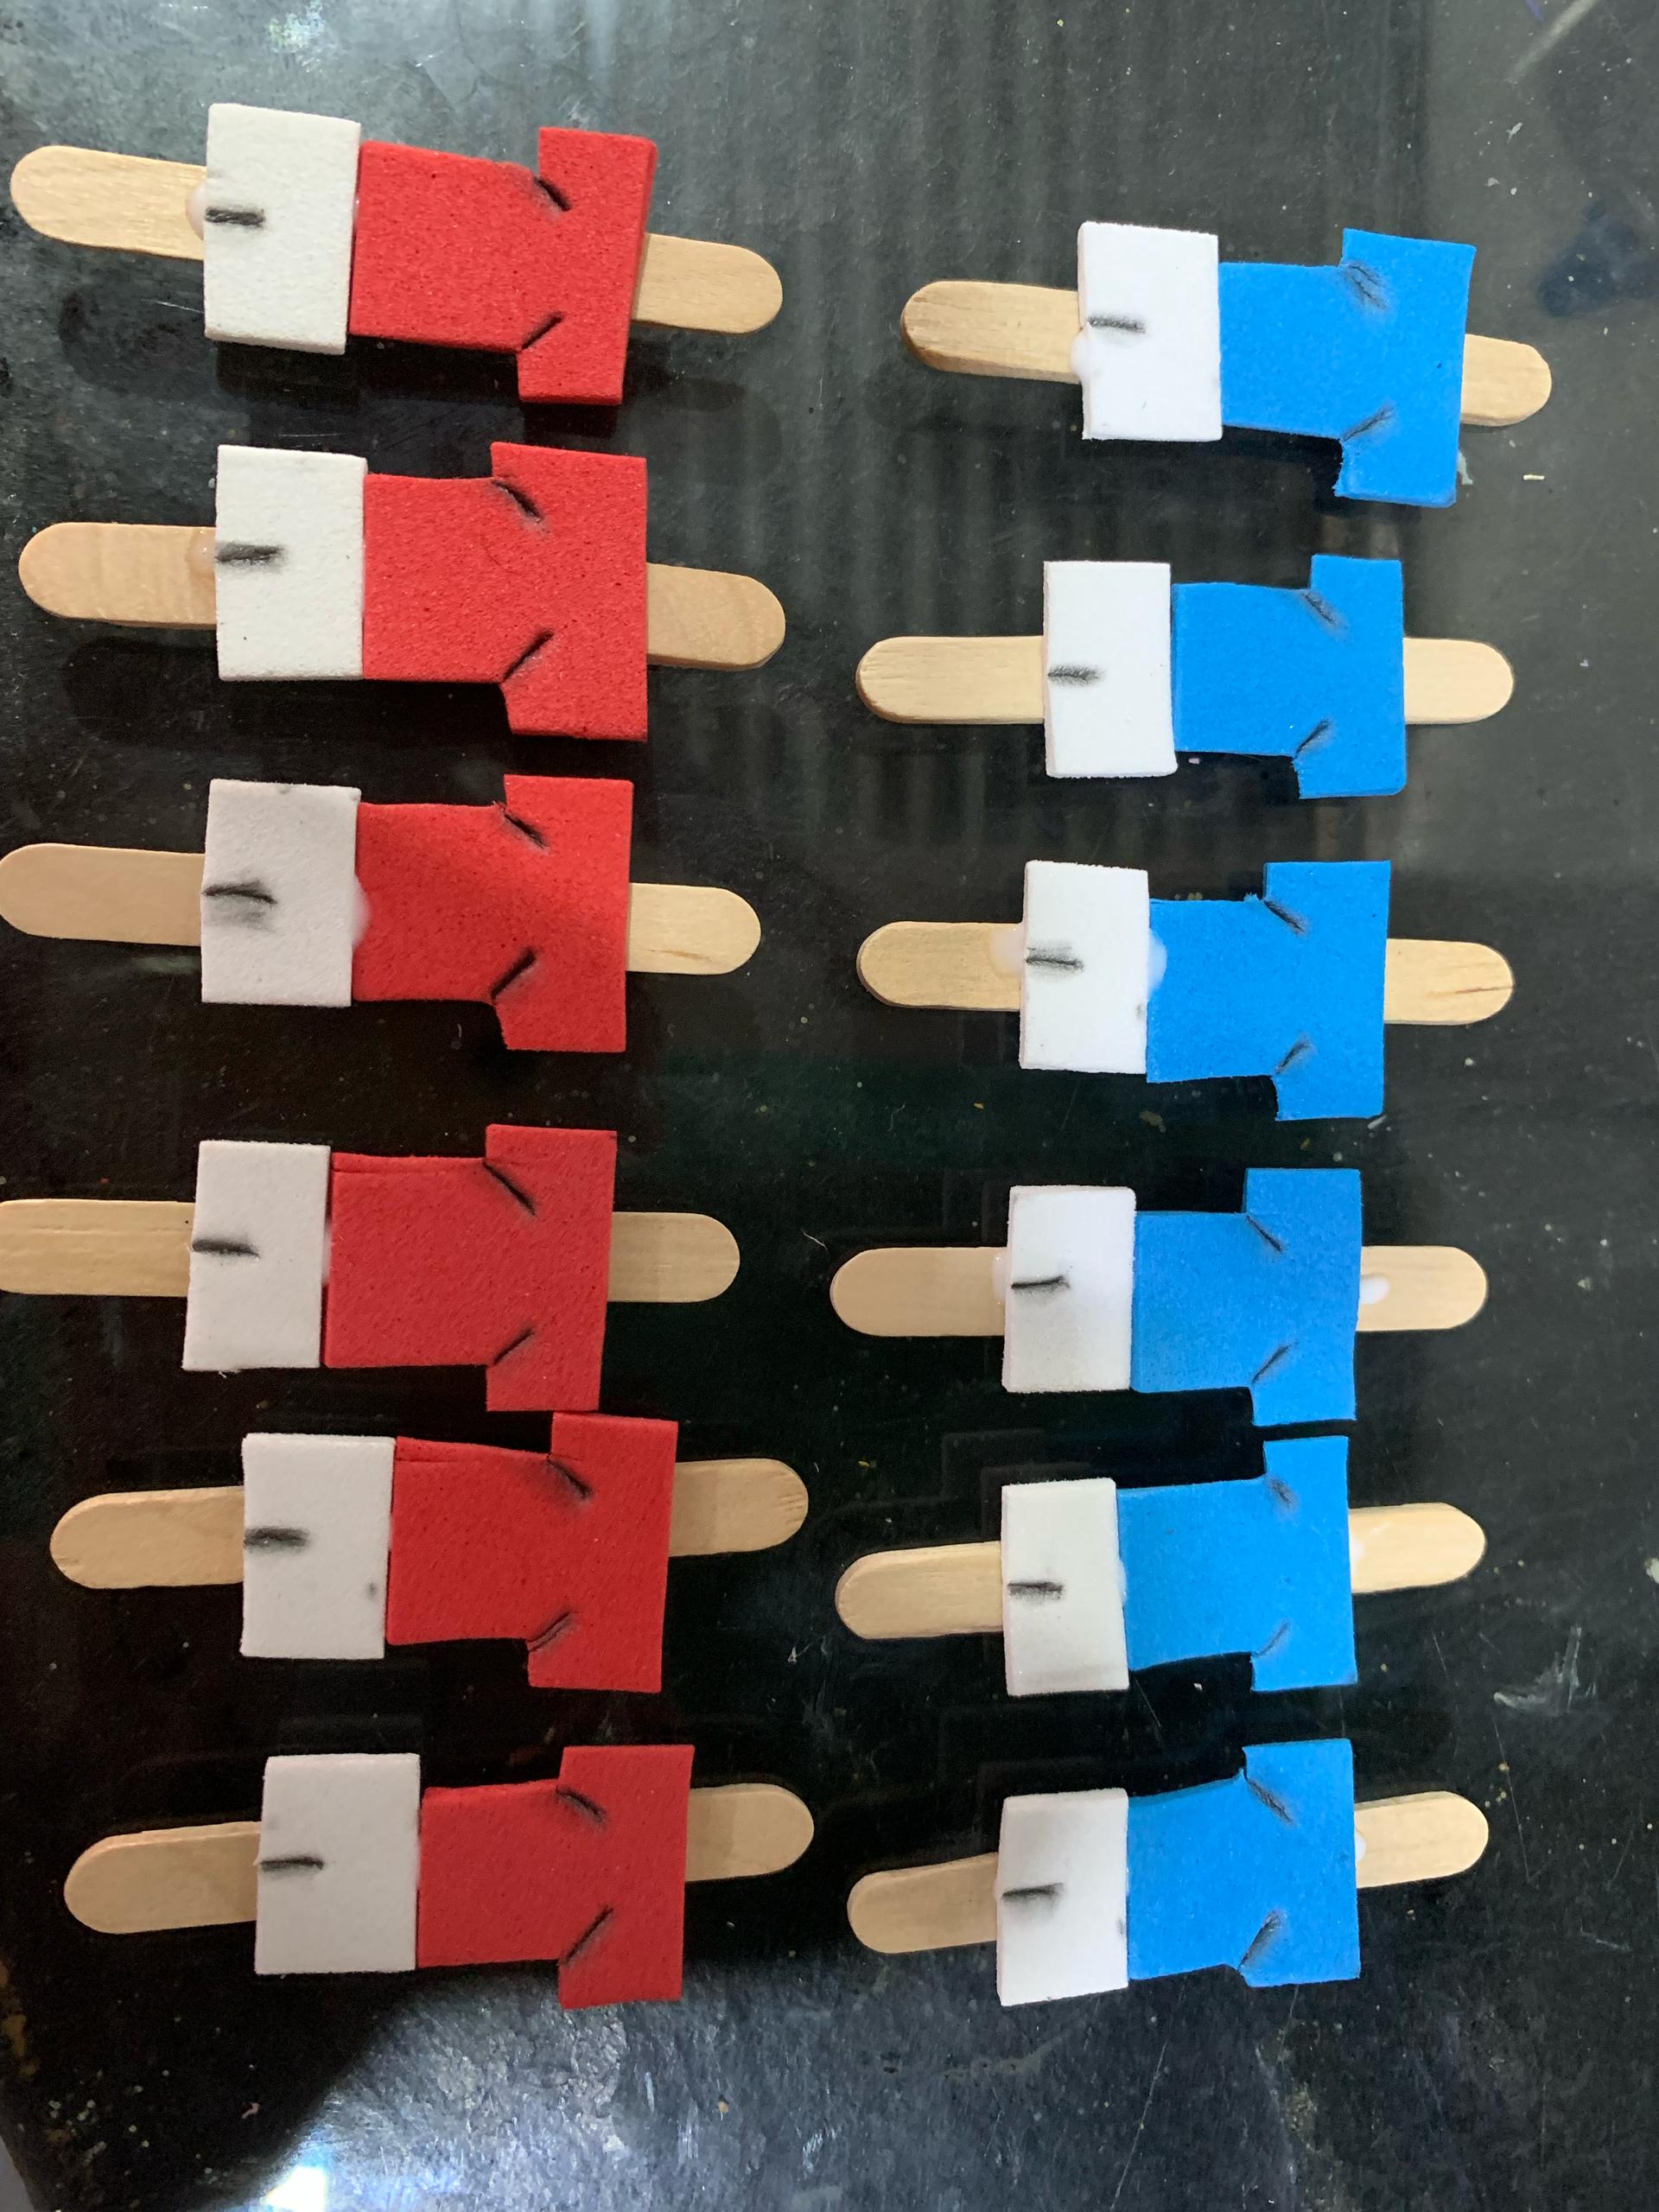
I glued these pieces onto small wooden popsicle sticks, leaving about 1 cm from one corner of the stick and first attaching the shorts, then the shirt, and finally the skin-colored square representing the head. This way, I created 12 players—6 for each team (6 red and 6 blue).
To finish assembling our table:
 |  | .jpeg) |
|---|
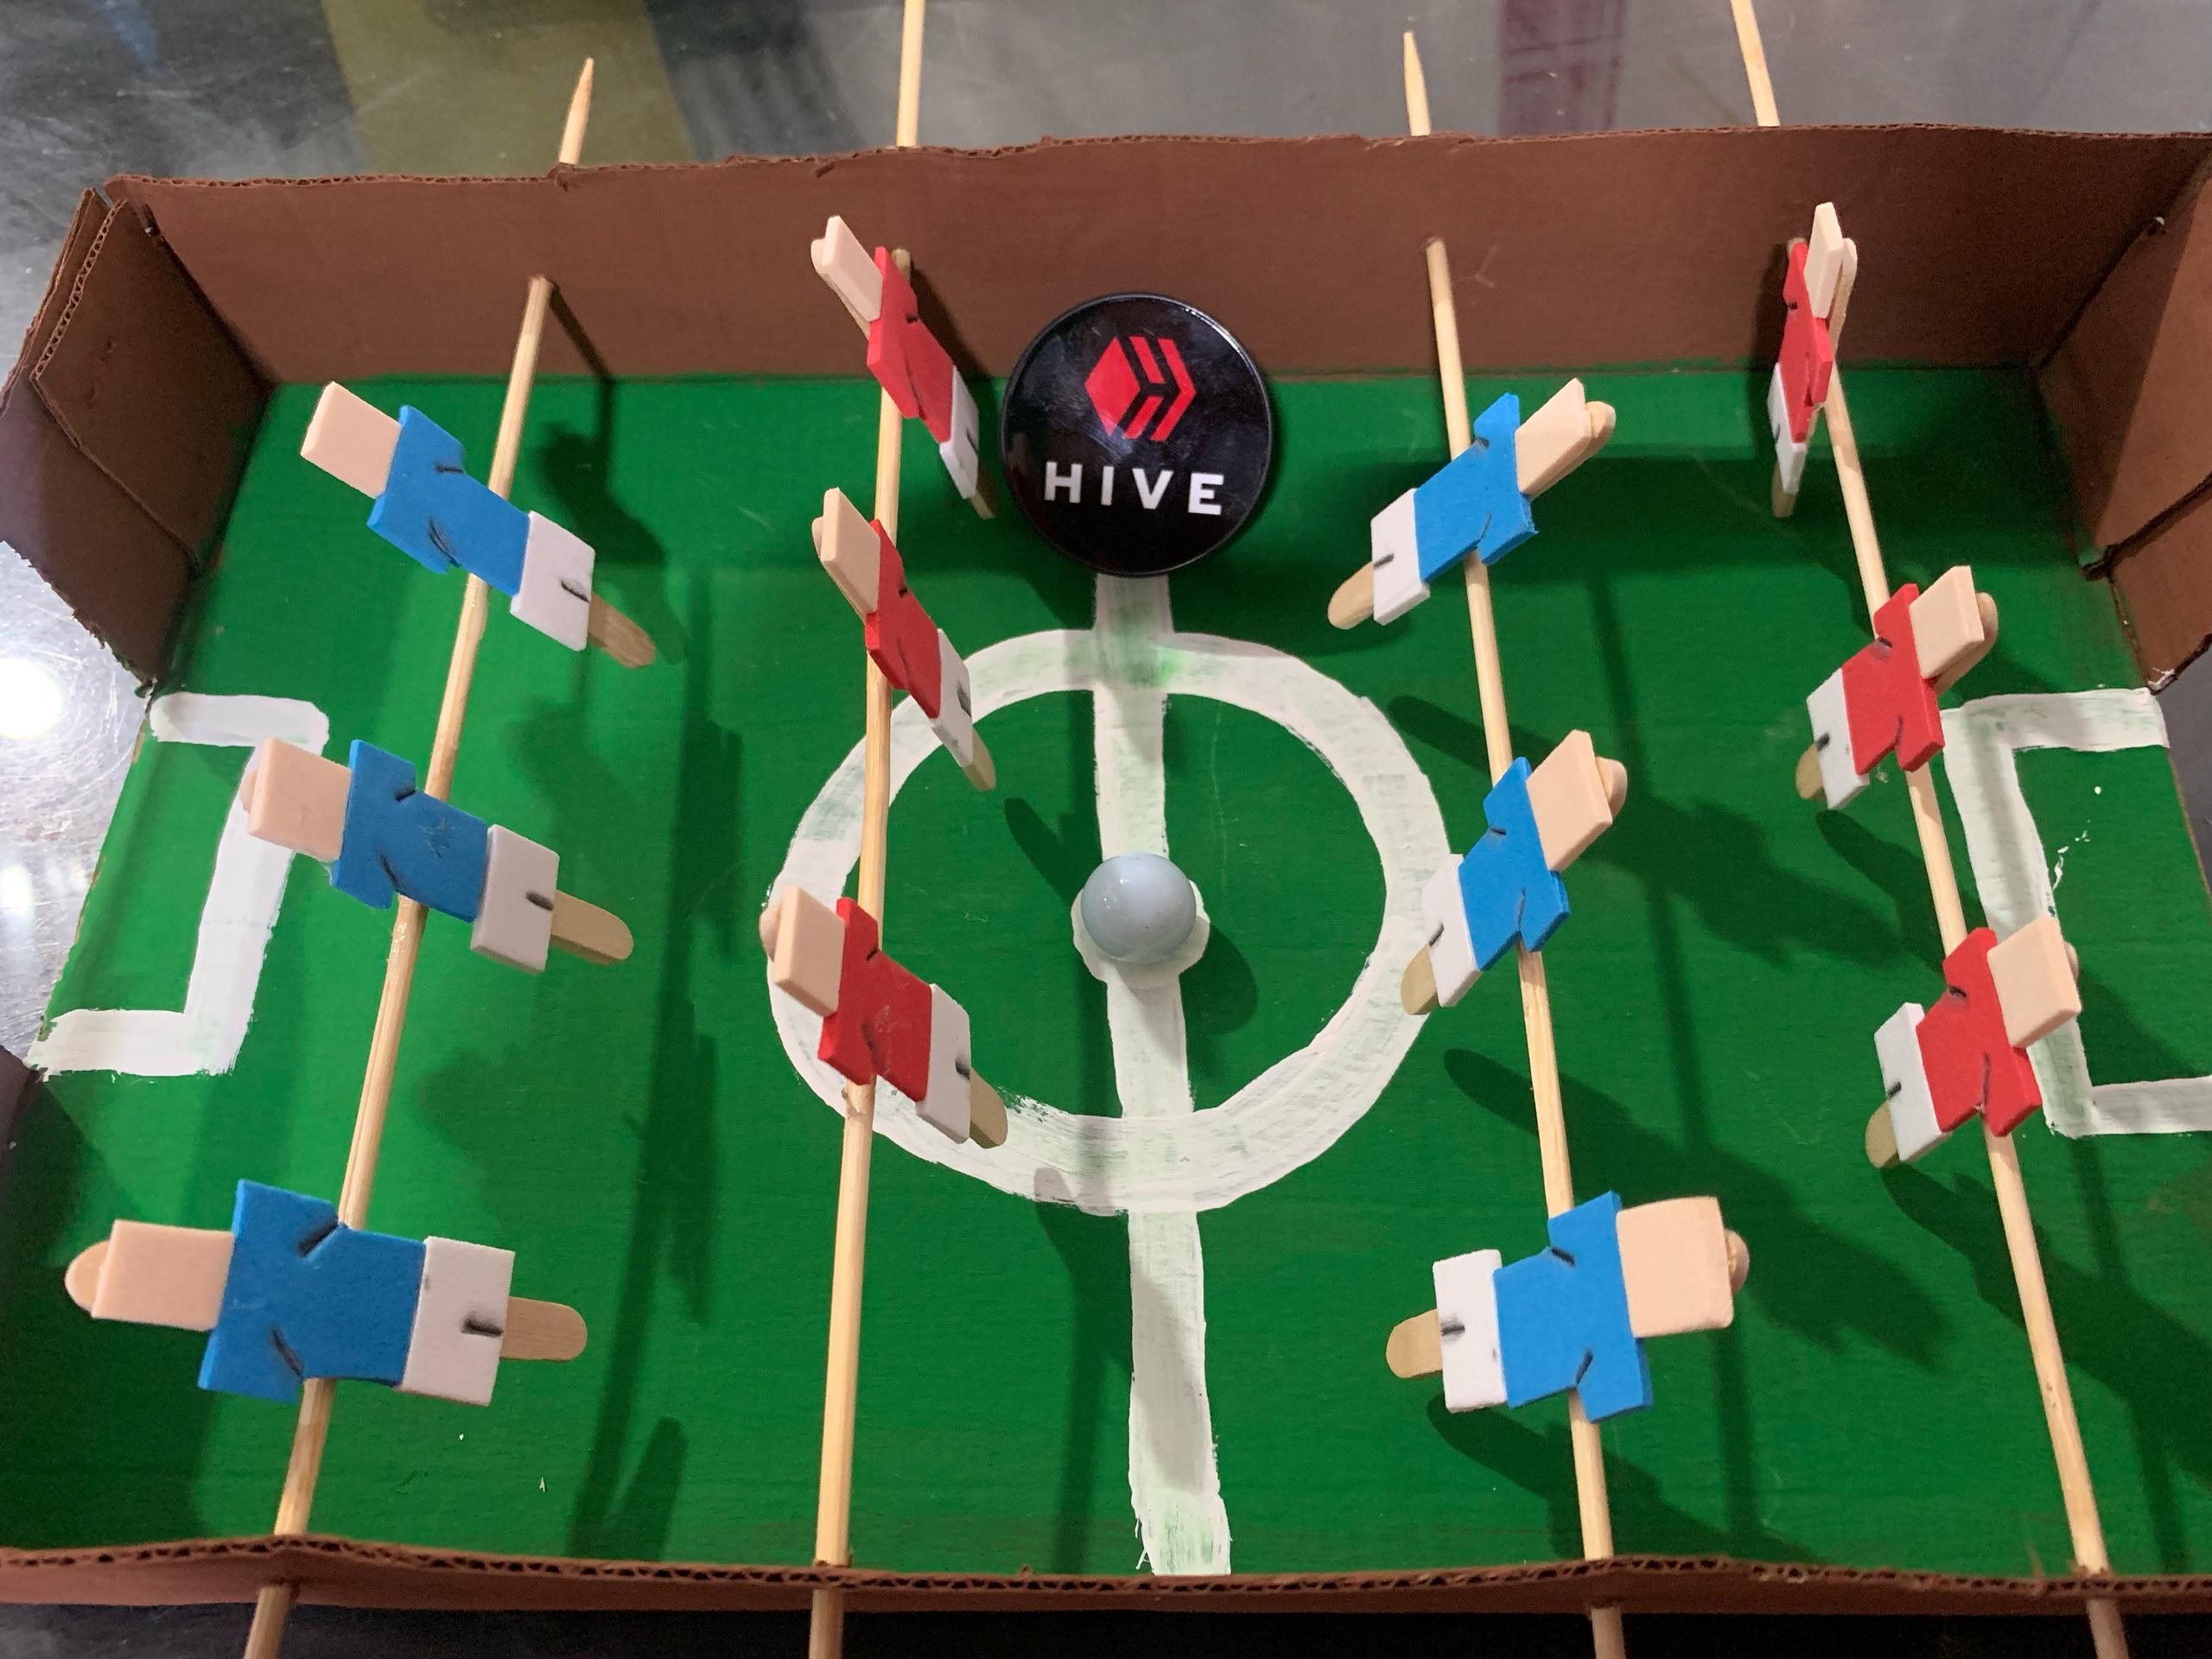
I took the field I had made, already with the skewers inserted, and began gluing each of the 12 players on them. On the first skewer, I placed 3 blue players, on the second skewer, 3 red players, on the third skewer, 3 blue players looking in the opposite direction of the previous ones, and on the fourth skewer, 3 red players in the same way as those on the third skewer. I left about 3 cm of distance between each player on every skewer.
.jpeg) |
|---|
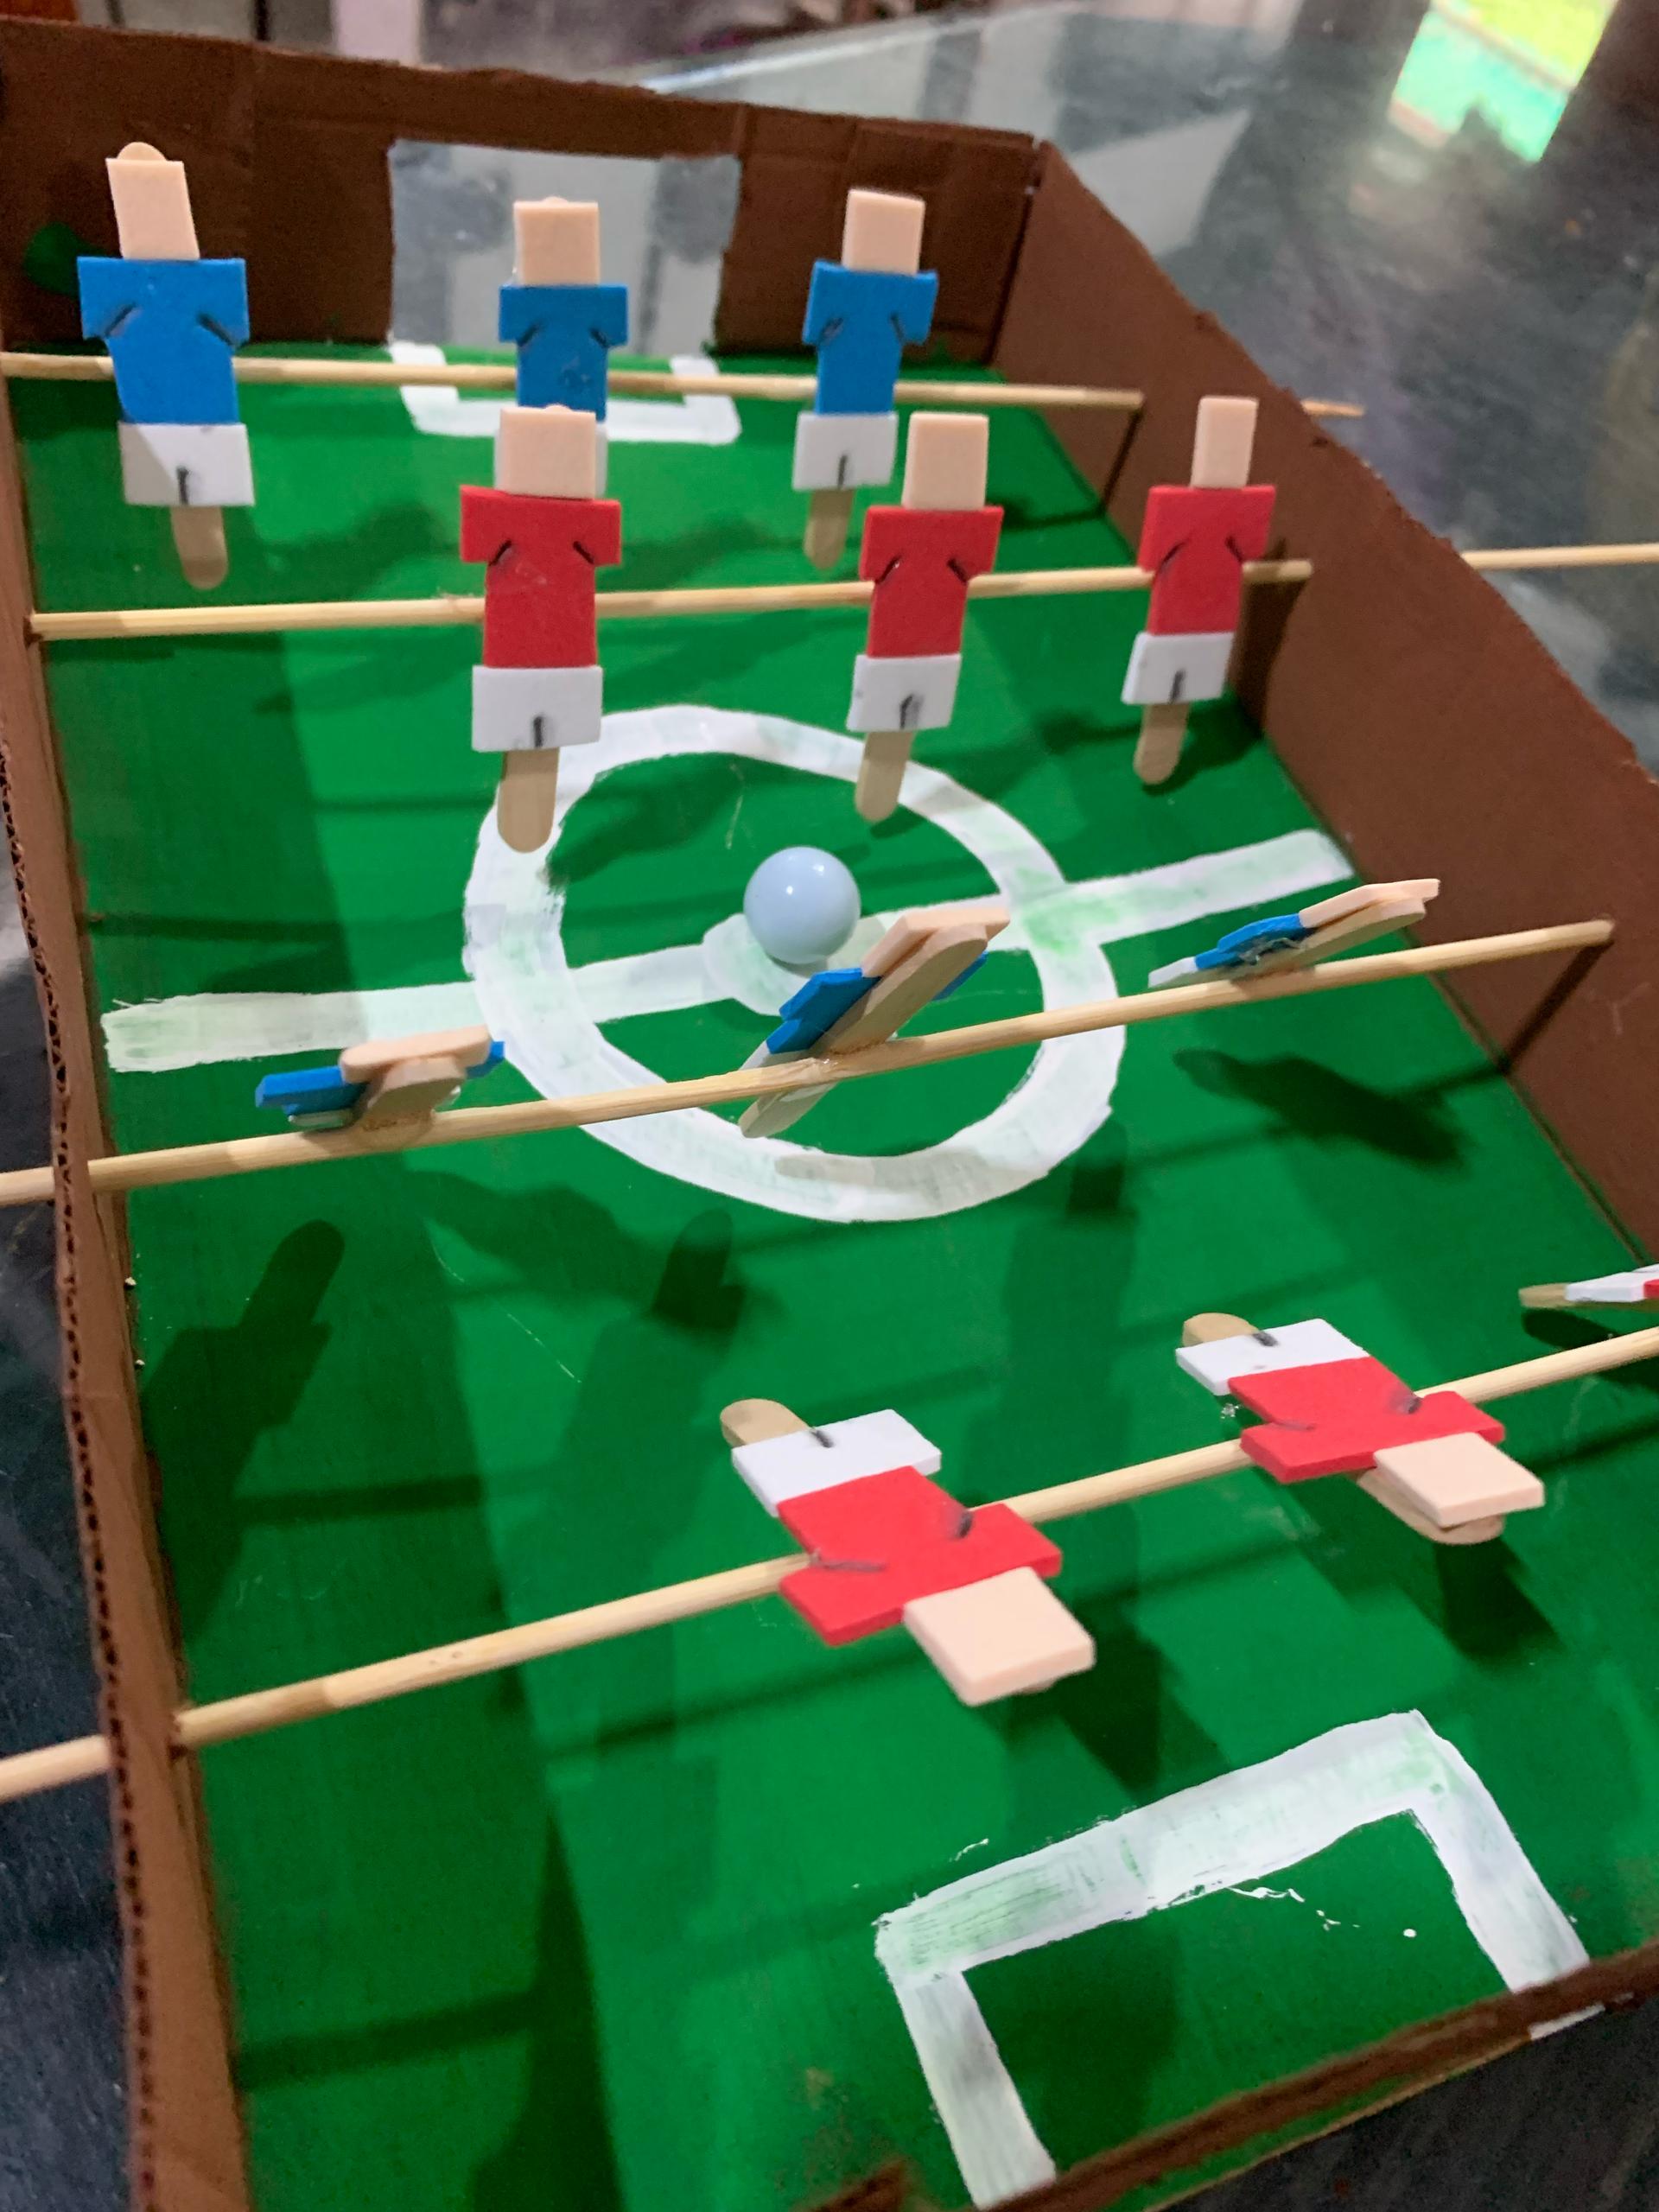
| And there you have it! With this little table, you can use a marble to simulate the ball, turning it into a game that you can enjoy while spending quality time with your loved ones. |
All photographs are my own, taken with my iPhone XR.
The cover was published on the BeFunky website.
Beautiful creativity, this looks so nice. You have done so well with the detail design of this project. Thanks for sharing.
Thank you for your nice comment, I really appreciate it.
Wow, you have done a great job here, there is a lot of creativity and perfect details, thanks for sharing it on DIYHub Community, this post is an example for everyone to follow.
selected by @jesuslnrs
Thank you very much, I'm glad you liked it.
Congratulations @merlysmont! You have completed the following achievement on the Hive blockchain And have been rewarded with New badge(s)
Your next target is to reach 5000 upvotes.
You can view your badges on your board and compare yourself to others in the Ranking
If you no longer want to receive notifications, reply to this comment with the word
STOPCheck out our last posts: