[ESP-ING] DIY: Blusa manga larga en color verde olivo. || DIY: Olive green long sleeve blouse.
¡Hola comunidad de Hive!
Hello Hive community!
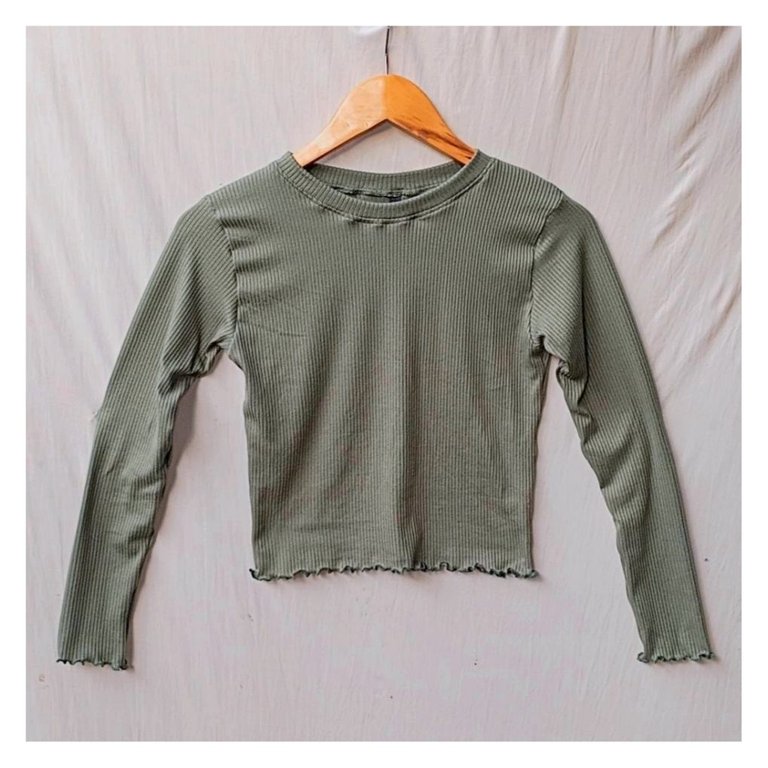
Hola queridos Needleworkers, feliz lunes de agujas, les deseo una semana cargada de muchas buenas vibras.🤗♥️ La semana pasada les he compartido varios proyectos que confeccioné que de verdad me encantaron, pero hoy lunes les traigo uno de mis favoritos hasta ahora, se trata de esta espectacular blusa manga larga en un color verde olivo que está 🔥🔥🔥 este color está en tendencia aún que muy pocos personas lo usan o les gusta. Lo que si es cierto, es que yo amé como quedó esta blusa.
Hello dear Needleworkers, happy needlework Monday, I wish you a week full of many good vibes.🤗♥️ Last week I have shared with you several projects that I made that I really loved, but today Monday I bring you one of my favorites so far, it is this spectacular long sleeve blouse in an olive green color that is 🔥🔥🔥🔥 this color is trending even that very few people use it or like it. What is true, is that I loved how this blouse turned out.
Yo no tengo una máquina overlock, pero hace un par de semana ví un vídeo en Pinterest que me cambio la vida jajajja 🤣🤣 en el vídeo mostraban como hacer una falsa costura con acabado de overlock y desde que lo probé me ha fascinado, en esta blusa realicé esa falsa costura en el borde de las mangas y en todo el contorno de la cintura. Te invito a ir por tu aguja e hilo y comemos a coser...
I don't have an overlock machine, but a couple of weeks ago I saw a video on Pinterest that changed my life hahahahaha 🤣🤣 in the video they showed how to make a false seam with overlock finish and since I tried it I have been fascinated, in this blouse I made that false seam on the edge of the sleeves and all around the waist. I invite you to get your needle and thread and let's start sewing....
🧵🧷🧵🧷🧵🧷🧵🧷🧵🧷🧵🧷🧵🧷🧵🧷🧵
Necesitaremos || We will need
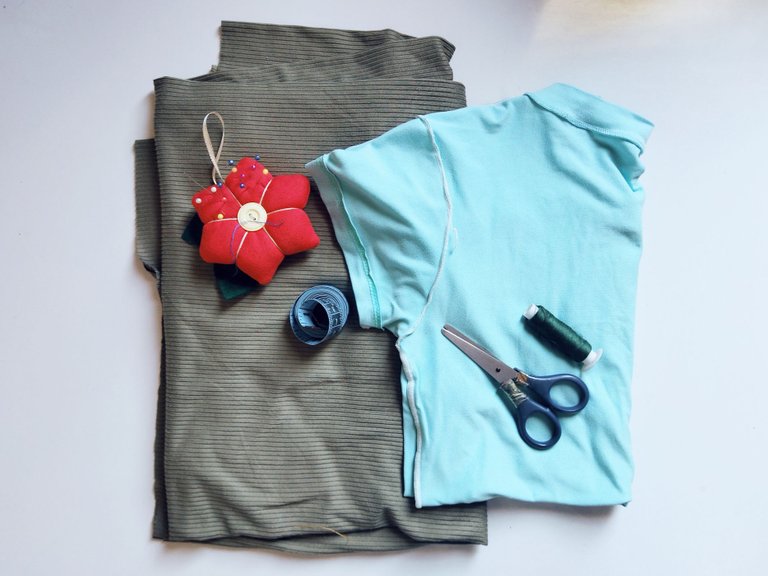
- Medio metro de tela micro rib verde olivo
- Hilo a tono
- Alfileres
- Tijera
- Cinta métrica
- Blusa patrón
- Aguja y máquina de coser
- Half meter of olive green micro rib fabric
- Matching thread
- Pins
- Scissors
- Tape measure
- Pattern blouse
- Needle and sewing machine
🧵🧷🧵🧷🧵🧷🧵🧷🧵🧷🧵🧷🧵🧷🧵🧷🧵
Paso 1 || Step 1
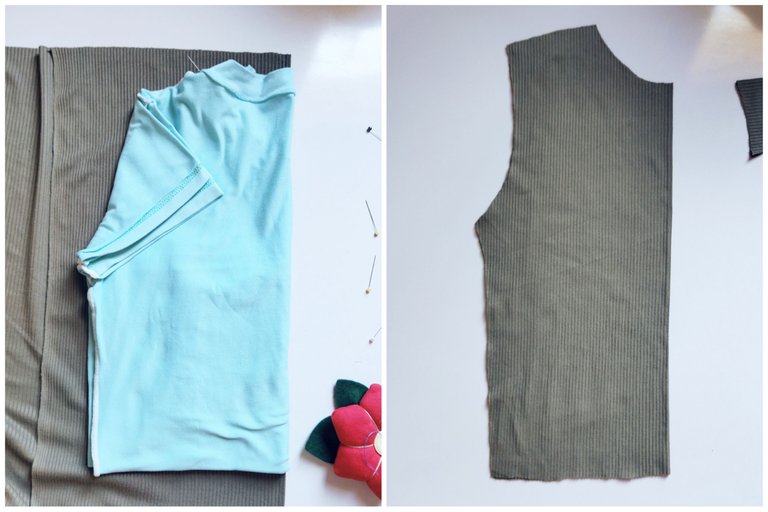
- Comenzamos doblando la tela y colocándola en una superficie plana, colocamos la blusa patrón sobre la tela y vamos a cortar de la tela colocando el lado que más estira en dirección horizontal, necesitamos sacar dos piezas (1 pieza delantera y 1 pieza trasera), Debemos tener en cuenta que el contorno del cuello de la pieza delantera es más bajo que el de la pieza trasera , al igual en la sisa delantera debemos cortar 1cm hacia adentro.
- We start by folding the fabric and placing it on a flat surface, we place the pattern blouse on the fabric and we are going to cut from the fabric placing the side that stretches the most in horizontal direction, we need to take out two pieces (1 front piece and 1 back piece), We must take into account that the contour of the neck of the front piece is lower than the back piece, the same in the front armhole we must cut 1cm inwards.

- Cortamos las mangas también, coloqué la blusa patrón sobre la tela para marcar la sisa de la manga y luego medí desde mi hombro hasta la muñeca para determinar el largo de la manga y lo marqué en la tela para luego cortarlo.
- We cut the sleeves as well, I placed the pattern blouse on the fabric to mark the sleeve armhole and then measured from my shoulder to my wrist to determine the sleeve length and marked it on the fabric and then cut it out.
Paso 2 || Step 2

- Después de tener la dos piezas cortadas (Delantera y trasera), enfrentamos los derechos de las piezas. Y sujetamos con alfileres las hombros de la blusa, como te muestro en la imagen. Pasamos costura recta y luego zigzag para rematar la costura en los hombros.
- After having the two pieces cut (front and back), we face the right sides of the pieces. And pin the shoulders of the blouse, as shown in the picture. We pass straight seam and then zigzag to finish the seam on the shoulders.
Paso 3 || Step 3
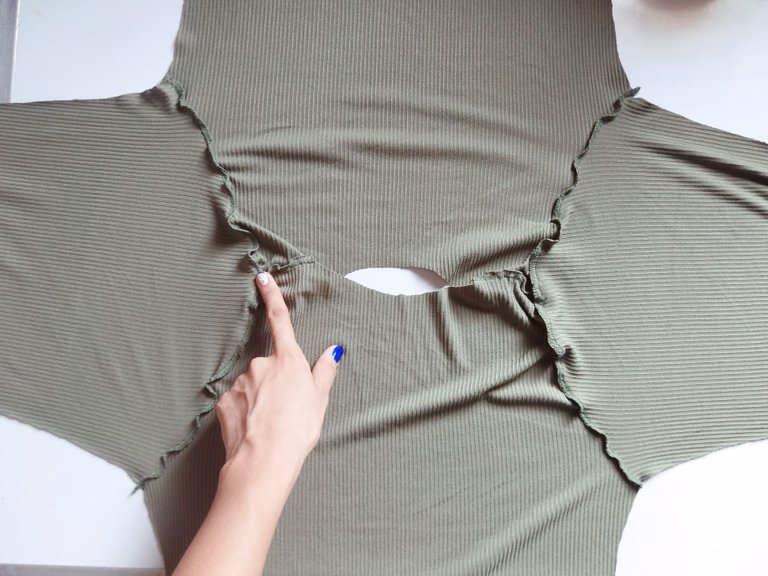
- Teniendo los hombros de la blusa ya cosidos vamos a sujetar las manga a la sisa, me ayude con alfileres y luego fuí a la máquina y pasé costura recta y zigzag para un mejor acabado en los bordes (👀 OJO!!! Muy pendiente de la dirección de la tela, el derecho y el revés).
- Having the shoulders of the blouse already sewn we are going to attach the sleeves to the armhole, I helped myself with pins and then went to the machine and passed straight stitching and zigzag for a better finish on the edges (👀 EYE!!! Very attentive to the direction of the fabric, the right and the back).
Paso 4 || Step 4
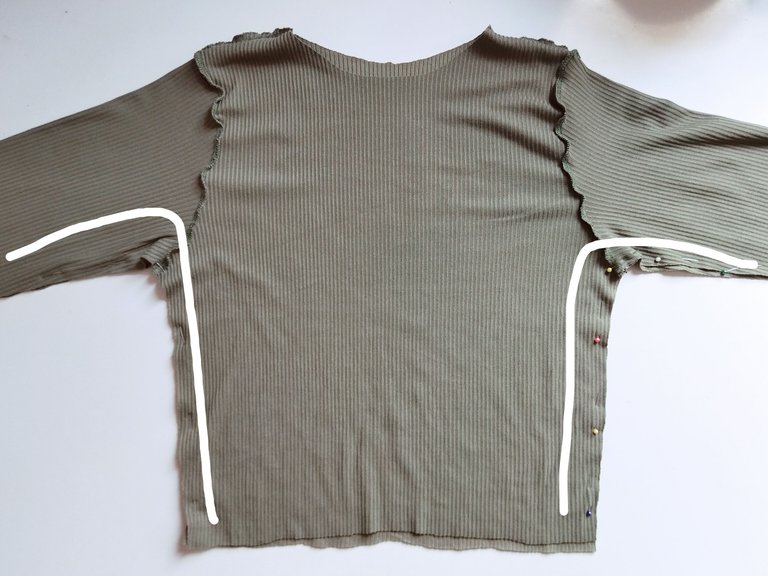
Toca enfrentar los derechos de la blusa ya con las mangas cosidas y vamos a pasar costura desde el borde de las mangas hasta los costados cerrando los dos lados, acostumbró a pasar costura recta y zigzag.
Luego volteamos la blusa y pasamos costura de overlock en los bordes de las mangas y el ruedo del top, si no tenemos overlock como en mi caso podemos colocar la costura en zigzag con el largo de puntada en 1,5 y pasamos estirando la orilla de la tela lo más que podemos para que nos quedé un lindo faralao.
- Now it's time to face the rights of the blouse with the sleeves already sewn and we will sew from the edge of the sleeves to the sides closing both sides, I used to sew straight and zigzag seams.
- Then we turn the blouse over and overlock the edges of the sleeves and the hem of the top, if we don't have overlock as in my case we can place the seam in zigzag with the stitch length in 1.5 and we pass stretching the edge of the fabric as much as we can so that we have a nice faralao.
Paso 5 || Step 5
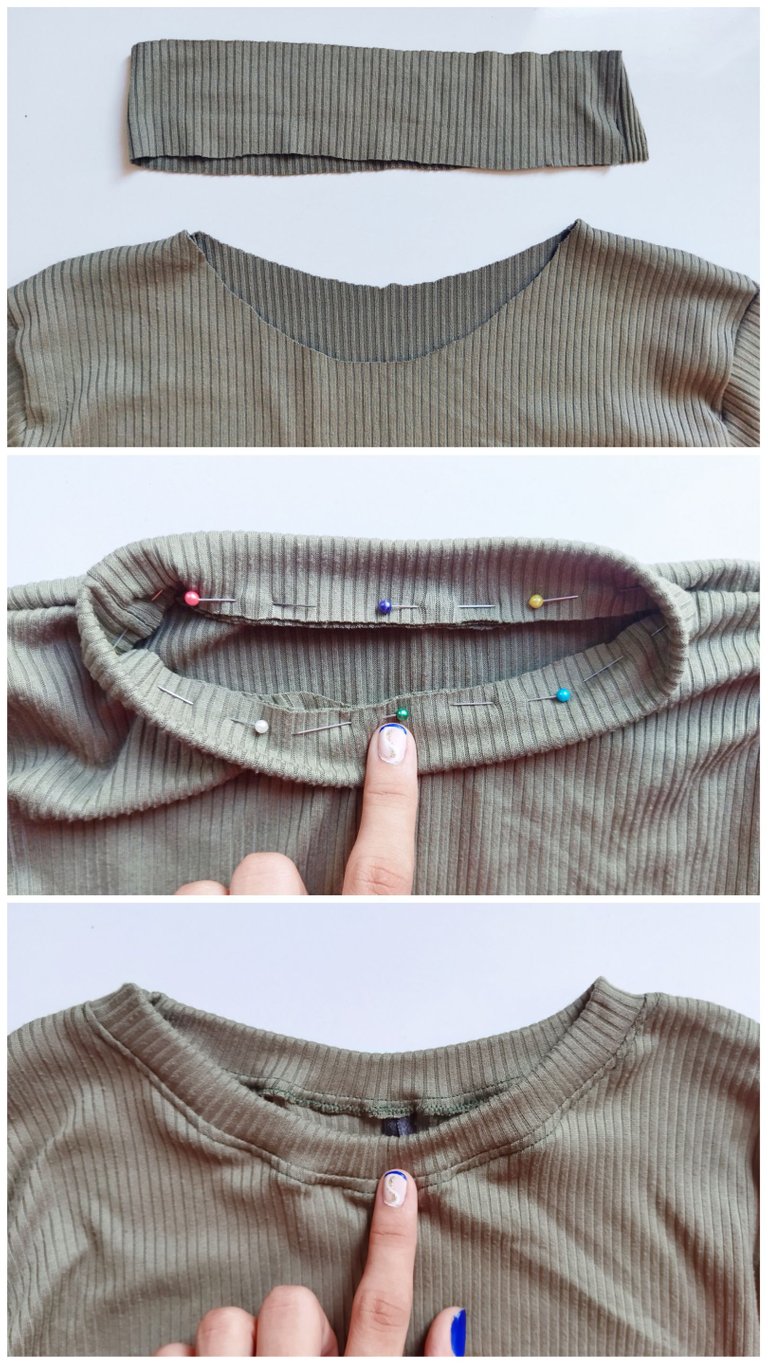
- Cortamos una tira de 5 cm de ancho para coser el vivo del cuello, doblé la tira a la mitad y la sujeté con alfileres al contorno del cuello enfrentando derechos y luego cosí a máquina, procedí a coser en la parte externa con línea recta. y ya tendríamos el vivo del cuello listo.
- We cut a 5 cm wide strip to sew the neckline, I folded the strip in half and pinned it to the contour of the neckline facing right sides together and then sewed by machine, I proceeded to sew on the outside with a straight line and we would have the neckline ready.
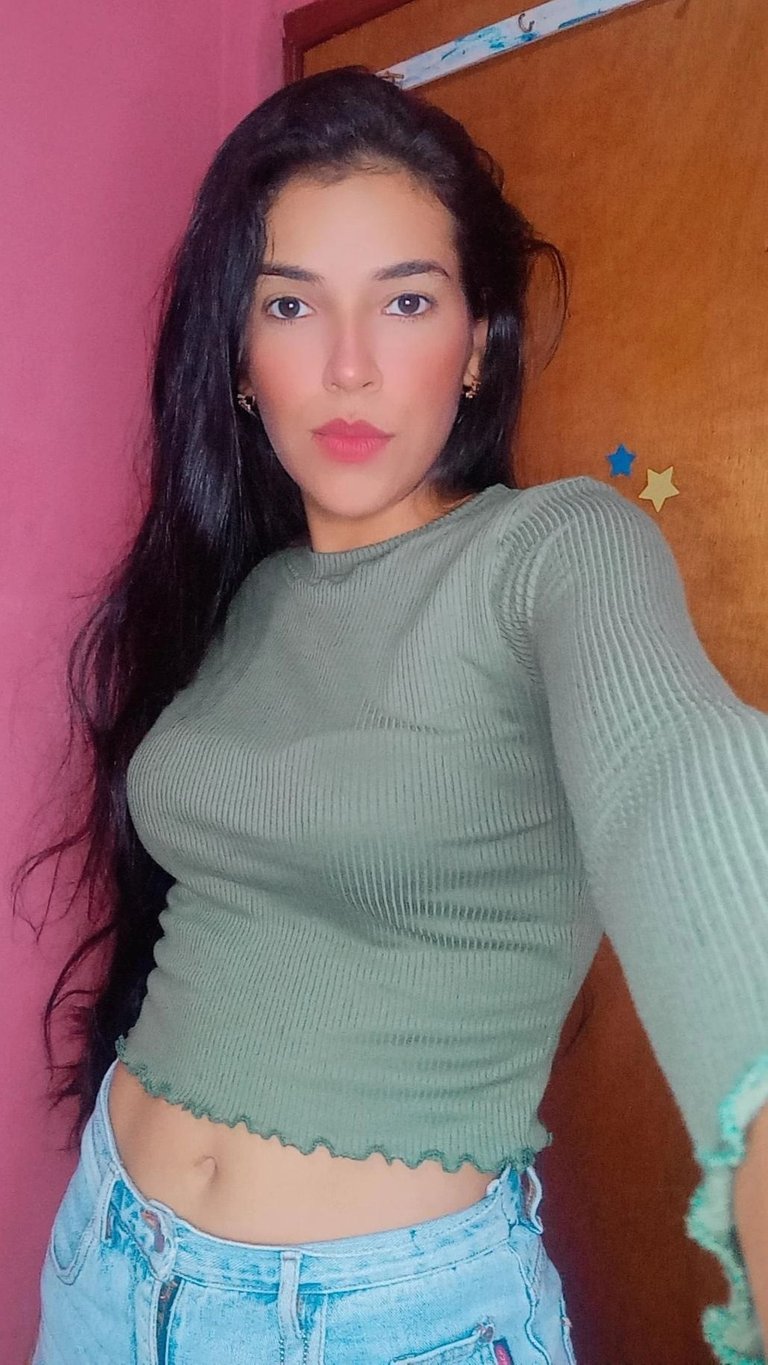
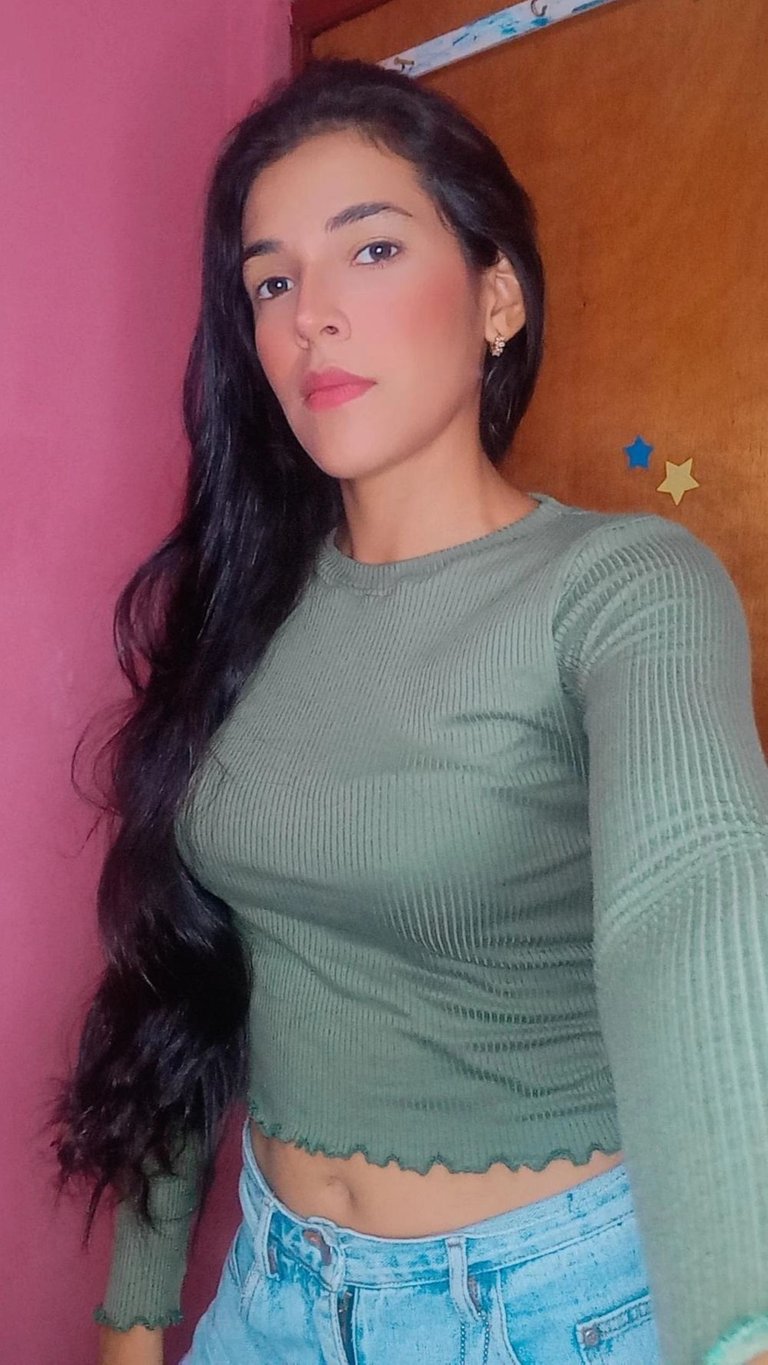
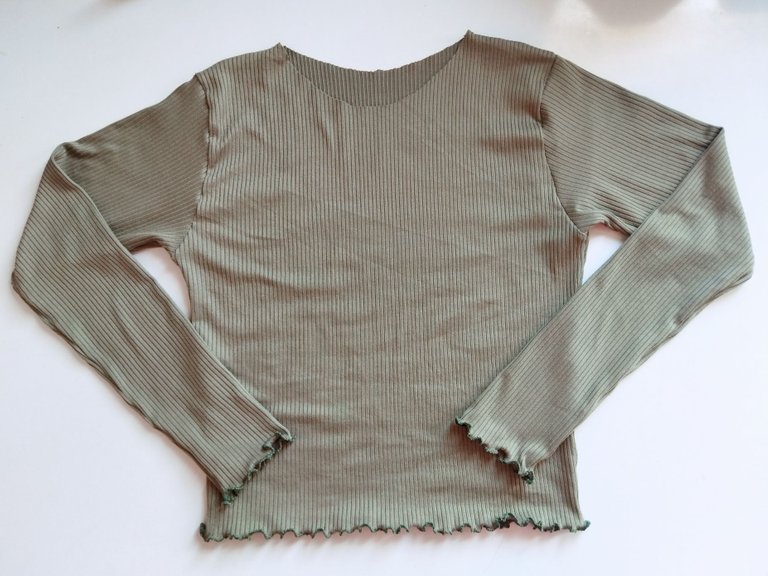
Resultado final.
Final result.
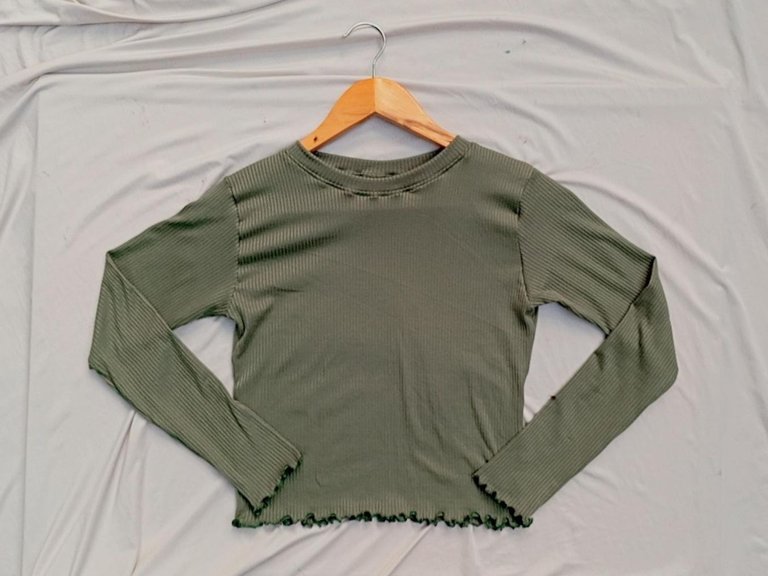
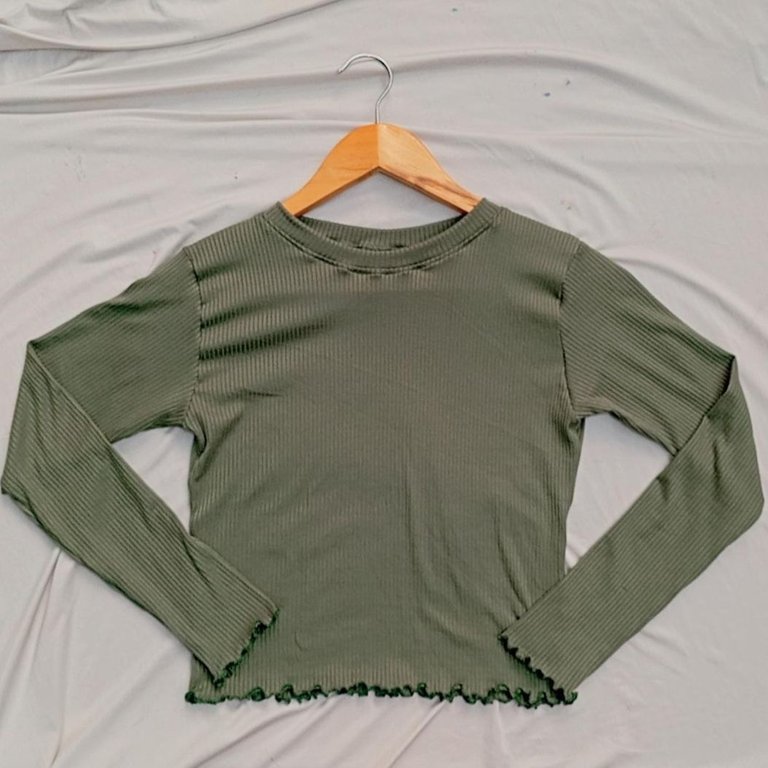
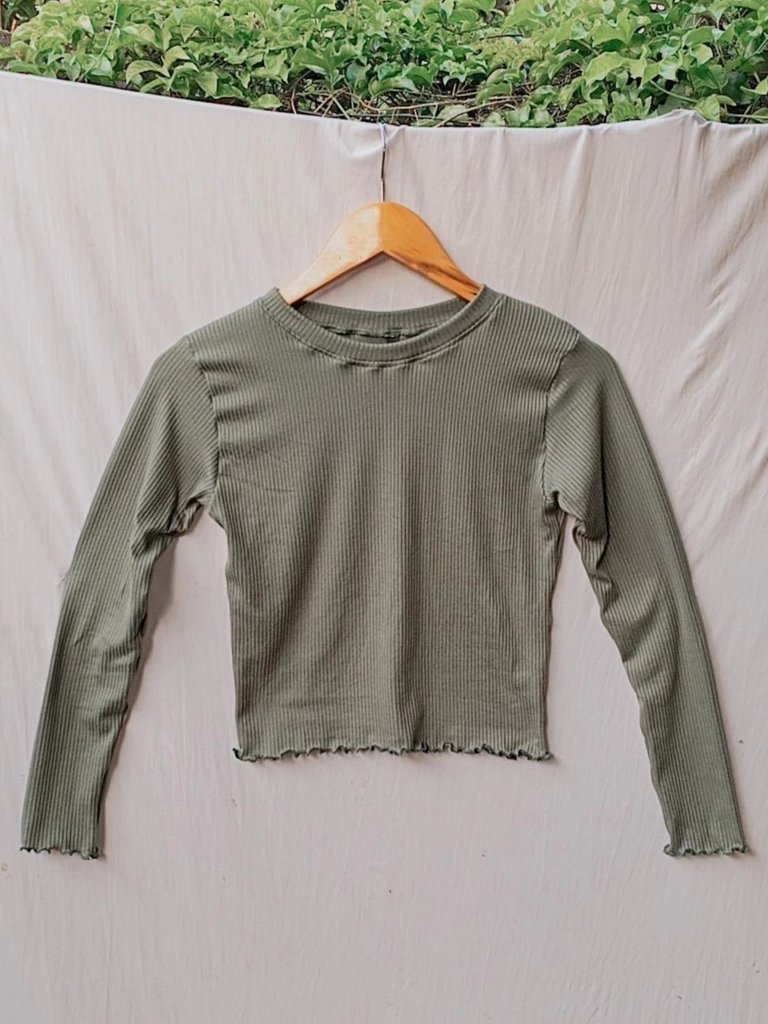

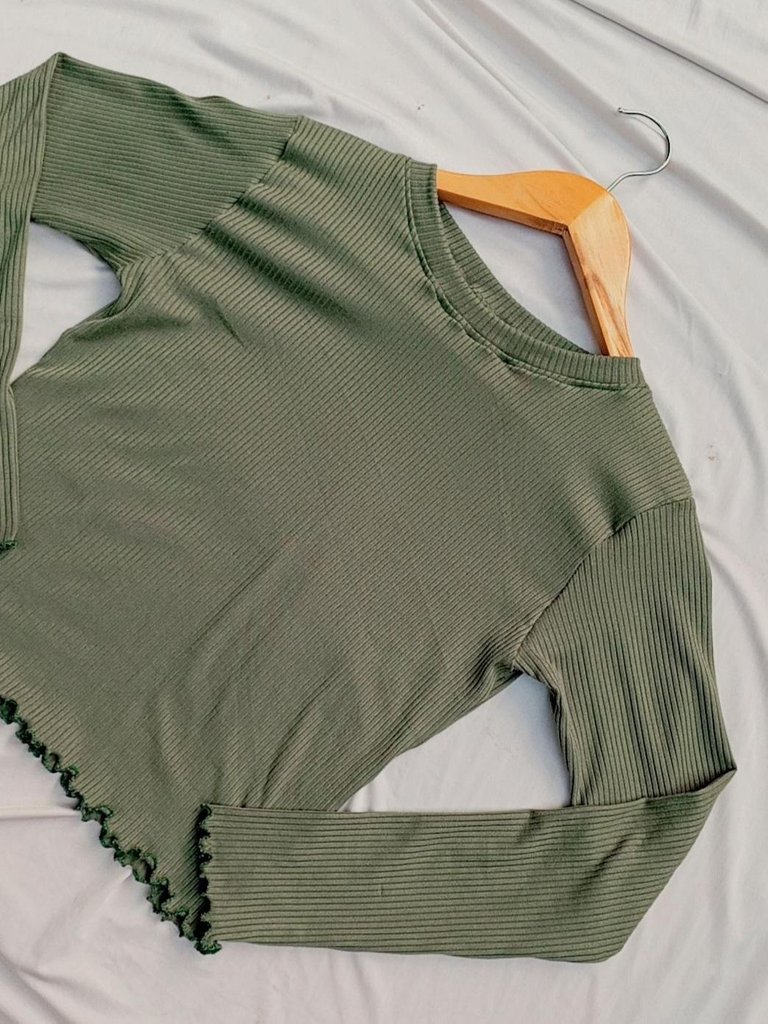
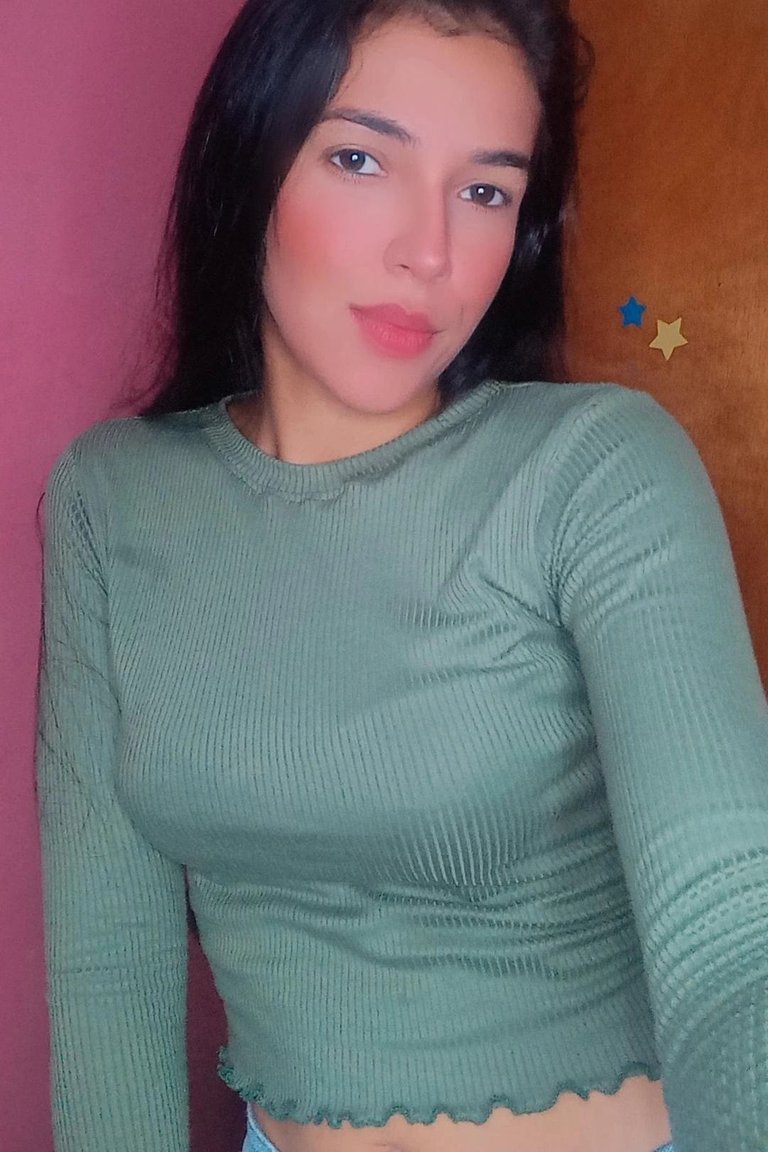
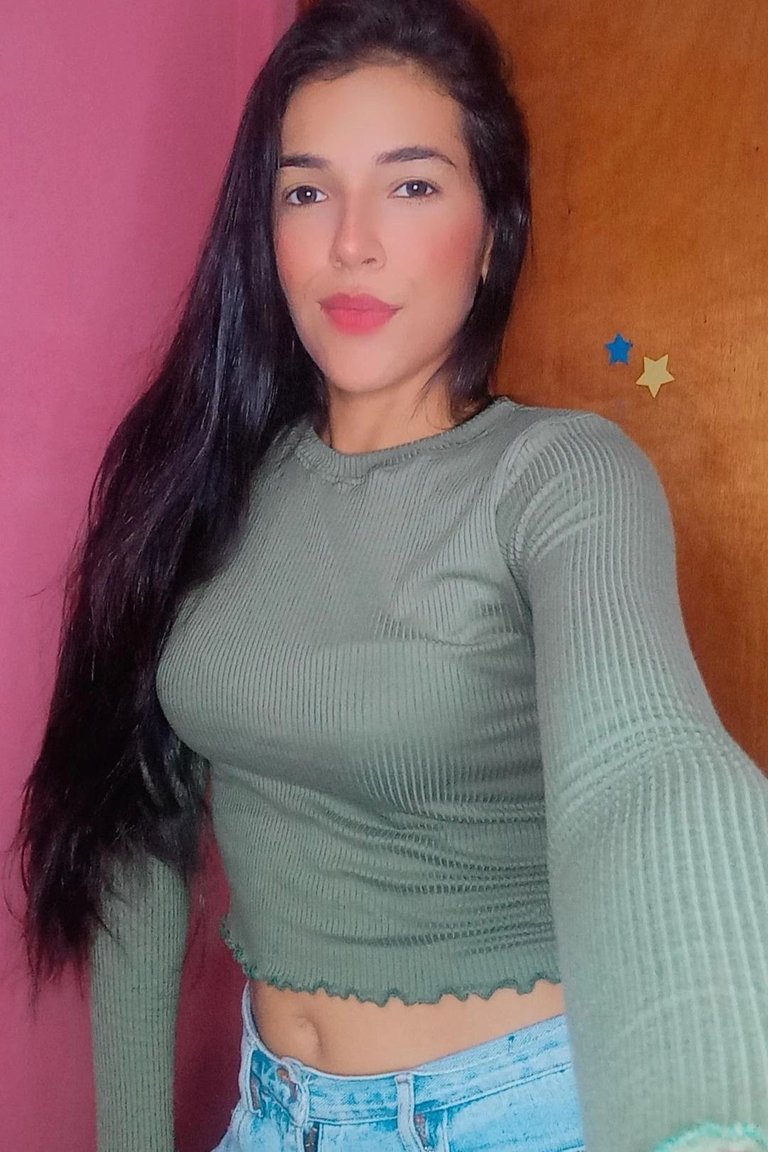
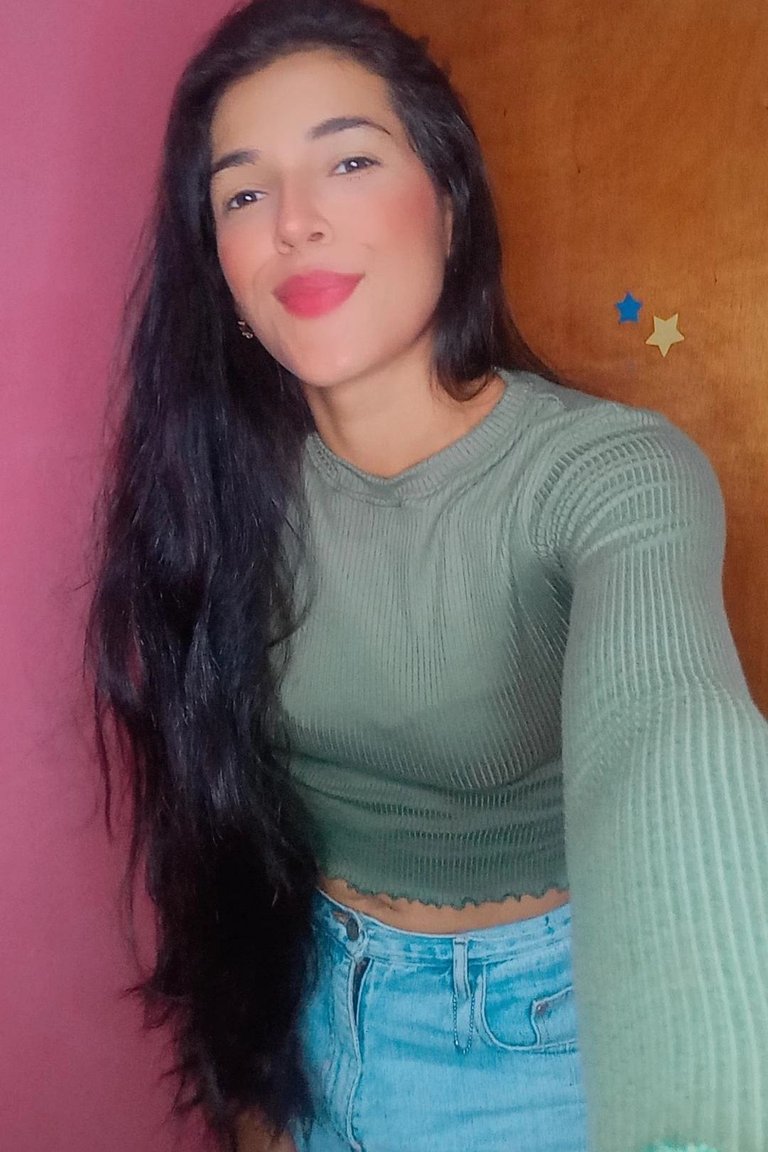
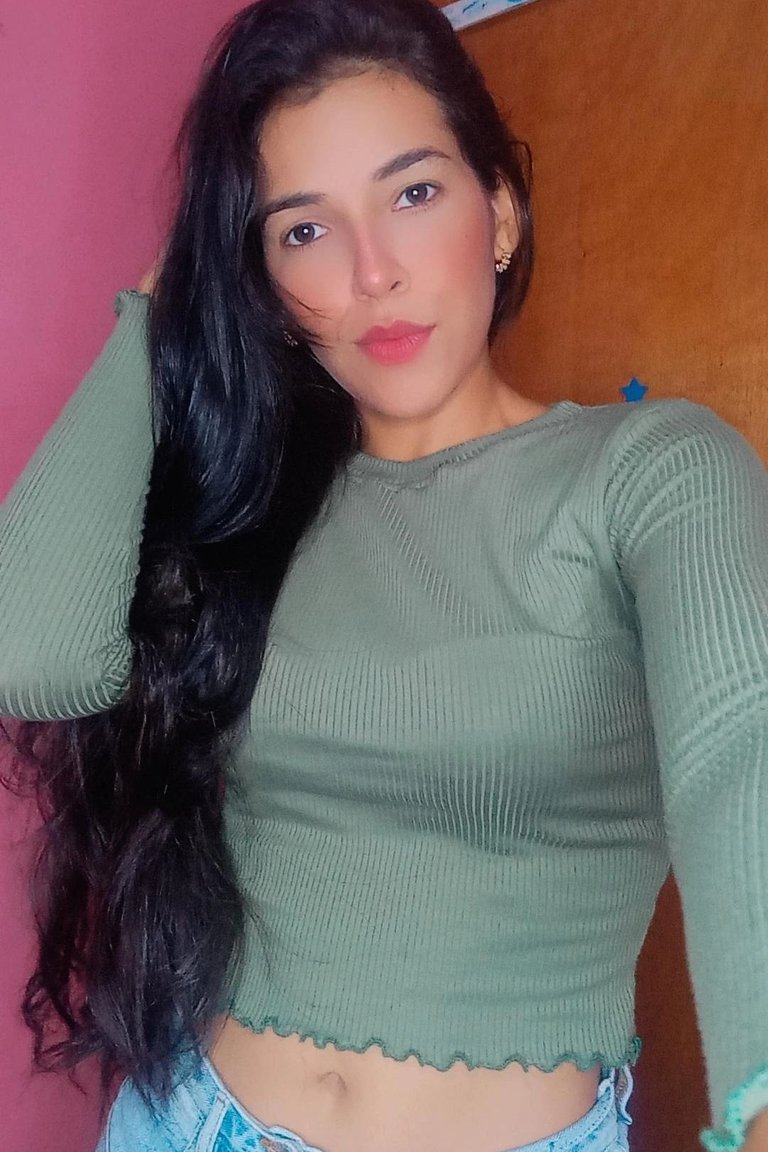
Amigos así quedó el resultado final de esta bella blusa manga larga, sin duda me encantó, quiero una en color vinotinto y negra 🤪 espero que les hay gustado tanto como a mí y si llegaste hasta aquí mil gracias por leer mi post ❤️🥰 un fuerte abrazo.
Friends this is the final result of this beautiful long sleeve blouse, no doubt I loved it, I want one in vinotint and black 🤪 I hope you liked it as much as I did and if you got this far thank you for reading my post ❤️🥰 a big hug.
Recuerda que todos los lunes puedes compartir tu amor y pasión por las artes de la aguja utilizando la etiqueta #NeedleWorkMonday
Remember that every Monday you can share your love and passion for needle arts using the hashtag #NeedleWorkMonday
All images are my property / Todas las imágenes son de mi propiedad
Camera: Xiaomi Redmi 9T.
Translation: Deepl.com
Beautiful thanks for sharing @yulilemus02
This is so beautiful and it looks lovely on you, thanks for sharing @yulilemus02
Thanks so much ❤️
Me ha encantado tu proyecto y te agradezco por este nuevo tips de costura, Dios te bendiga
¡Enhorabuena!
✅ Has hecho un trabajo de calidad, por lo cual tu publicación ha sido valorada y ha recibido el apoyo de parte de CHESS BROTHERS ♔ 💪
♟ Te invitamos a usar nuestra etiqueta #chessbrothers y a que aprendas más sobre nosotros.
♟♟ También puedes contactarnos en nuestro servidor de Discord y promocionar allí tus publicaciones.
♟♟♟ Considera unirte a nuestro trail de curación para que trabajemos en equipo y recibas recompensas automáticamente.
♞♟ Echa un vistazo a nuestra cuenta @chessbrotherspro para que te informes sobre el proceso de curación llevado a diario por nuestro equipo.
Cordialmente
El equipo de CHESS BROTHERS
Excelente resultado amiga, como de tienda 😊