Realizando una pulsera para mi mamá.//Making a bracelet for my mom.(Esp-Eng)
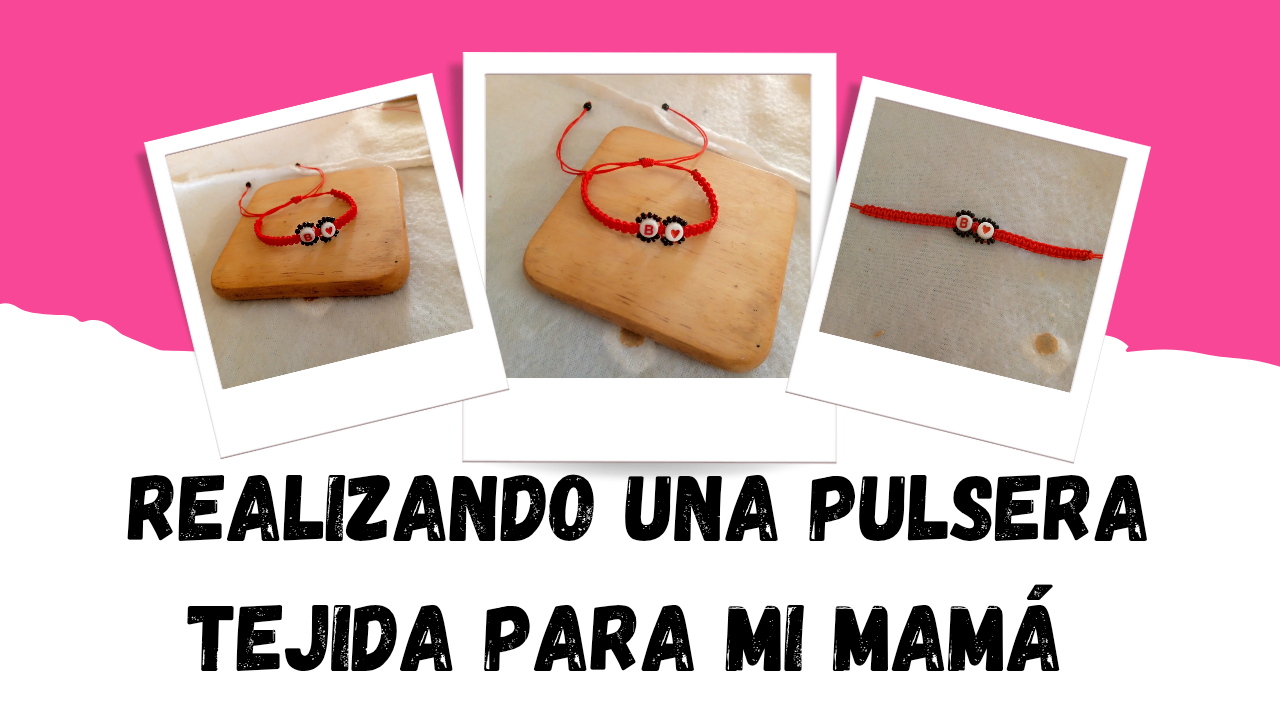
Hello to all of you friends of diyhub, it's been a while since I last stopped by here to show you a craft, but hey, I hope that today you feel encouraged to join me in making a woven bracelet or flat knot bracelet. I'm going to make this bracelet for my mom since she wanted a new bracelet in red, so I got to work, and thinking of something different to make that isn't always the same, then I remembered that there is a design with beads with initials and I just bought some of those and it had the initial of my mom's name and I'm also going to add a bead with a heart, by the way, they are also red, and so that it isn't so red I will use black beads to make it look like flower petals, so I hope you like it.
I always like to use the flat knot because it's essential in macramé due to its versatility and durability. It's used to create repetitive patterns that form the basis of many macramé designs. It's ideal for beginners, as learning to tie the flat knot is the first step in this wonderful journey of macramé art. With this knot, you can create everything from simple projects to more elaborate and complex pieces, depending on your creativity and skill.
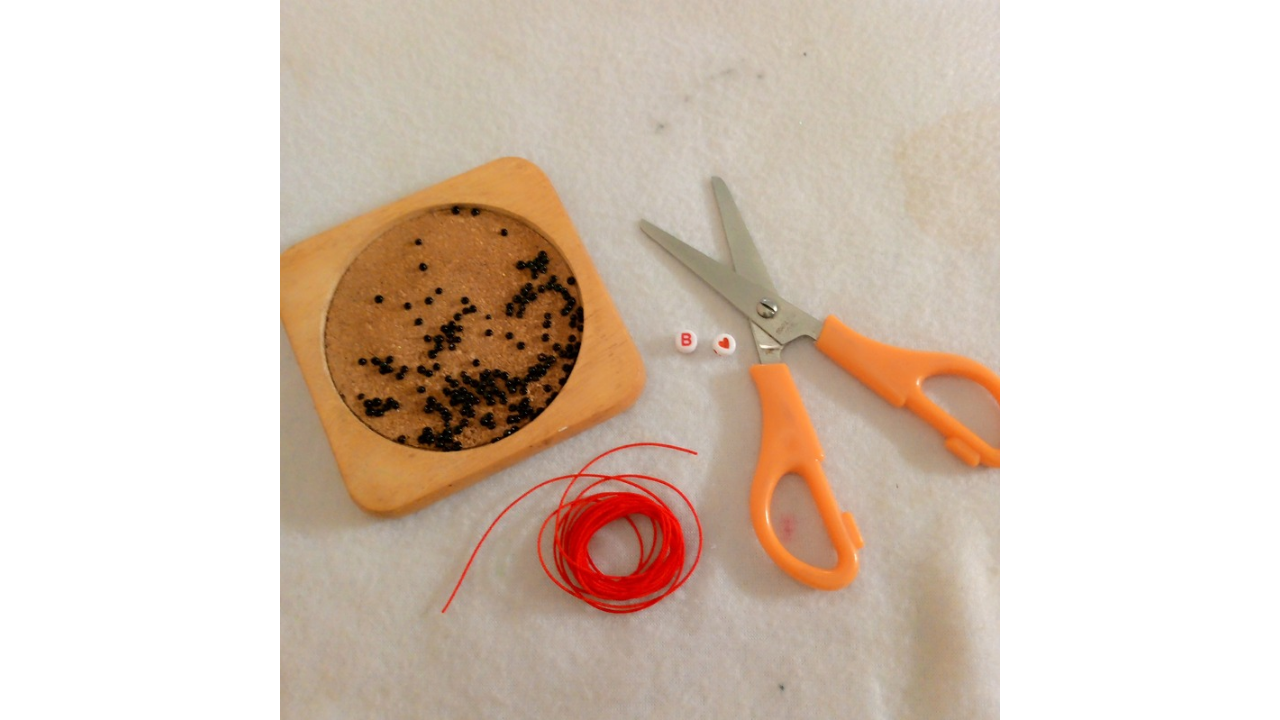
(Materiales:)||(Materials:)
- Dos metros de hilo chino color rojo
- Tijeras
- Mostacillas de color negro
- Una cuenta con inicial y corazón
- Una vela encendida para ayudar a sellar las puntas del hilo
- Two meters of red Chinese thread
- Scissors
- Black seed beads
- One initial and heart bead
- A lit candle to help seal the ends of the thread
(Procedimiento:)||(Procedure:)
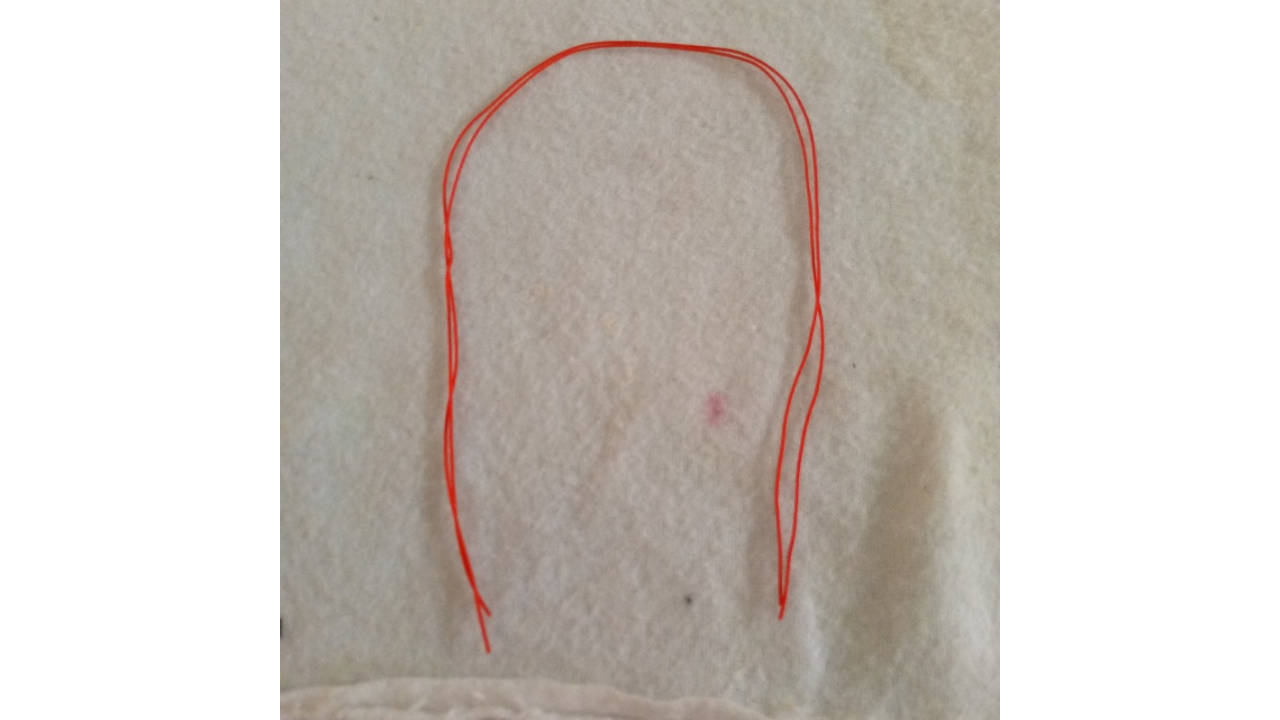
Paso nro 1
Paso nro 1
First I'm going to start by taking the measurement of the wrist to know how much thread I'm going to use to make the bracelet and even though I have two meters of thread, it's never enough and then the times I make woven bracelets I don't have enough thread so it's better to measure and see how much thread is enough for the weaving, then I take the measurement of the wrist and that measurement will serve as the base of the bracelet, and with the rest of the thread I do the weaving.
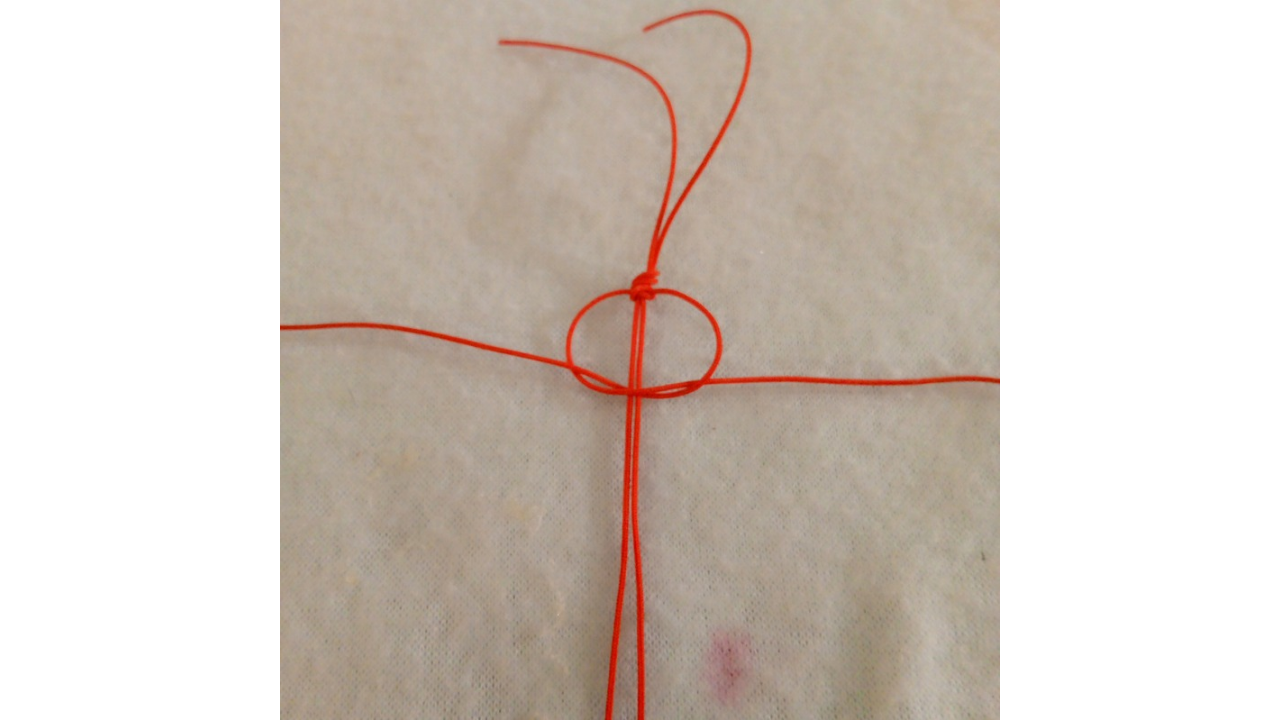
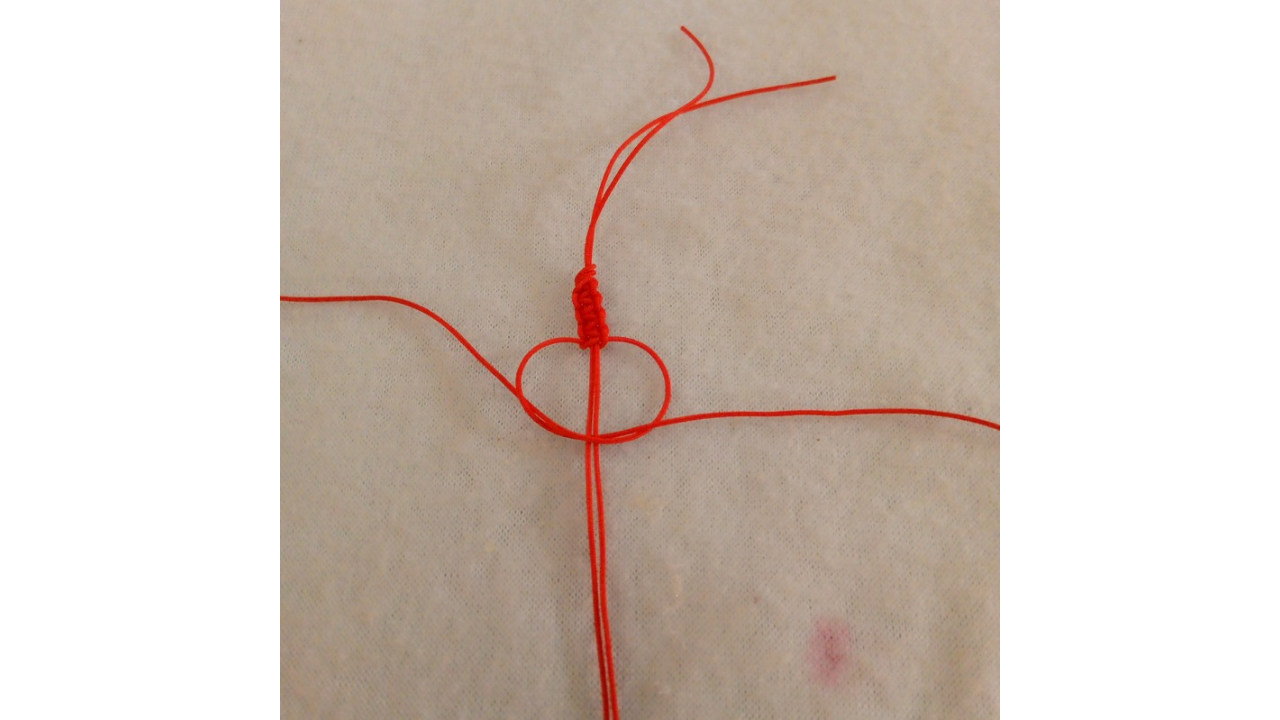
Paso nro 2
Paso nro 2
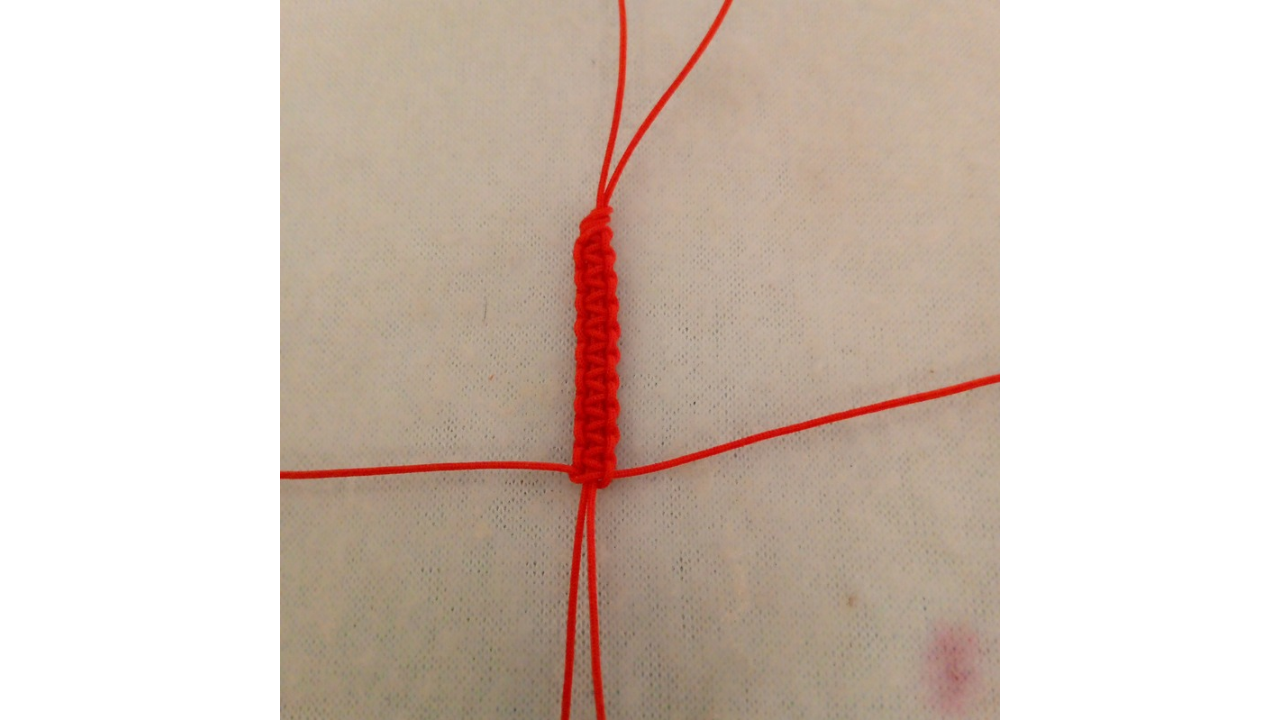
Now I'm going to start weaving. First I'm going to take the left string and cross it behind the guide strings and bring it forward, inserting it through the loop of the right string. Adjust it to the height where you want the finished knot to be. Take the right string and cross it behind the guide strings and bring it forward, inserting it through the loop of the left string. Tighten the flat knot, taking into account that both strings (right and left) must be pulled at the same time and applying the same force, so that the knot is straight and does not tend to deform. Now, repeat the procedure, starting with the left string. Take the string on the left side and cross it over the guide strings and then under the rightmost string.
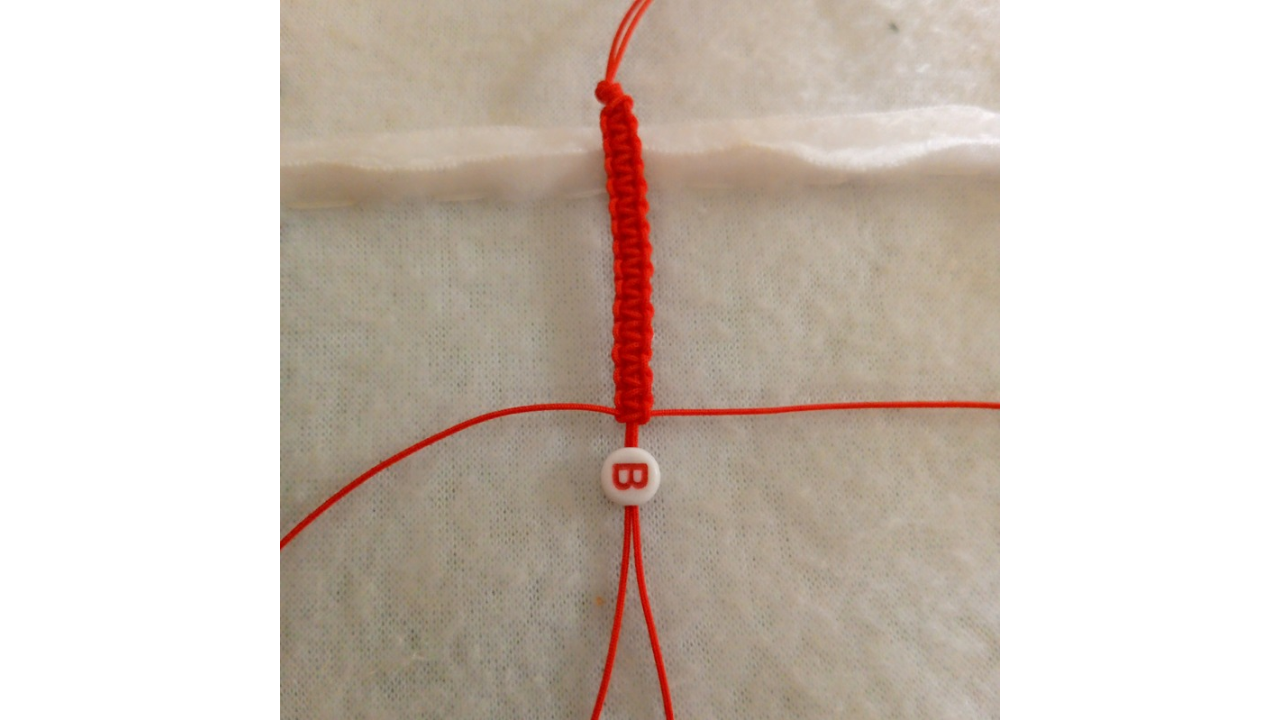
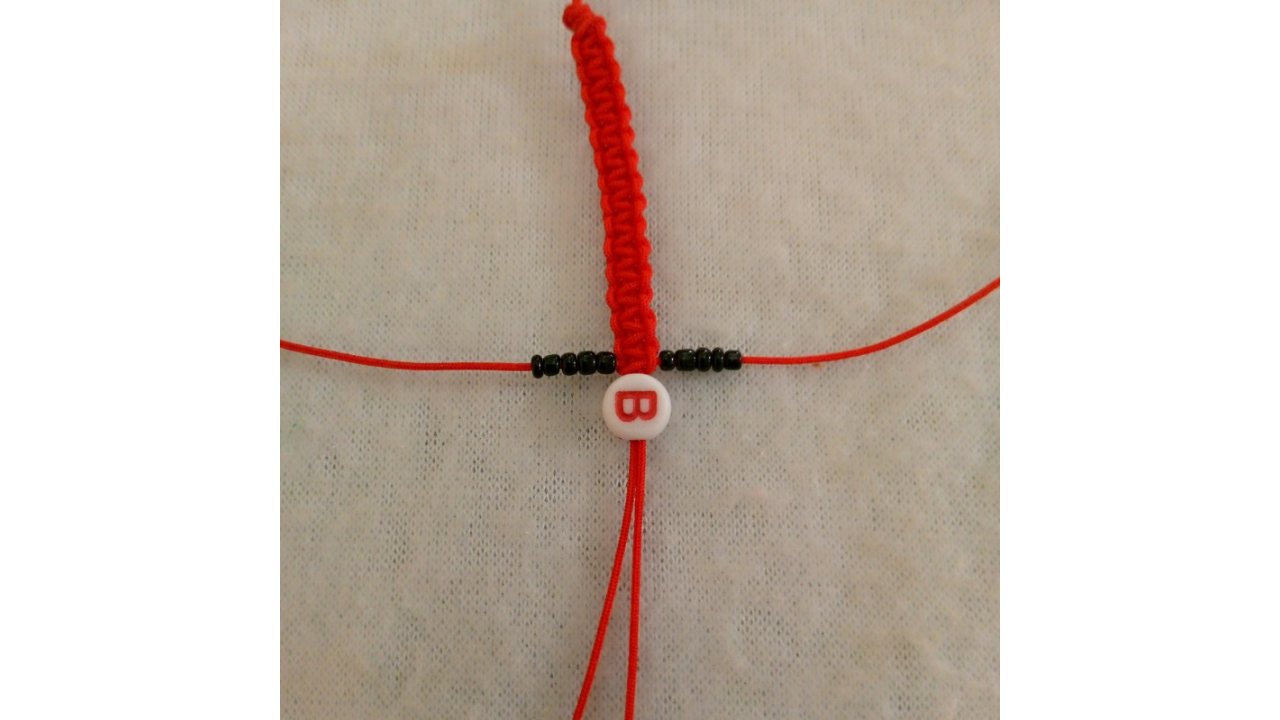

Paso nro 3
Paso nro 3
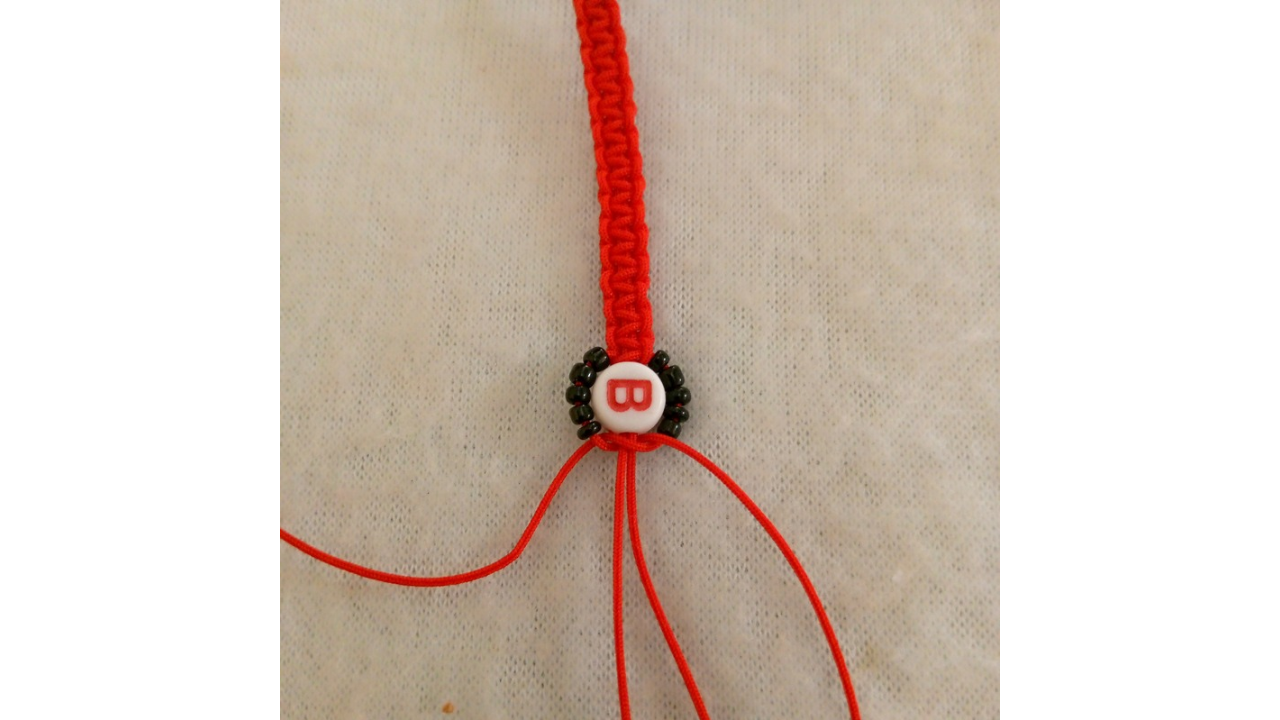
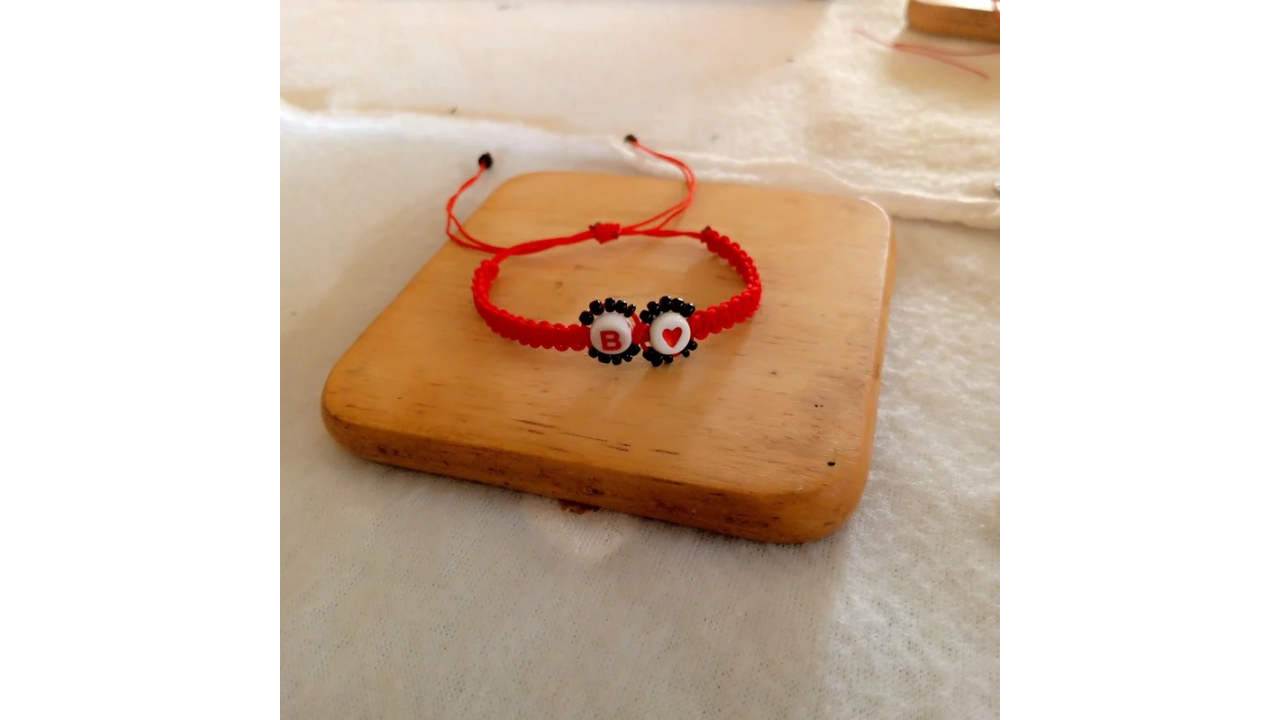
Now when I see that the weaving is halfway through the bracelet it is time to place the bead with the initial first, the bead will go on the base thread so that it is in the middle, and on the side threads I will place five beads on each side and then I continue with the weaving but I only made two turns, and then I place the bead with the heart and I do the same procedure as at the beginning, I place five beads on each side and seal again weaving, you can now see that it has the shape of a flower.

Paso nro 4
Paso nro 4
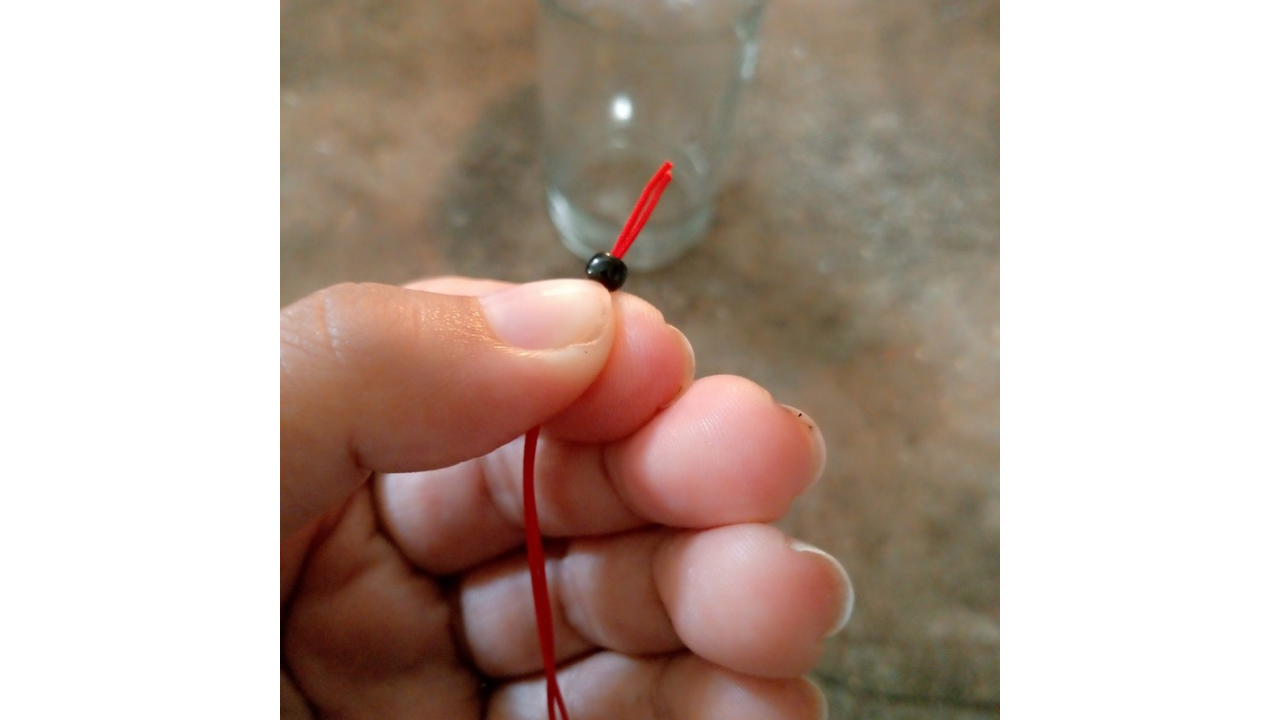
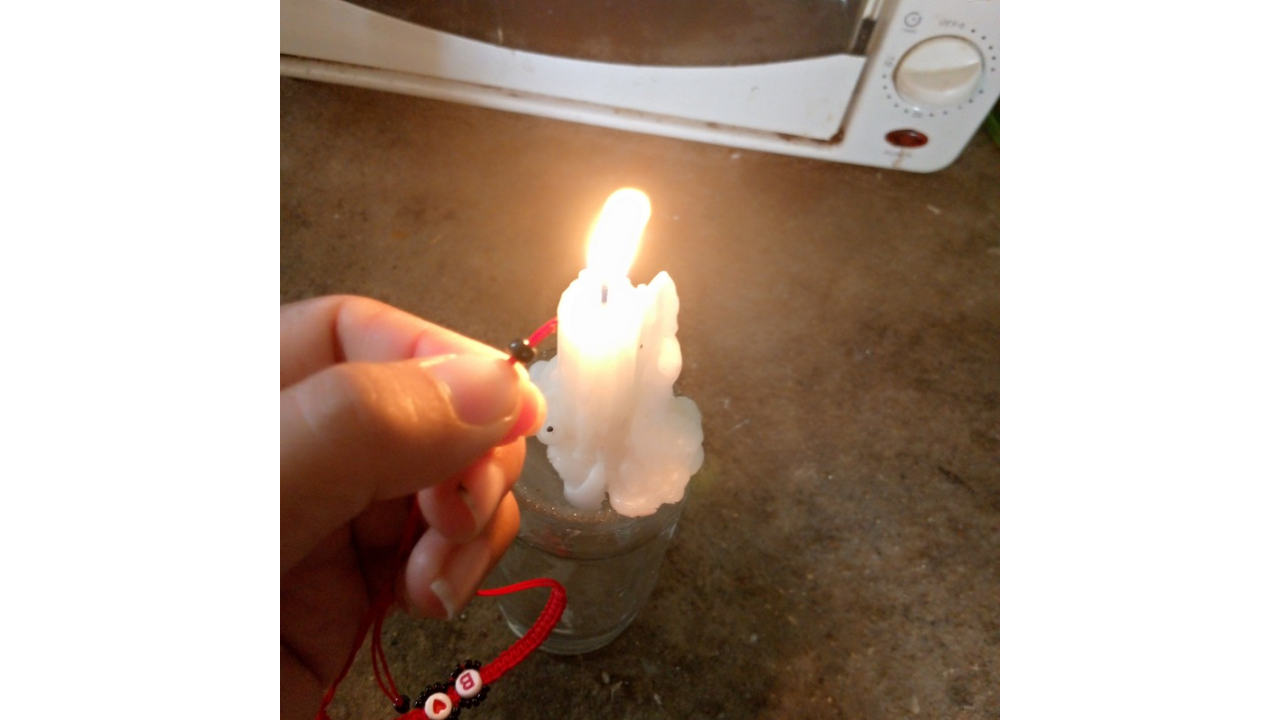
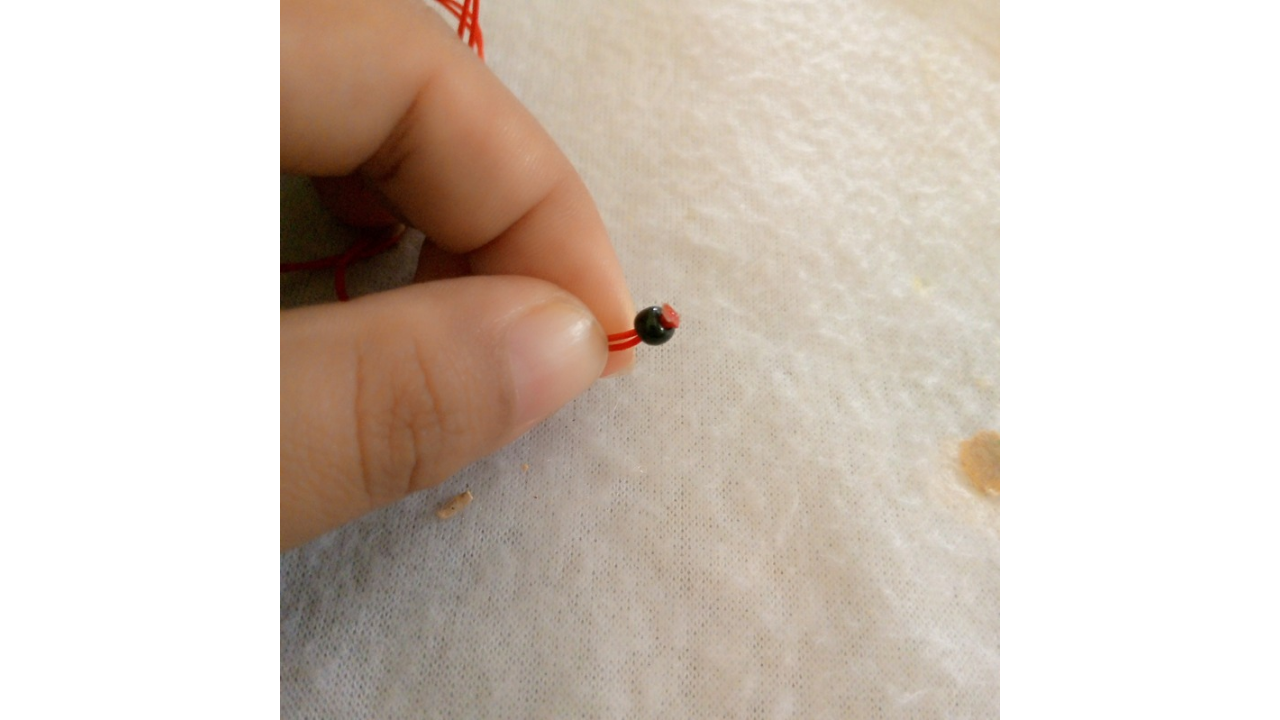
After a while I had the bracelet completely woven and I see that this time the finish was better, now to finish I am going to place a black bead on the tip of each side of the thread and with the help of a candle I melted the tip of the thread and sealed it, and so in this way I am finished.
(Resultado final:)||(Bottom line:)
I hope you found this tutorial entertaining. Every time I make a bracelet, I always want to change things. After I make it, I think, "I should have done this or that," but I'll show you that on other occasions. Thanks, I'll see you again another time.

Las fotos de este blog son de mi propiedad|Las imágenes son editadas en canva|Fotografías tomadas en mi celular infinix Smart 7|El contenido está traducido en el traductor de Firefox.
Congratulations @stefany0720! You have completed the following achievement on the Hive blockchain And have been rewarded with New badge(s)
Your next target is to reach 300 upvotes.
You can view your badges on your board and compare yourself to others in the Ranking
If you no longer want to receive notifications, reply to this comment with the word
STOPCheck out our last posts:
You made such a beautiful bracelet for your mum and your and your flat knot looks really good too. Well done and thanks for sharing.
selected by @ibbtammy
Thanks, I'm glad you liked it 😊
¡Enhorabuena!
✅ Has hecho un buen trabajo, por lo cual tu publicación ha sido valorada y ha recibido el apoyo de parte de CHESS BROTHERS ♔ 💪
♟ Te invitamos a usar nuestra etiqueta #chessbrothers y a que aprendas más sobre nosotros.
♟♟ También puedes contactarnos en nuestro servidor de Discord y promocionar allí tus publicaciones.
♟♟♟ Considera unirte a nuestro trail de curación para que trabajemos en equipo y recibas recompensas automáticamente.
♞♟ Echa un vistazo a nuestra cuenta @chessbrotherspro para que te informes sobre el proceso de curación llevado a diario por nuestro equipo.
🏅 Si quieres obtener ganancias con tu delegacion de HP y apoyar a nuestro proyecto, te invitamos a unirte al plan Master Investor. Aquí puedes aprender cómo hacerlo.
Cordialmente
El equipo de CHESS BROTHERS
The bracelet is beautiful and lovely, am sure she likes it. Keep up the good work friend