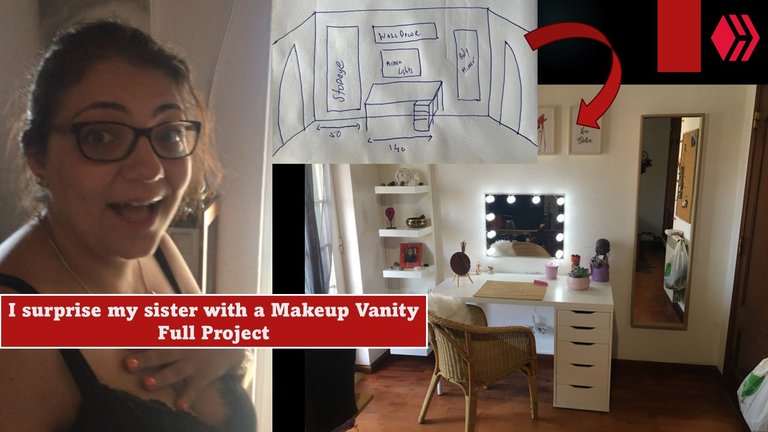
SET UP Tocador // Makeup Vanity - Full Project [Esp/Eng]
Hola Hive!!💄👄
Hello Hive!!💄👄

1º Moodboard✍️🔍📷
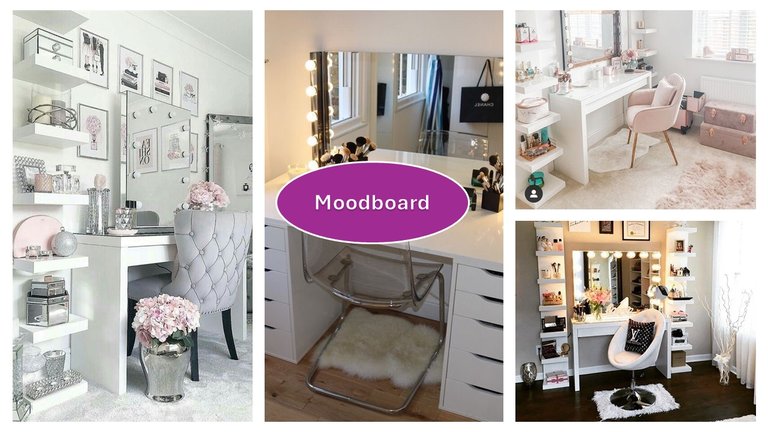
Pictures colected from/Imagenes recopiladas de Pintarest®
En este caso particular, además de recopilar imágenes, también se definieron objetivos:
• Tener una estación de maquillaje;
• Tener un espejo con luces;
• Disposición de las decoraciones que tenía en el lugar;
• Cajones para guardar maquillaje;
•Silla;
• Espejo de cuerpo entero.
Con mis objetivos definidos, hice un boceto en papel de lo que visualizaba. Evidentemente, en esta etapa, un profesional que tenga a su disposición una variedad de software podrá crear un diseño 2D o 3D para presentarlo al cliente. Lo hice a la vieja escuela y dibujé un boceto. El término Croqui se refiere a perspectivas hechas a mano alzada de forma espontánea para visualizar ideas, en particular la disposición de los muebles.
In this particular case, in addition to collecting images, there were also defined objectives:
• Have a makeup station;
• Have a mirror with lights;
• Arrangement for the decorations she had on site;
• Drawers for storing makeup;
• Chair;
• Full-length mirror.
With my goals defined, I made a paper sketch of what I visualized. Obviously at this stage, a professional who has a range of software at their disposal will be able to create a 2D or 3D layout to present to the client. I did it old school and drew a sketch. The term Croqui refers to freehand perspectives made spontaneously to visualize ideas, particularly the layout of furniture.
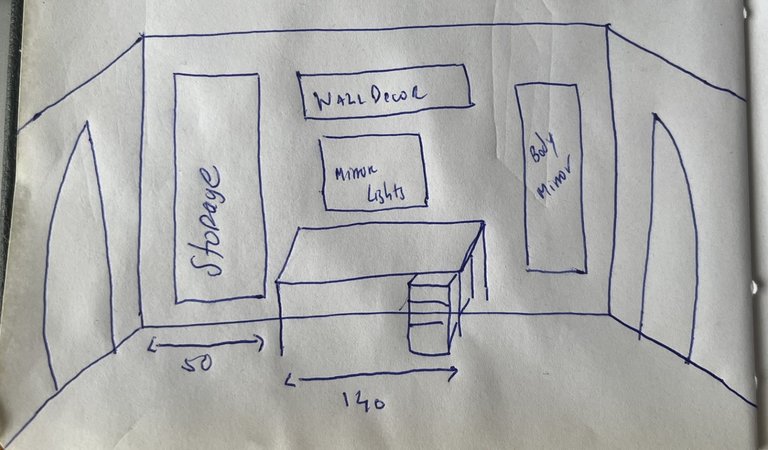
Croqui |que hice para este proyecto/made for this project
2. Definición de Estilo, Paleta de Colores e Iluminación
Tenía algunas ideas ya definidas sobre el estilo que le gustaría a ella, así que opté por una línea más casual chic con colores neutros. Mi objetivo es jugar al blanco con referencias naturales como el yute.
En cuanto a las luces, el área remodelada tiene mucha luz natural por lo que solo me voy a centrar en la iluminación del espejo, no requiriendo iluminación adicional por ahora.
2. Definition of Style, Color Palette and Lighting
I had some ideas already defined about the style she would like so I opted for a more casual chic line with neutral colors. My goal is to play white with natural references like jute.
Regarding Lights, the remodeled area has a lot of natural light so I'm just going to focus on mirror lighting, not requiring additional lighting for now.
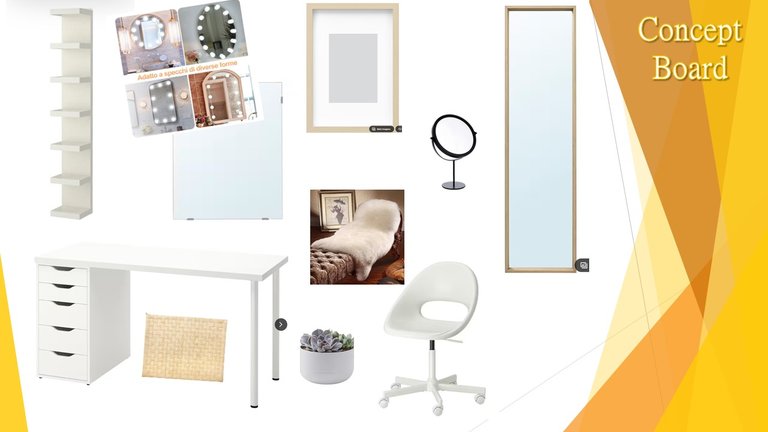
3. Panel de Presentación🔍📷
El siguiente paso fue crear un panel de presentación. En el panel de presentación, a diferencia del mood board, ya no se trata de inspiración sino de ejecución, es decir, tenemos muestras de lo que se incluirá en el proyecto final, por lo que es normal ver ya muebles, muestras de telas, accesorios o luminarias. Esta es la recta final del design antes de la ejecución.
A continuación podéis ver el panel de presentación de este design, yo elegí los muebles así como algunos accesorios y las luces para el espejo.
3. Concept Board🔍📷
The next step was to create a sample dashboard. In the sample panel, unlike the mood board, it is no longer about inspiration but rather about execution, that is, we have samples of what will be included in the final project, so it is normal to already see pieces of furniture, fabric samples, accessories or luminaires. This is the final stretch of design before execution.
Below you can see the sample board for this design, I chose the furniture as well as some accessories and the lights for the mirror.
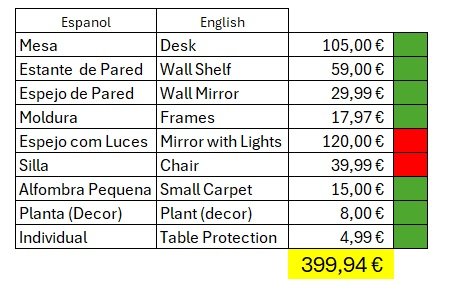
4. Presupuesto🫰💰
Fijamos el presupuesto para el proyecto en $270, por esta cantidad era consciente de que tendría que ser creativo en la ejecución ya que los muebles son caros y fácilmente no cumplirían con mi visión (o el presupuesto…).
Después de hacer mi panel de muestra, fui a hacer una investigación de mercado y llegué a esta conclusión:
4. Budget🫰💰
We set the budget for the project at $270, for this amount I was aware that I would have to be creative in the execution as the furniture is expensive and would easily not fulfill my vision (or the budget…).
After having my sample panel made, I went to do some market research and came to this conclusion:
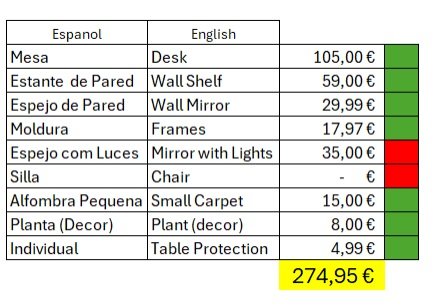
4.1 Ajuste Presupuestario💰
Para ajustar el presupuesto y respetar el valor que habíamos definido, tomé dos decisiones. En lugar de comprar el espejo con luces integradas, voy a comprar un espejo y luces y haré el trabajo de pegado. El otro ahorro será en la silla, no compraré una nueva y usaré una que ya había en casa. Entonces el presupuesto final será:
4.1 Budget Adjustment💰
To adjust the budget and respect the value we had defined, I made two decisions. Instead of buying the mirror with integrated lights, I'm going to buy a mirror and lights and do the gluing work. The other saving will be on the chair, I won't buy a new one and will use one that was already in the house. Therefore, the final budget will be:
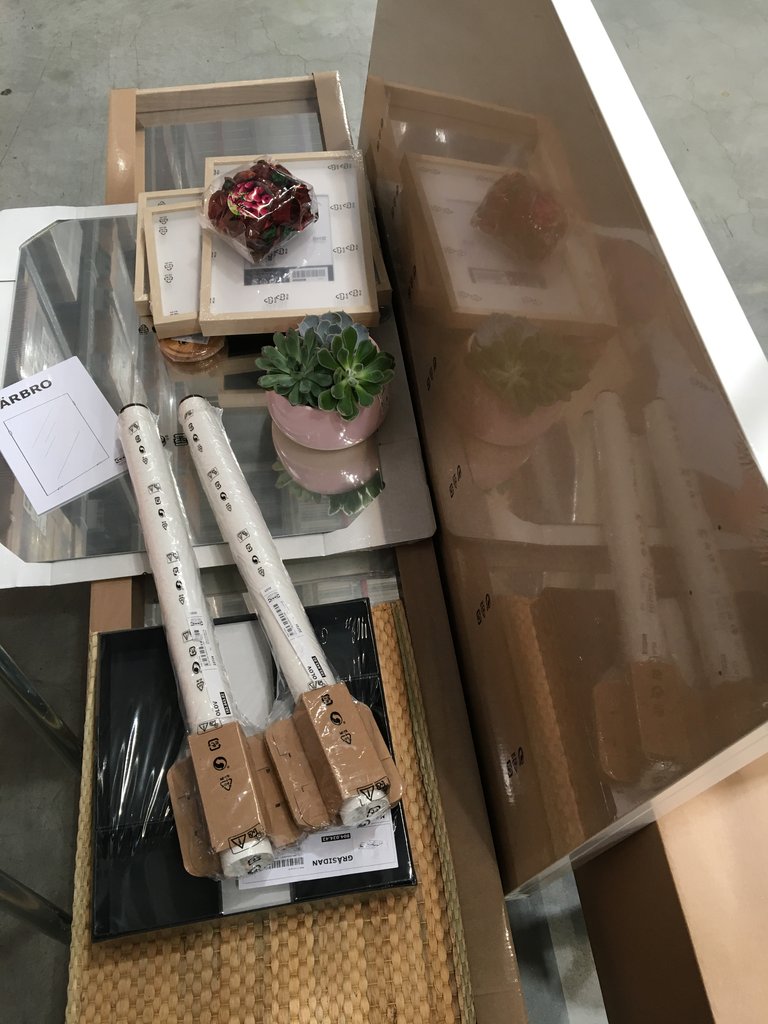
5. Compras🛒
Luego de definir el presupuesto y la lista de compras, fui a la mueblería a buscar todos los elementos que necesitaba para este diseño. Mientras tanto, ya había pedido online la alfombra y las lámparas para el espejo. La llegada era inminente.
5. Shopping 🛒
After defining the budget and shopping list, I went to the furniture store to get all the items I needed for this design. Meanwhile, I had already ordered the rug online as well as the lights for the mirror. The arrival was imminent.
 )
)
6. Ejecución 👷♀️
Para la ejecución comencé montando las luces en el espejo. El trabajo de bricolaje no fue muy complejo, solo necesitaba pegar las luces en un espacio simétrico.
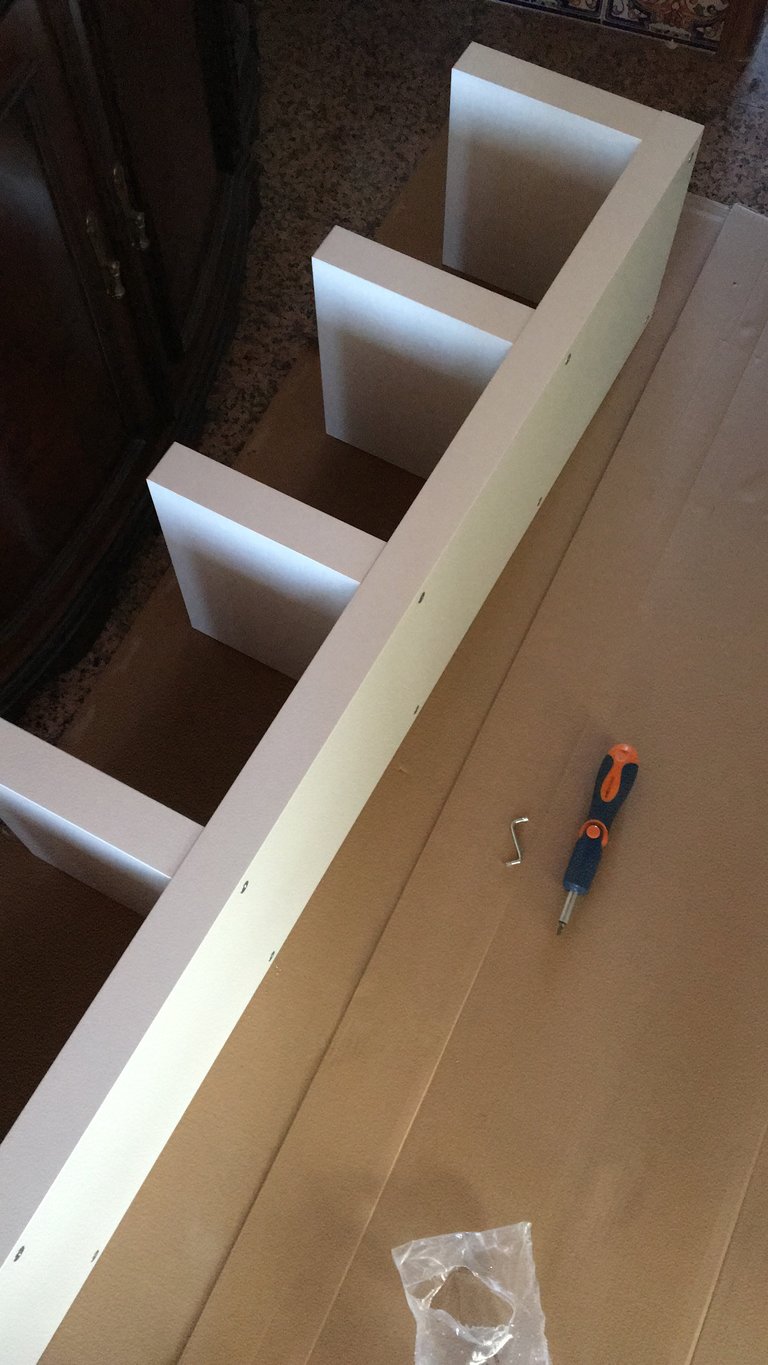
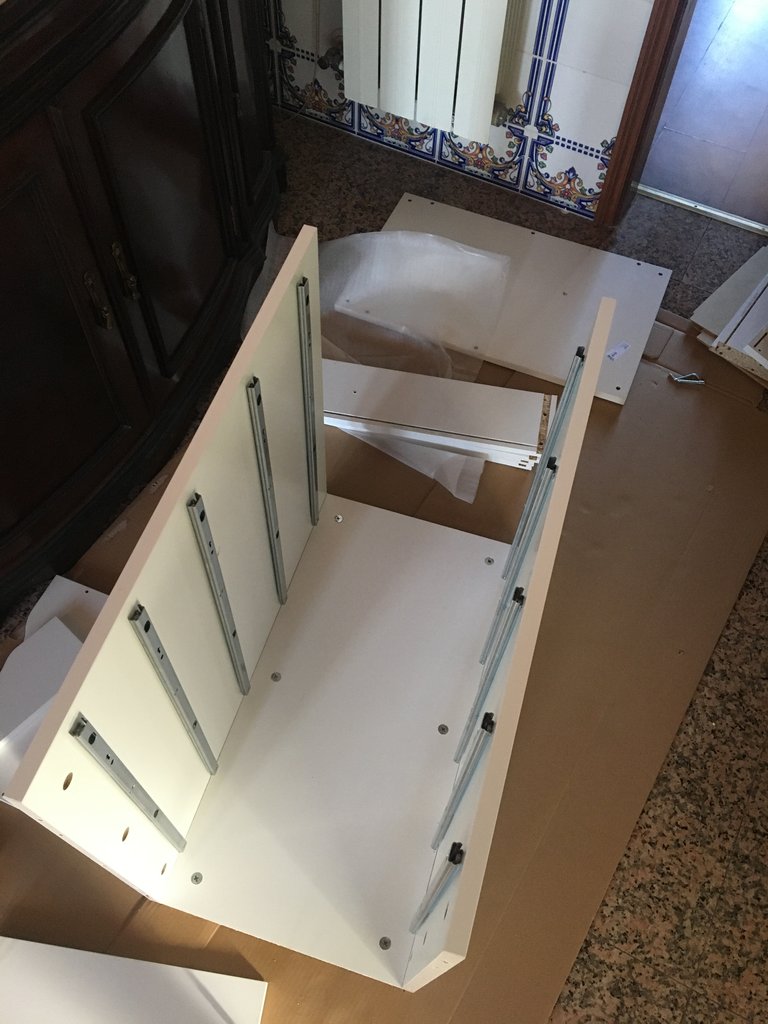
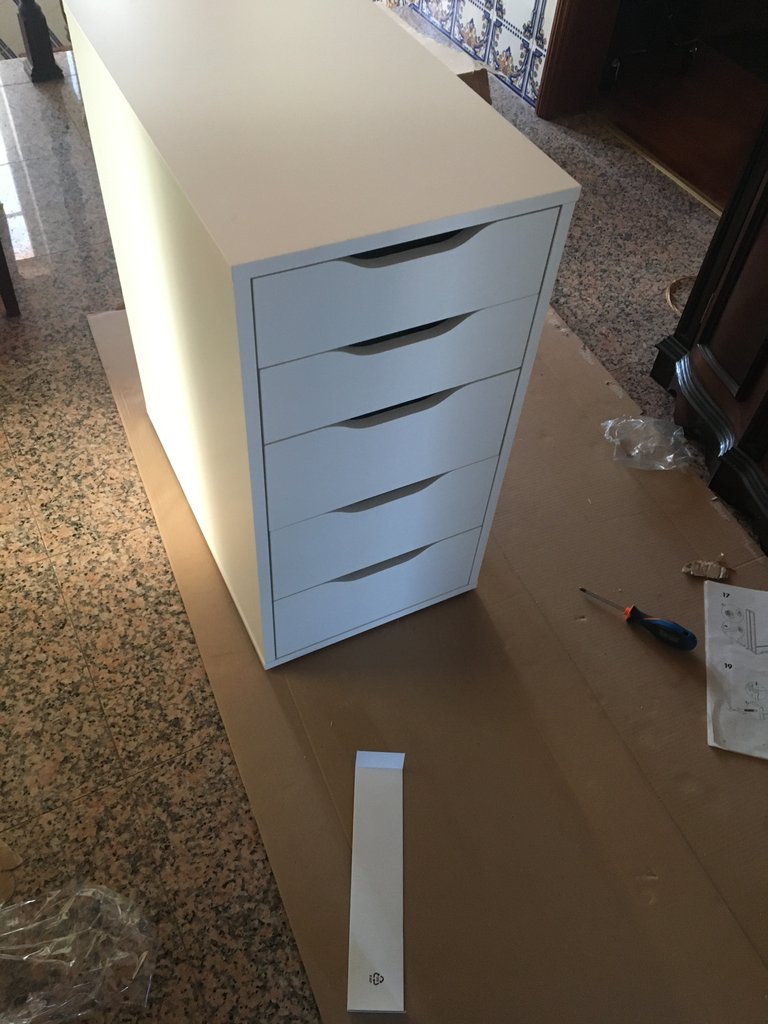
Luego, montar los muebles. Este tipo de muebles son más económicos pero ya sabes que además de transportarlos también debes montarlos.
Después de montar los muebles, sólo me faltaba hacer algunos agujeros en la pared y fijarlo todo.
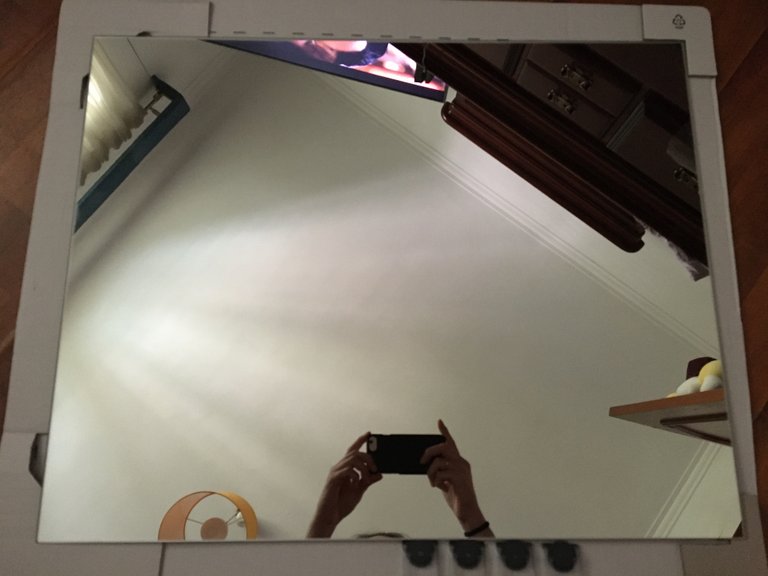
6. Execution 👷♀️
For the execution, I started by assembling the lights on the mirror. The DIY work wasn't very complex, I just needed to glue the lights in a symmetrical spacing.
Then, assembling the furniture. This type of furniture is cheaper but you already know that in addition to transporting it, you must also assemble it.
After assembling the furniture, I just needed to drill a few holes in the wall and attach everything.
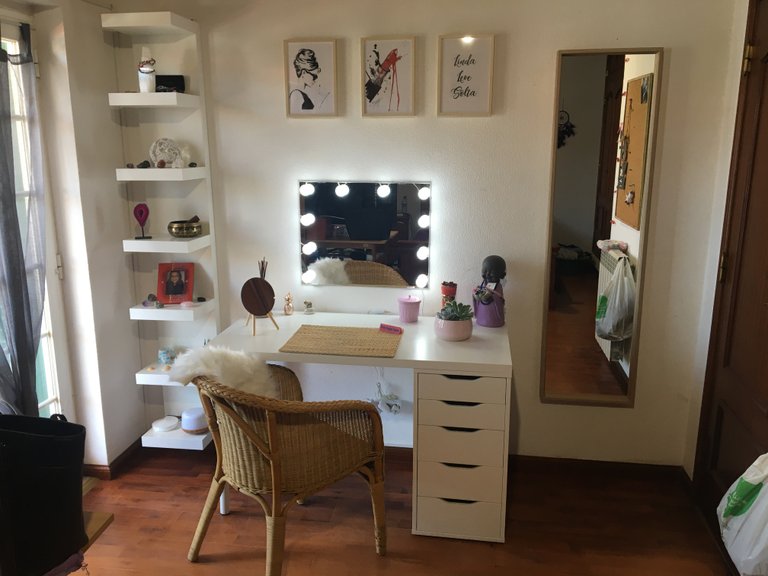
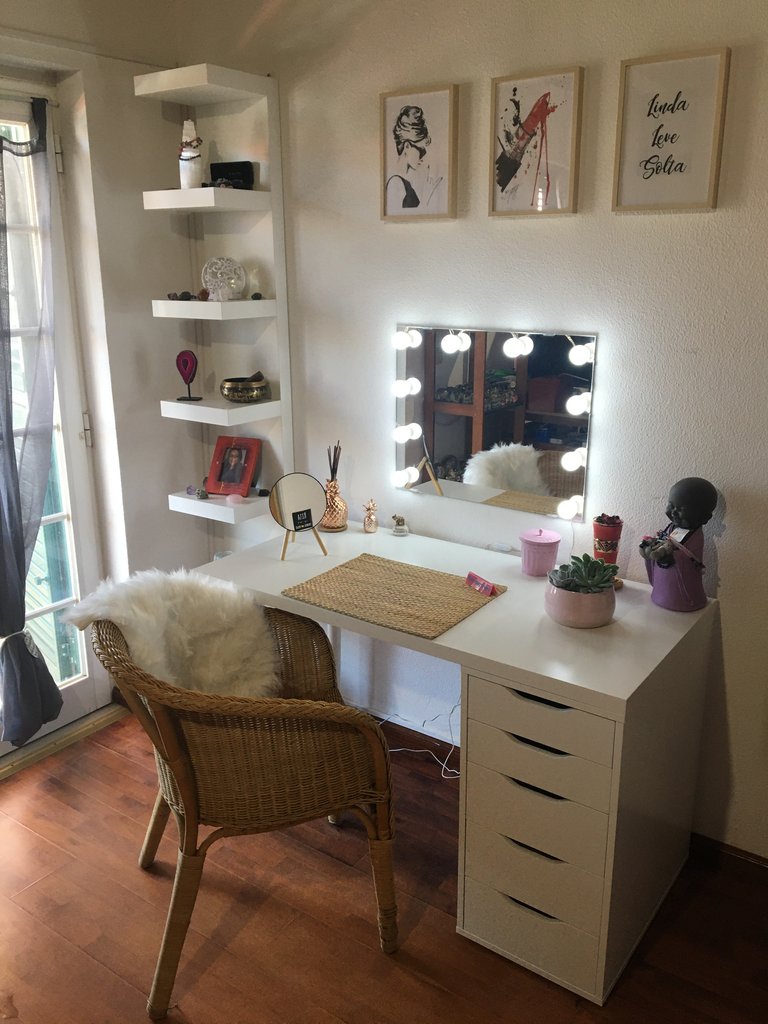
6. Revelación
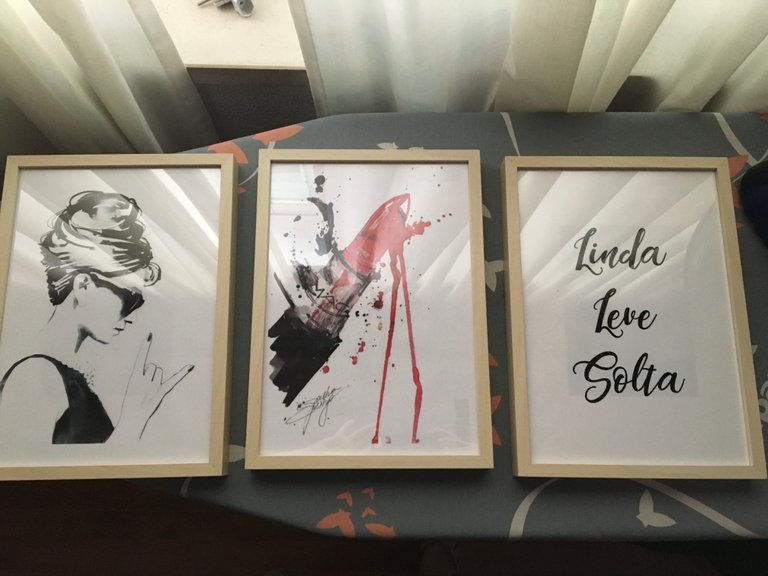
Y después de todo este trabajo de investigación, análisis y ejecución finalmente llegó la mejor parte, la revelación. Dejo fotos del trabajo final así como un breve vídeo de cuando mi hermana "recibió" el regalo
6. Revelation
And after all this research, analysis and execution work finally came the best part, the revelation. I leave photos of the final work as well as a short video of when my sister "received" the gift

¡Muchas gracias por el tiempo que te tomaste leyendo mi post! Espero que os haya gustado!
Fotos y Videos de mi Propiedad
Thank you very much for the time you took reading my post! I hope you liked it!
Pictures and Videos are my property
!CURATE BY
@biologistbrito
Thank you for your contribution to the community🌍🐏
Remember to delegate to us or join the curation trail to participate in the weekly hbd prizes🥇🏅
A very creative and beautiful work, the video and the construction steps are great!
Congratulations @laam! You have completed the following achievement on the Hive blockchain And have been rewarded with New badge(s)
Your next target is to reach 100 upvotes.
Your next target is to reach 50 replies.
You can view your badges on your board and compare yourself to others in the Ranking
If you no longer want to receive notifications, reply to this comment with the word
STOPCheck out our last posts:
¡Felicidades! Esta publicación obtuvo upvote y fue compartido por @la-colmena, un proyecto de Curación Manual para la comunidad hispana de Hive que cuenta con el respaldo de @curie.
Si te gusta el trabajo que hacemos, te invitamos a darle tu voto a este comentario y a votar como testigo por La Colmena.
Si quieres saber más sobre nuestro proyecto, te invitamos a acompañarnos en nuestro servidor de Discord.
¡Enhorabuena!
✅ Has hecho un buen trabajo, por lo cual tu publicación ha sido valorada y ha recibido el apoyo de parte de CHESS BROTHERS ♔ 💪
♟ Te invitamos a usar nuestra etiqueta #chessbrothers y a que aprendas más sobre nosotros.
♟♟ También puedes contactarnos en nuestro servidor de Discord y promocionar allí tus publicaciones.
♟♟♟ Considera unirte a nuestro trail de curación para que trabajemos en equipo y recibas recompensas automáticamente.
♞♟ Echa un vistazo a nuestra cuenta @chessbrotherspro para que te informes sobre el proceso de curación llevado a diario por nuestro equipo.
🏅 Si quieres obtener ganancias con tu delegacion de HP y apoyar a nuestro proyecto, te invitamos a unirte al plan Master Investor. Aquí puedes aprender cómo hacerlo.
Cordialmente
El equipo de CHESS BROTHERS