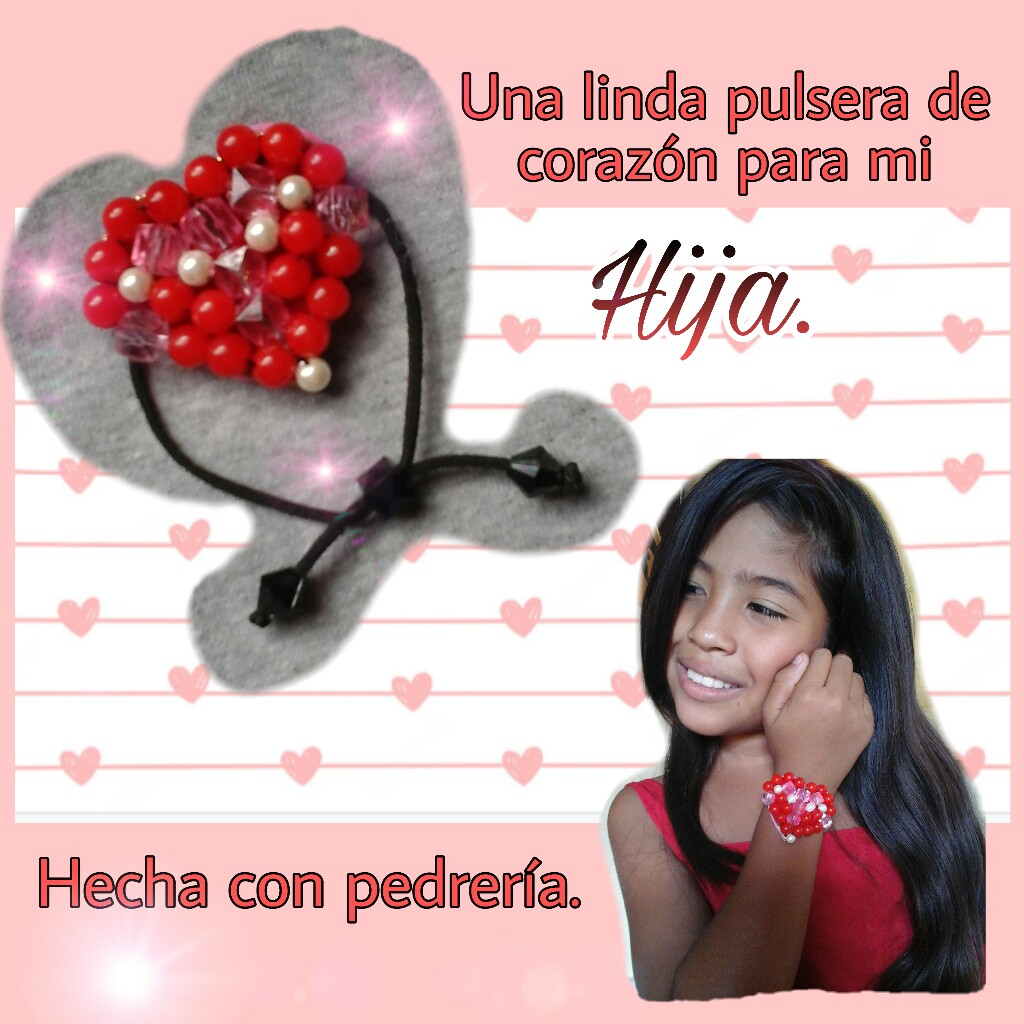
[Esp/Ing]Linda pulsera de corazón hecha con pedrería💙💗🌷👧/un lindo detalle para mi hija//Cute heart bracelet made with rhinestones💙💗👧🌷/ a nice detail for my daughter.
¡Helloooo @jewelry friends!🙋
¡Feliz y bendecida tarde para toda esta gente hermosa! ¡Es un gran placer saludarles nuevamente! siempre será un regocijo para mi, poder interactuar a través de esta plataforma con tantas personas talentosas y creativas como lo son ustedes😄.
Happy and blessed afternoon to all these beautiful people! It is a great pleasure to greet you again! It will always be a joy for me to be able to interact through this platform with so many talented and creative people like you😄.
It fills me with great joy and enthusiasm, because yesterday I was able to make a nice accessory for my little girl, whenever I can do something for her I am very happy, it is a satisfaction for me, to see a smile on her face every time I give her a nice present. The truth is that yesterday I didn't know what to do and immediately I came up with something nice that she can always carry with her, so I looked for the necessary materials to make this bracelet. In addition to being a cute accessory, it symbolizes the love of mother and daughter. As you can see, this heart of beads is not made with thread, since they are glued to a piece of fabric, which is a new option to make charms without using thread. So from now on I invite you to read until the end and you will be able to appreciate the procedure of this beautiful accessory.

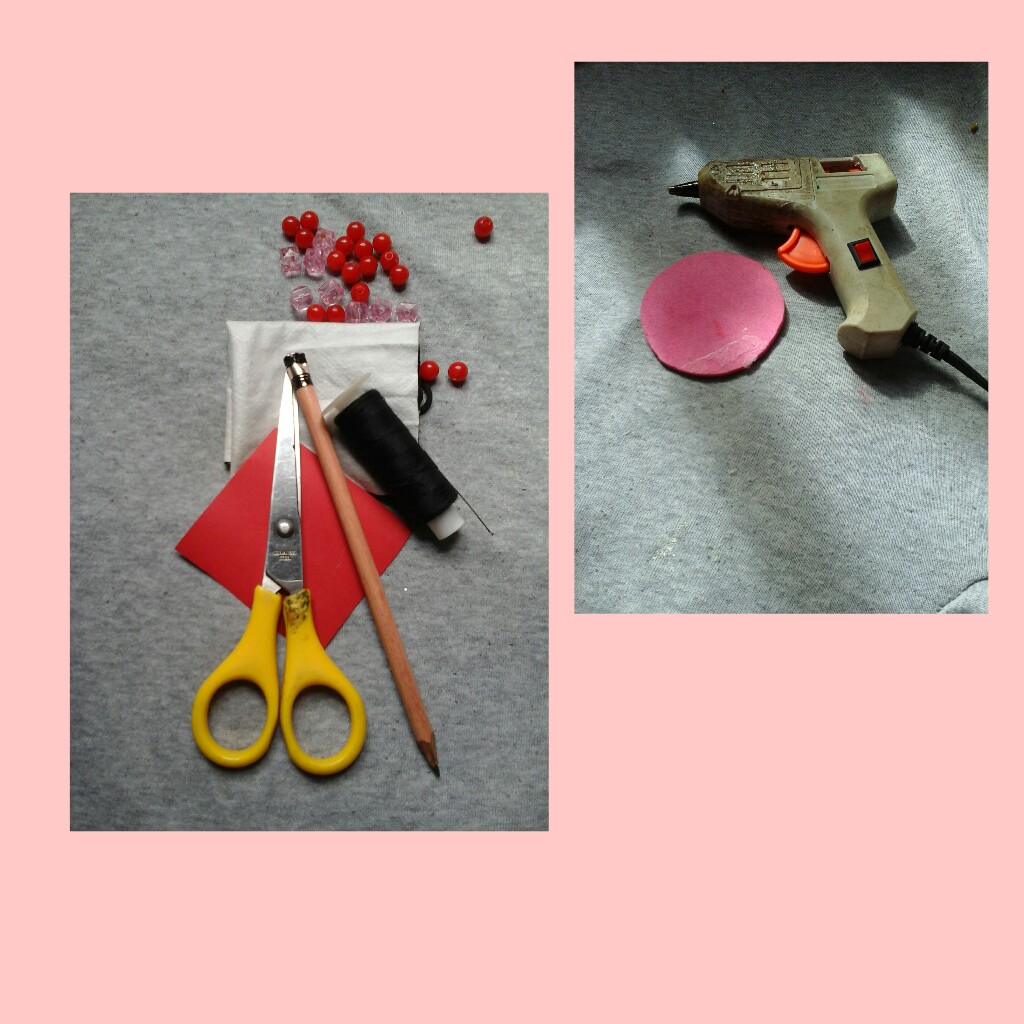
- Un trozo de tela roja y otra para soporte.
- Pistola para silicona.
- Un trocito de foami.
- algunas cuentas rojas y rosadas.
- Hilo decorativo y cordón negro.
- Un trocito de papel.
- Una lápiz.
- Hilo y aguja.
- Tijera.
- A piece of red cloth.
- Gun for silicone.
- A piece of foami.
- some red and pink beads.
- Decorative thread and black cord.
- A piece of paper.
- A pencil.
- Thread and needle.
- Scissors.
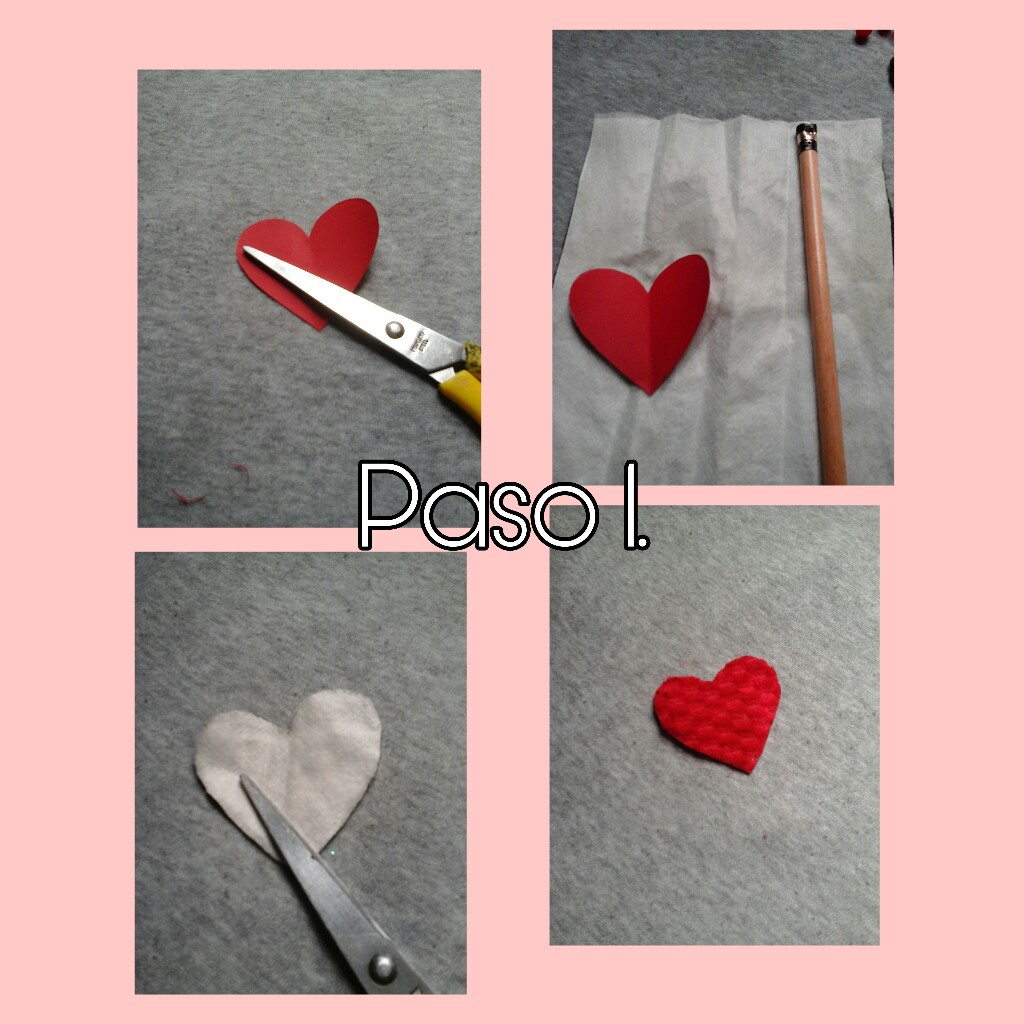
Friends, let's start this tutorial, the first thing is to draw a heart on a piece of paper and cut it out, this will serve as a mold to make some fabric. Next, we place our paper heart on the fabric, mark and cut out.
In this step we are going to take the threaded needle to start inserting the beads and adapt them to the fabric. We will start at the bottom of the heart, pass the needle through the fabric and introduce three beads, now we will pass the needle through the fabric and return to the starting point to go through the three beads again.
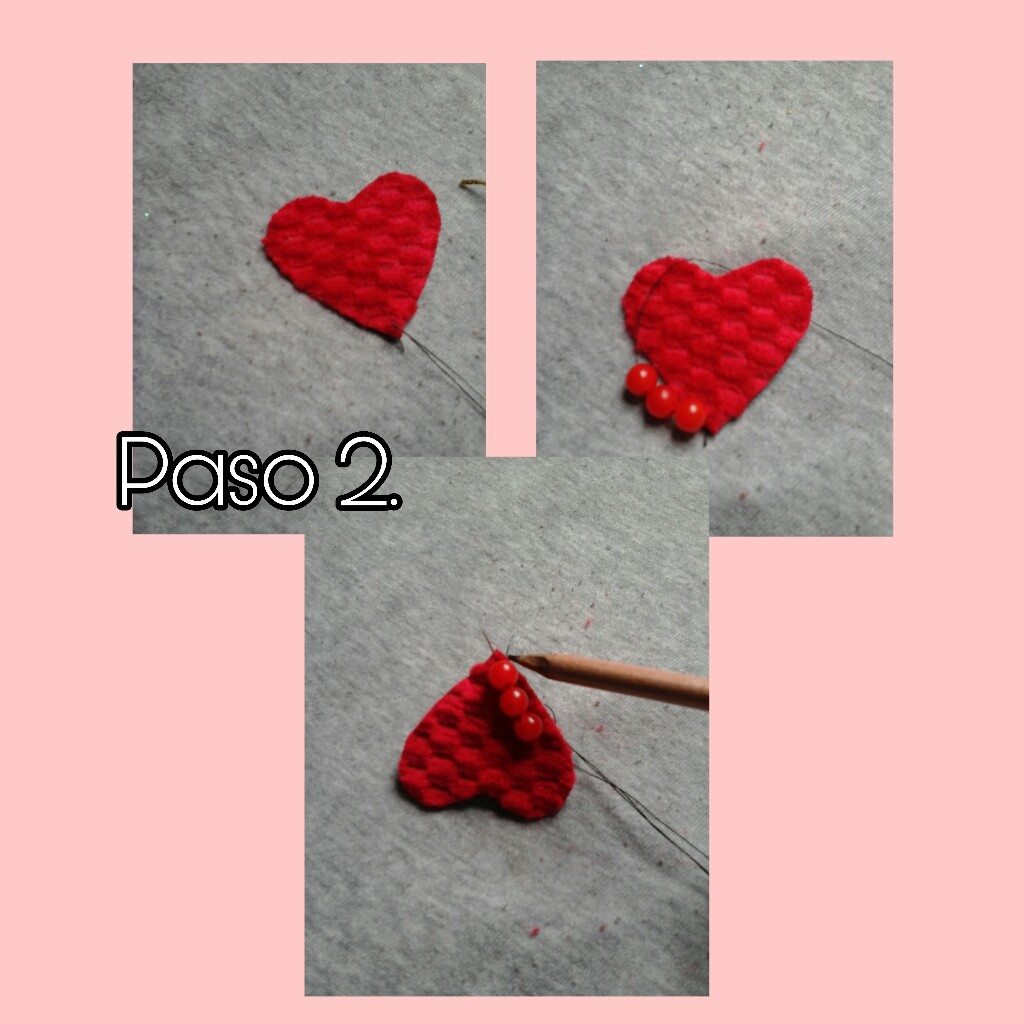
Here you can see more clearly that I have returned the needle and passed it again through the three start beads, we are going to repeat the same procedure only that we are going to change the first bead, that is instead put a red one, let's put a pink one. Once we have placed the pink bead, we introduce four red ones, we pass the needle through the fabric to fix it. We repeat the procedure returning the needle to pass it through the pink bead and through the rest of the red color.
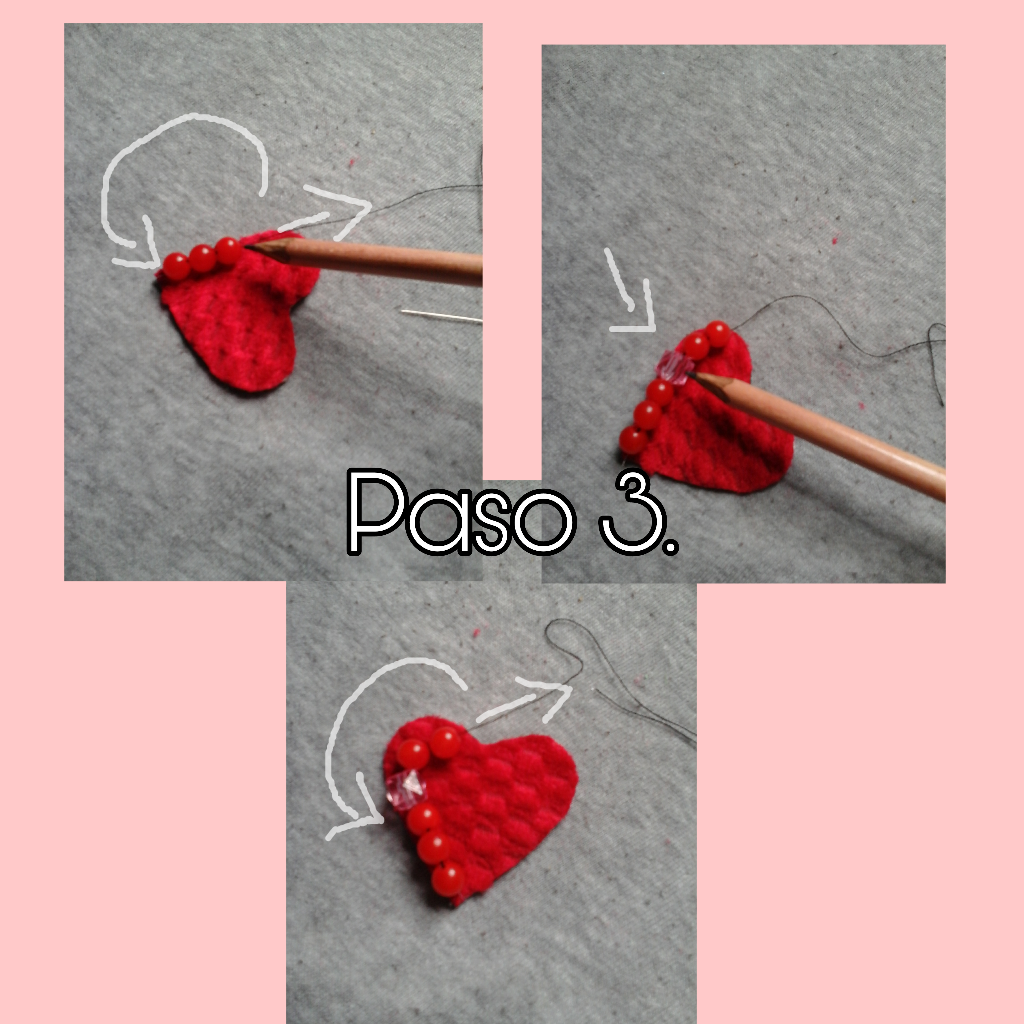
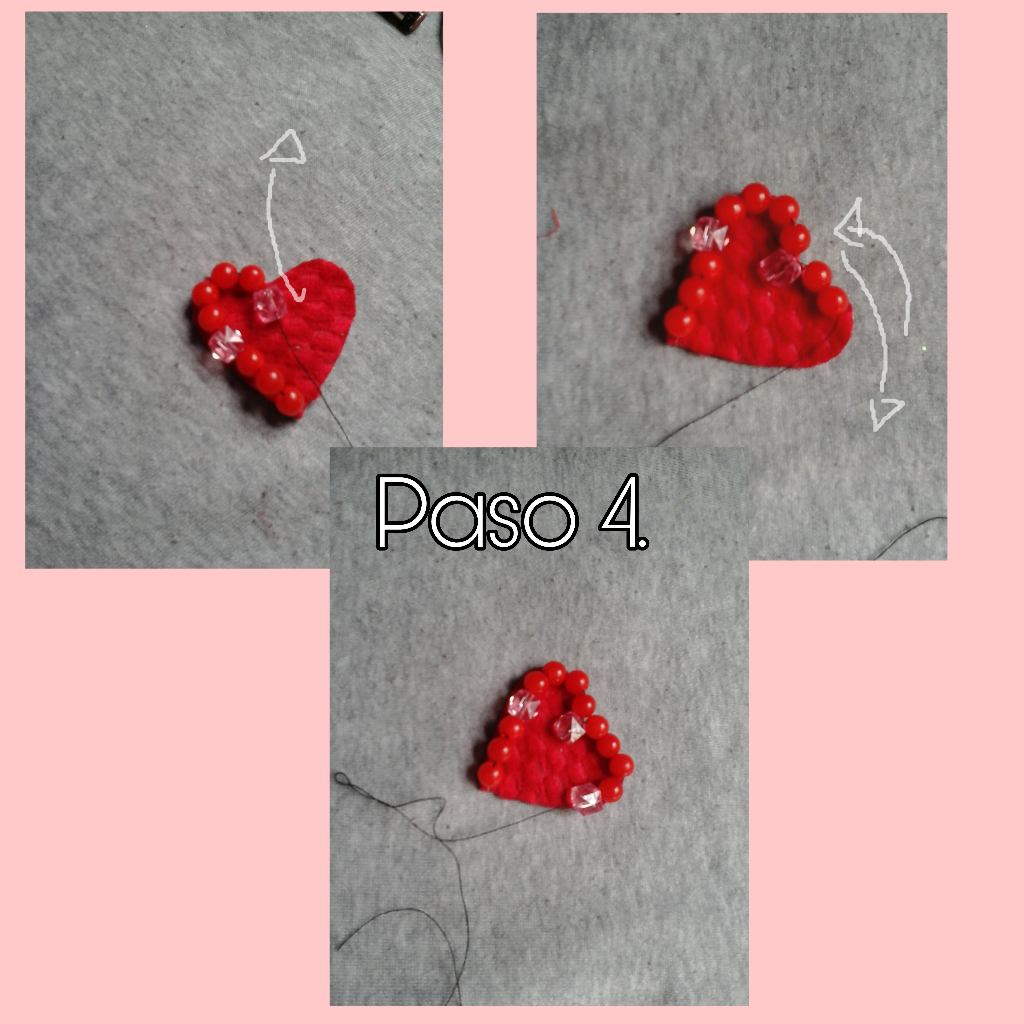
Now we are going to place a pink bead so that it sits on top of the heart. Here we are going to sew to fix this bead, we return the needle passing it through the same hole of the old one that we have already placed, if you can see how I am indicating the procedure with some arrows. We introduce two red beads and fix; We return the needle and pass it first through the pink bead. This procedure of passing the needle through the beads and back, will make it look very nice and not noticeable.
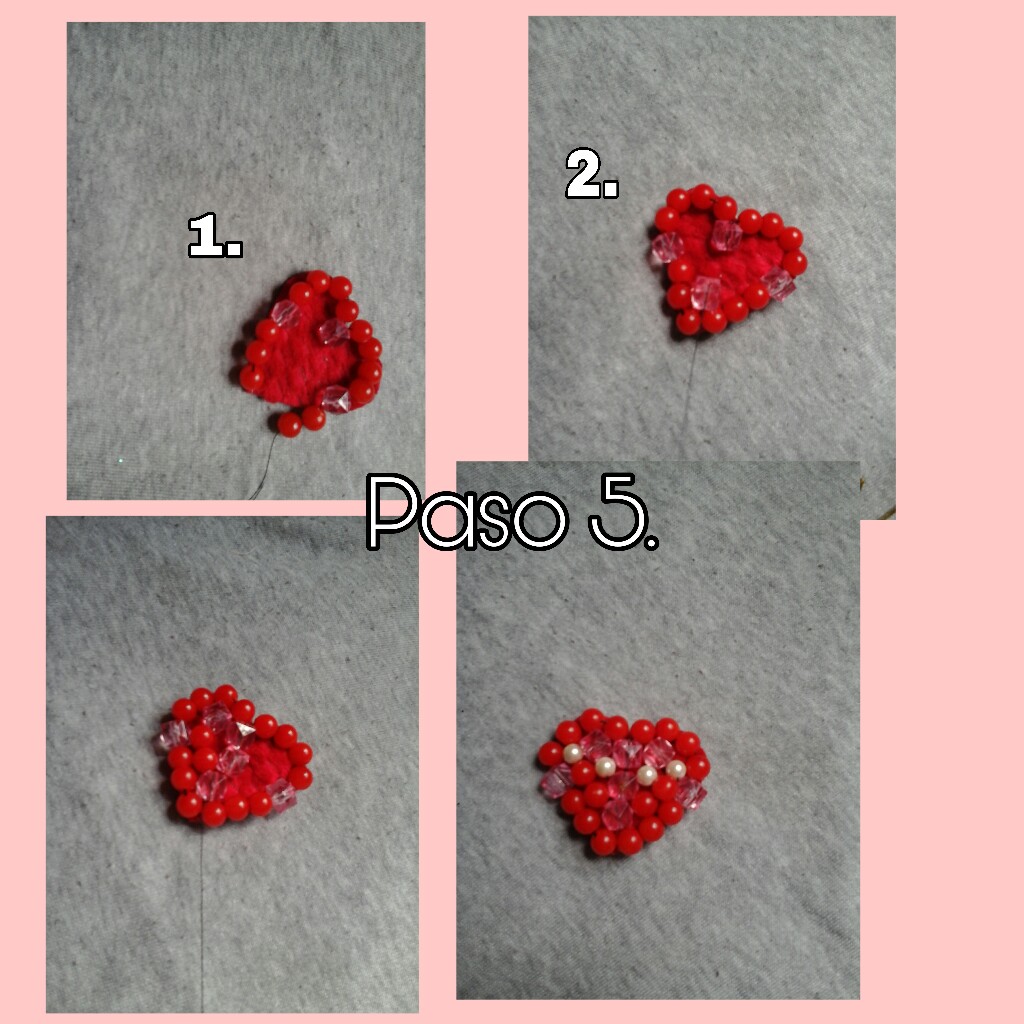
As I told you before, it is about inserting the beads, sewing and returning the needle, here you can see that I have been placing red and pink beads until I cover the entire heart, I have placed some smaller pearls to cover some small gaps that were left.
Once we have finished, we can decorate the edge with any thread, I preferred to place golden decorative thread, I glued this with a bit of hot silicone. We proceed to glue the laces on the back of the heart.
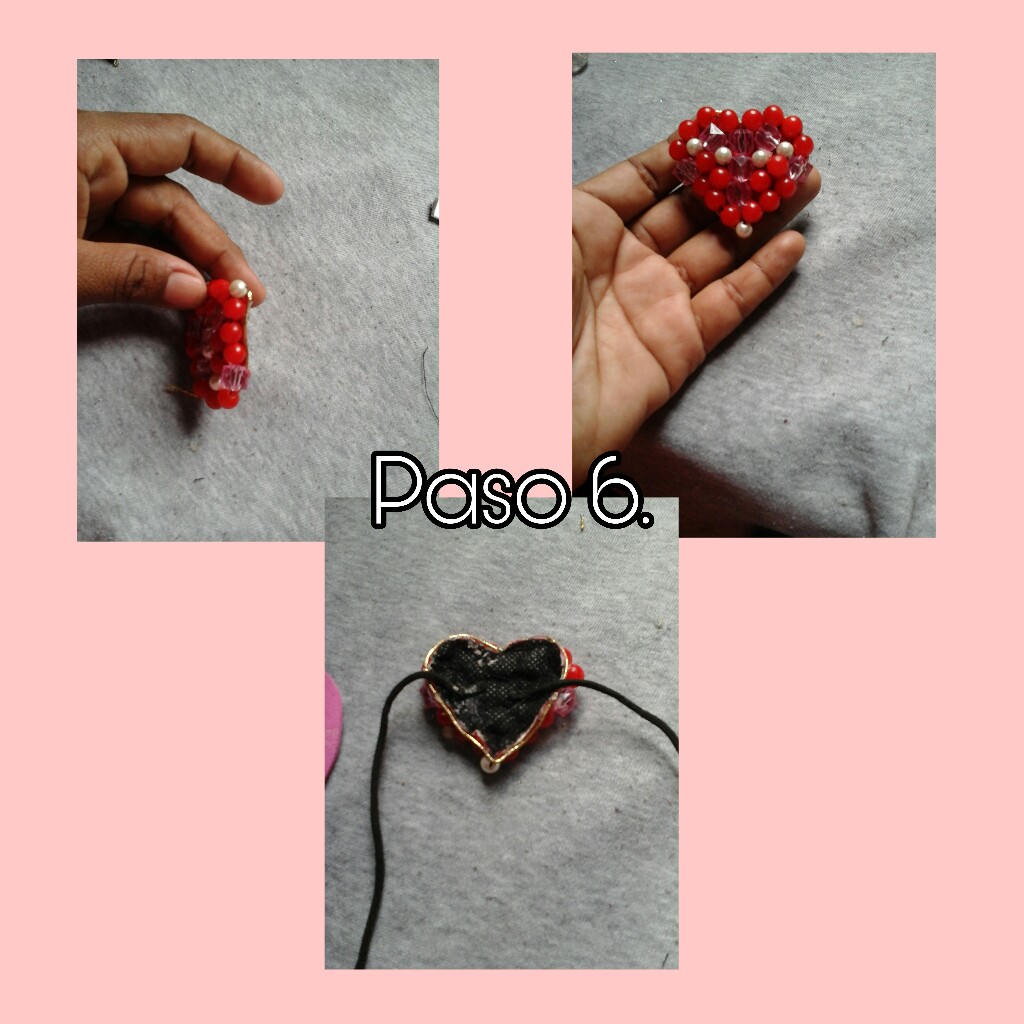
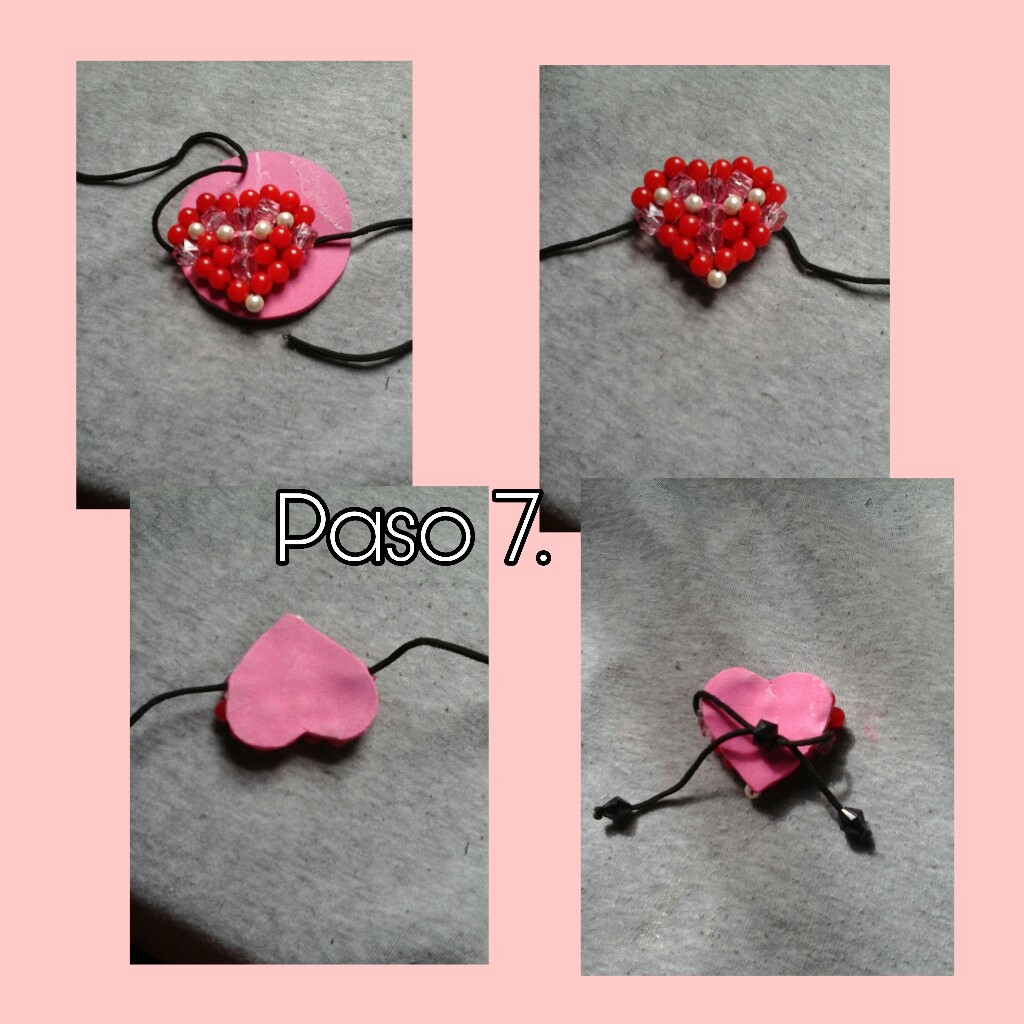
Once we have glued the laces, we place this beaded heart on a piece of foami, we add a bit of hot silicone, we wait for it to dry and cut, in this way any detail will be covered. Finally, they passed the laces through a black bead that they worked to adapt it to the size of the wrist.

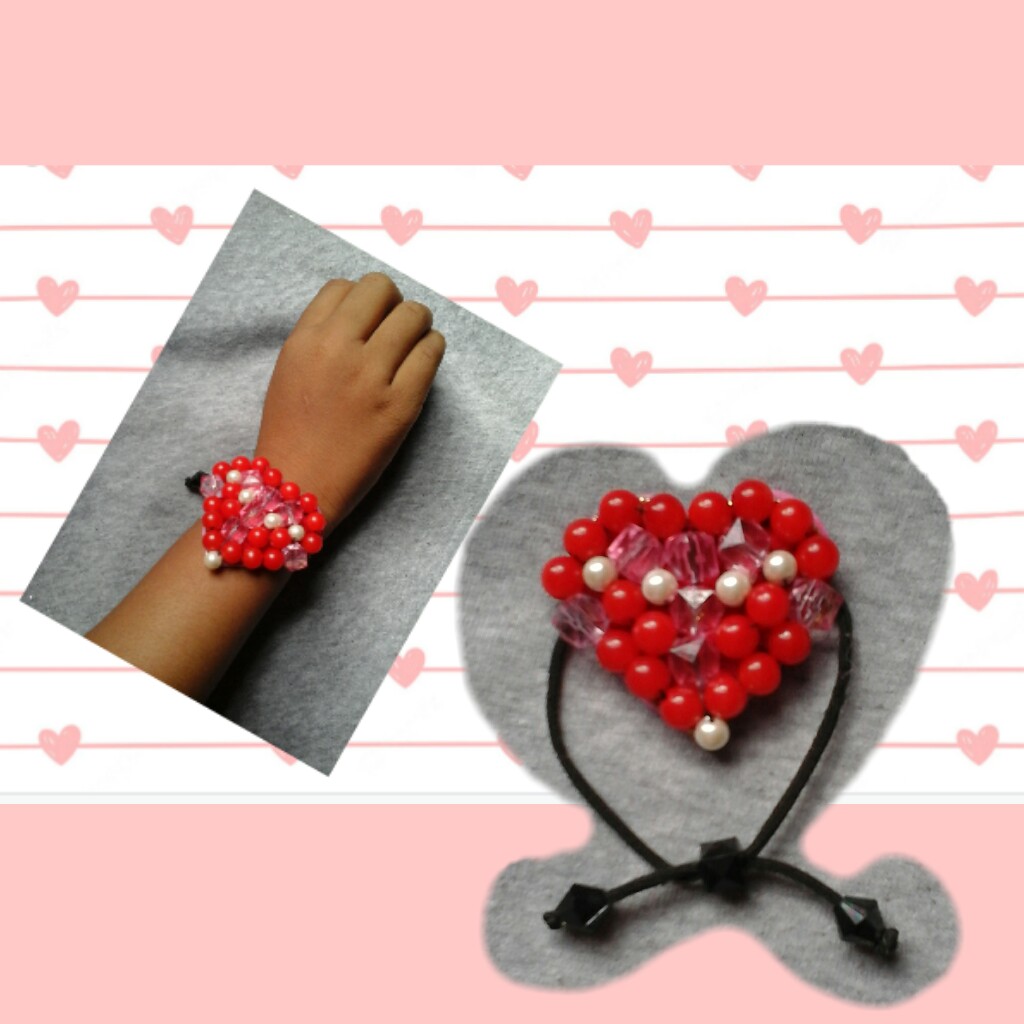
Dear friends we have finished this beautiful bracelet, look how beautiful it is and it looks great. I hope you like it and that you can make one for the princesses.
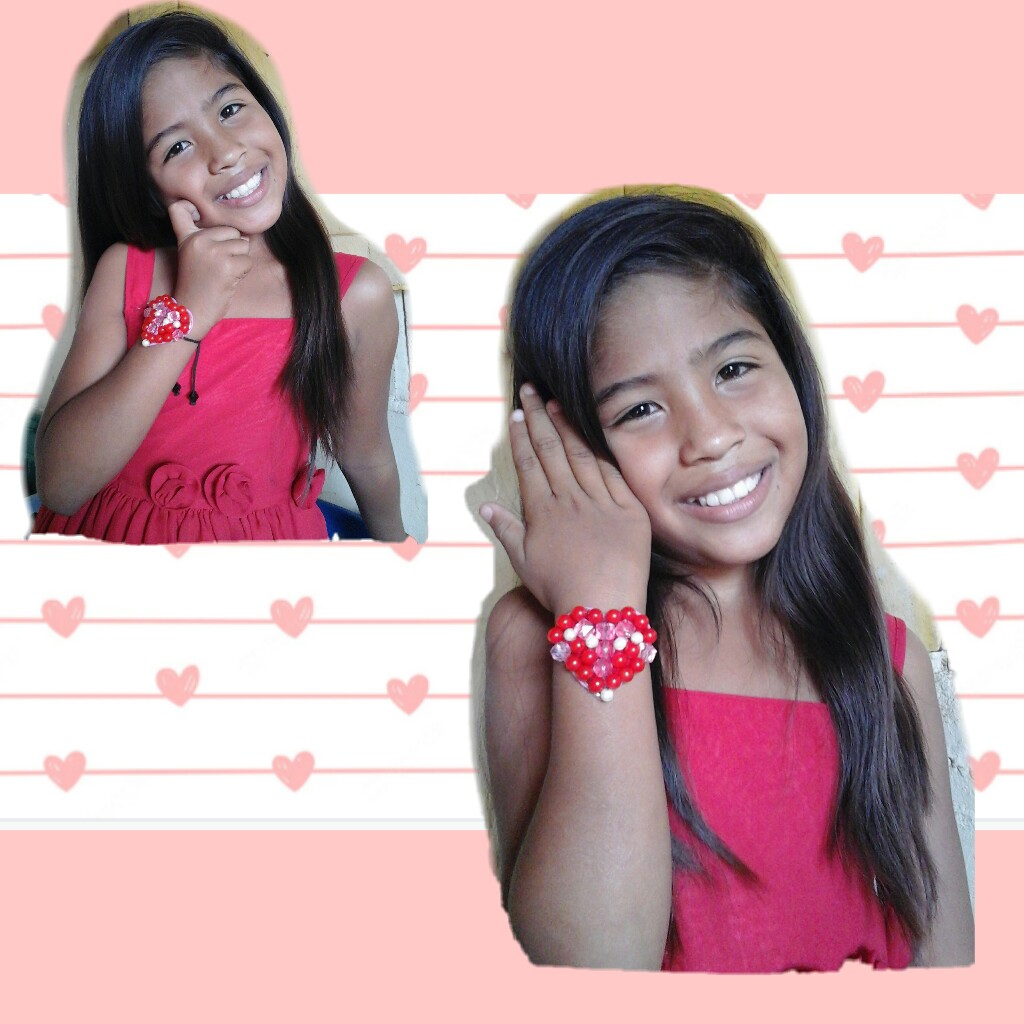
Aqui pueden apreciar a mi hija feliz y luciendo su nueva pulsera.
Here you can see my daughter happy and wearing her new bracelet.
It has been a pleasure for me to be able to share this work with all of you, I thank you for visiting my blog and accompanying me until the end of this tutorial. Without further ado, I wish you a beautiful day filled with many blessings!
We work with a lot of love for all of you.
Shalom is PEACE.
Créditos.
Todo el contenido es de mi autoria.
Fotos capturadas por mi tablet Samsung galaxy, editadas por Picsart.
Algunos fondos fueron tomados de Internet.
fuente
Traductor utilizado ESP/ING google.com
Credits.
All content is mine.
Photos captured by my Samsung galaxy tablet, edited by Picsart.
Some funds were taken from the Internet.
fuente
Used translator SPA/ENG google.com
@anaarevalo01 hermoso detalle para una pulsera, gracias por compartir tu creación, Saludos 😊
¡Hola! muchas gracias por comentar, saludos y un fuerte abrazo.
Muy linda y diferente! Gracias por compartirla @anaarevalo01
Gracias a ti querida, saludos😊
¡Enhorabuena!
✅ Has hecho un buen trabajo, por lo cual tu publicación ha sido valorada y ha recibido el apoyo de parte de CHESS BROTHERS ♔ 💪
♟ Te invitamos a usar nuestra etiqueta #chessbrothers y a que aprendas más sobre nosotros.
♟♟ También puedes contactarnos en nuestro servidor de Discord y promocionar allí tus publicaciones.
♟♟♟ Considera unirte a nuestro trail de curación para que trabajemos en equipo y recibas recompensas automáticamente.
♞♟ Echa un vistazo a nuestra cuenta @chessbrotherspro para que te informes sobre el proceso de curación llevado a diario por nuestro equipo.
Cordialmente
El equipo de CHESS BROTHERS
muchas gracias