My Actifit Report Card: June 3 2024| 【Make preserves./保存食を作る】03_2・Make red ginger.Completion/紅生姜を作る。完結/[ENG/JPN]
The article in Japanese is in the second half.★日本語の記事は後半に。
The following is a continuation of the red ginger making process.
Last time, washed fresh ginger was sliced and pickled in salt for two days.
I took it out, washed off the salt and dried it for half a day before proceeding to the next step in this process.
I only had to do a little work with my hands, the rest was like the fresh ginger, plum vinegar, rubbed shiso, salt, gravity and airtight jars did all the work.
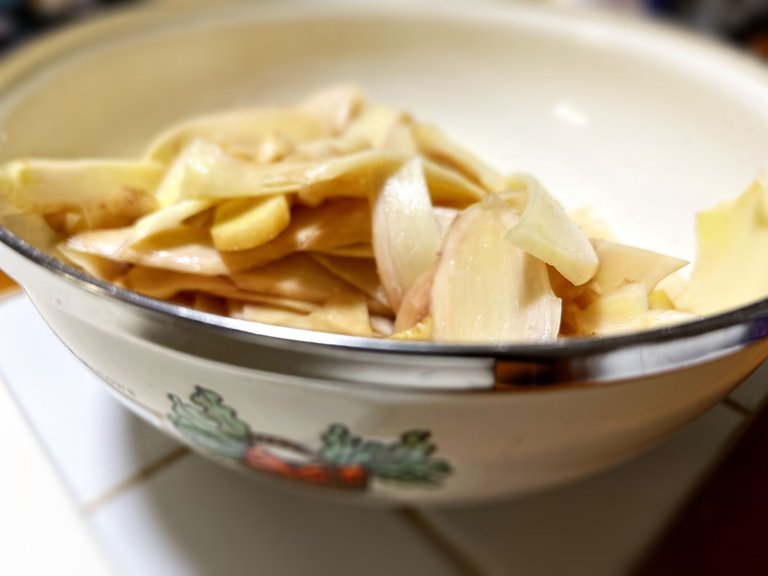
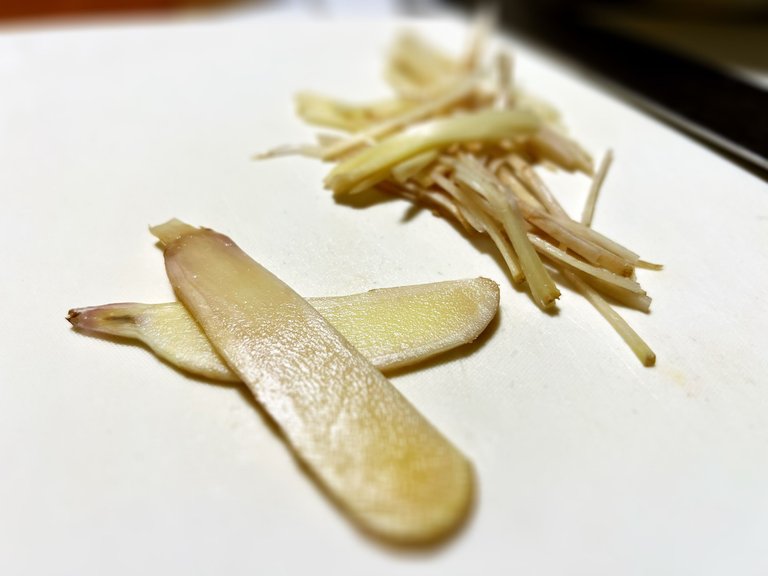
Chop up the slightly dried salted ginger.
As I mentioned in the previous article, even if you don't increase the cross-sectional area by cutting it so much, it will soak up the plum vinegar well enough and the salted pickled ginger will also be effective.
However, when I think of the 'state in which it is chopped every time it is used' and the 'state in which it is already cut into easy-to-eat pieces when it is taken out of the storage jar' after it has actually been pickled, I think that it would be better for impatient people like me if it was already cut, so I decided to chop it into thin strips. I decided to chop it into thin strips.
In Japan, red ginger is often used as a condiment, so when it is served with food, it is usually chopped into thin strips like this. This is the most common form.
When you buy it in supermarkets, it is also almost always sold chopped into this thin strips and dipped in ume vinegar.
I usually decide to pickle them in the shape that I find most convenient.
Nevertheless, if everything is chopped up into small pieces, it could be considered inconvenient if you want to use it for another purpose.
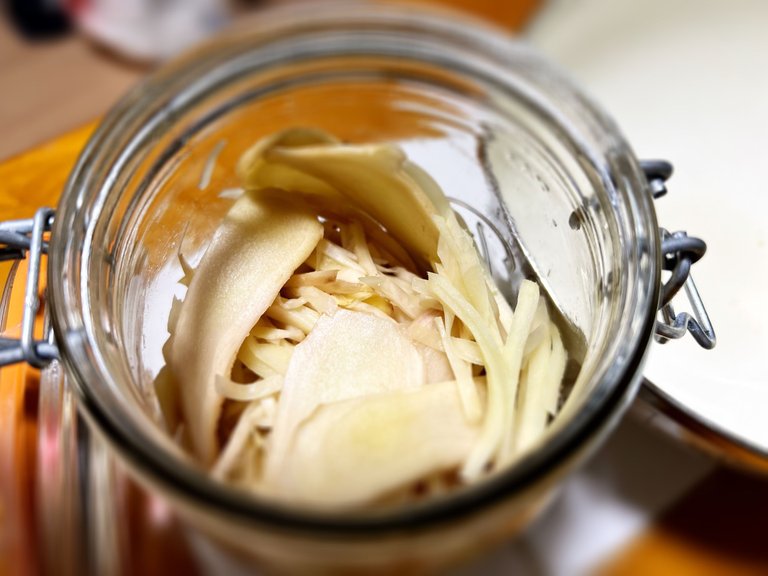
Since I am making my own preserved food for myself with my own hands, there is no need to make everything uniform, so I left some things uncut.
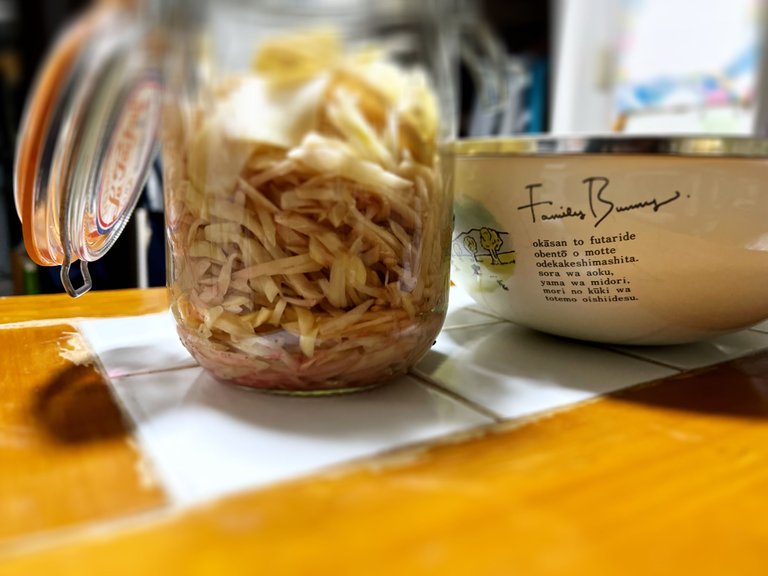
This is what it looked like when I packed the chopped pieces into an airtight jar.
This airtight jar is 1 litre size.
The size I assumed with fresh ginger was 1 litre, but after two days of salting, the excess water was drained out and the capacity was reduced a lot.
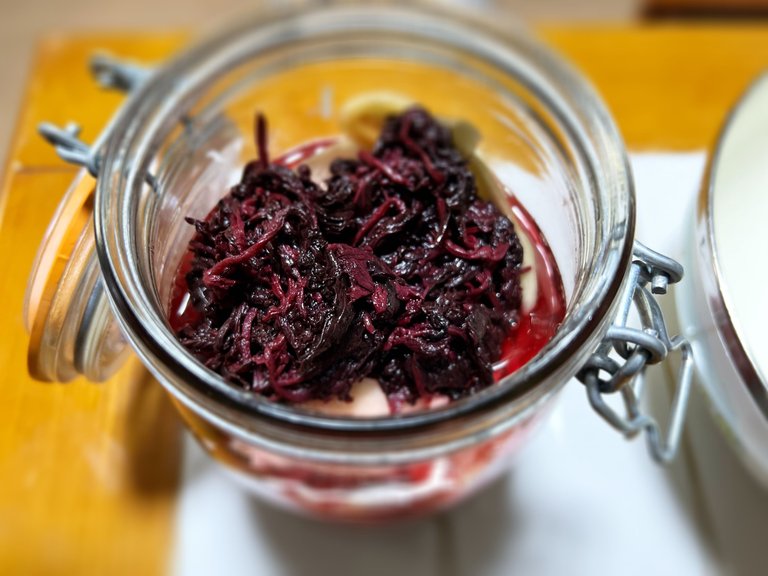
The plum vinegar is poured in and rubbed shiso is placed on top to cover it.
In this way, the air is blocked and the ume vinegar can be soaked in a stable state.
I didn't take a photo of the shiso that had been packed tightly until it reached the lid, so the photo on this blog is from when I pickled the crunchy plums.
Cover with red shiso like this.
Originally, "red ginger" was made by pickling fresh ginger with "ume vinegar" obtained from pickled plums and red shiso, and red ginger was "to avoid wasting the ume vinegar obtained as a by-product of making pickled plums".
The article on pickling 'crunchy plums' is below.
1/2_Pickling crunchy plums/カリカリ梅を漬ける/[ENG/JPN]
2/2_Pickling crunchy plums/カリカリ梅を漬ける/[ENG/JPN]
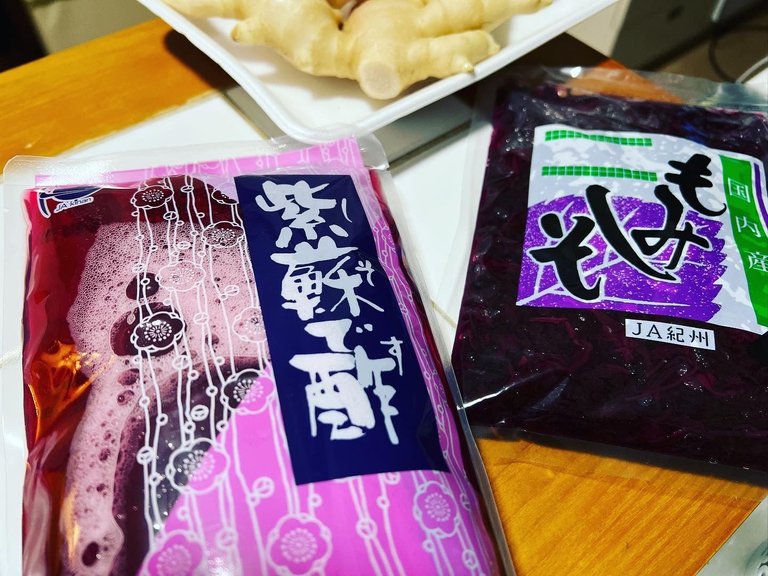
Today, fewer and fewer households make a large enough quantity of pickled plums to get plenty of plum vinegar, so plum vinegar and salt-rubbed shiso can be bought at supermarkets.
It is very nice and convenient to be supported in this way to make small quantities of 'homemade preserved food' and enjoy the taste of homemade food.
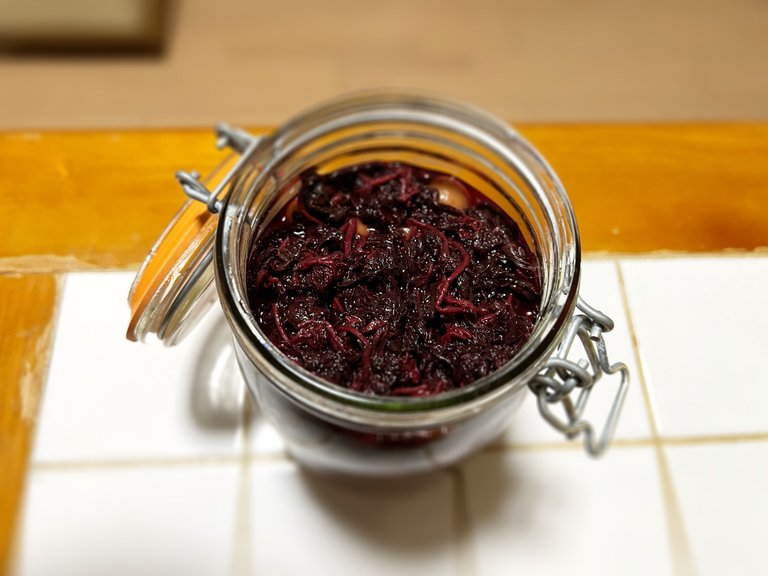
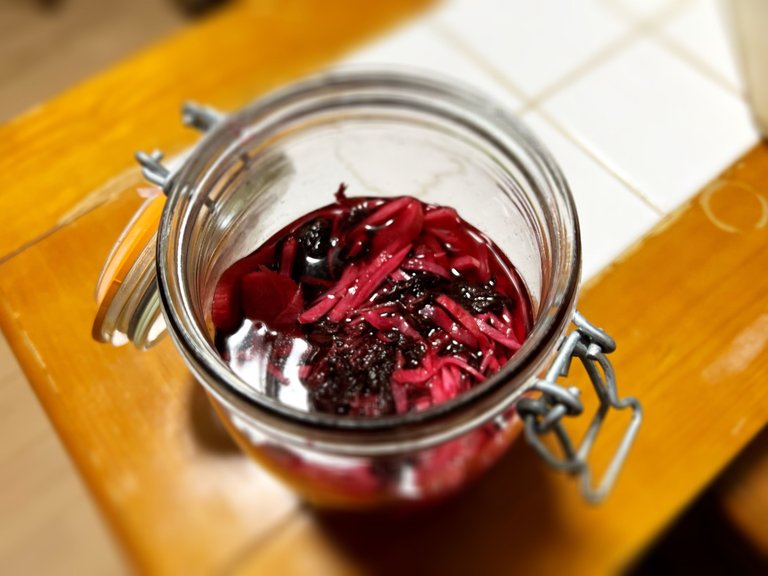
After about two weeks of soaking, the jar was opened for testing.
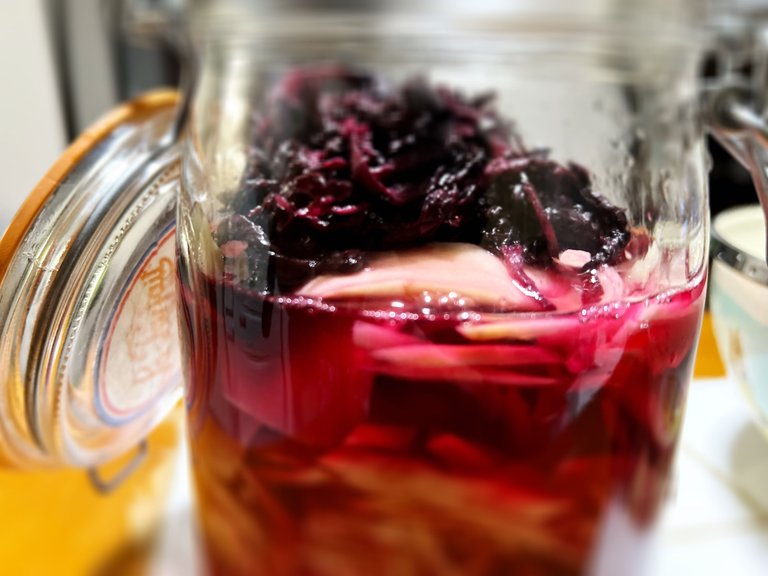
This was taken after removing the red shiso on top so that the contents could be seen.
It has a very beautiful crimson colour.
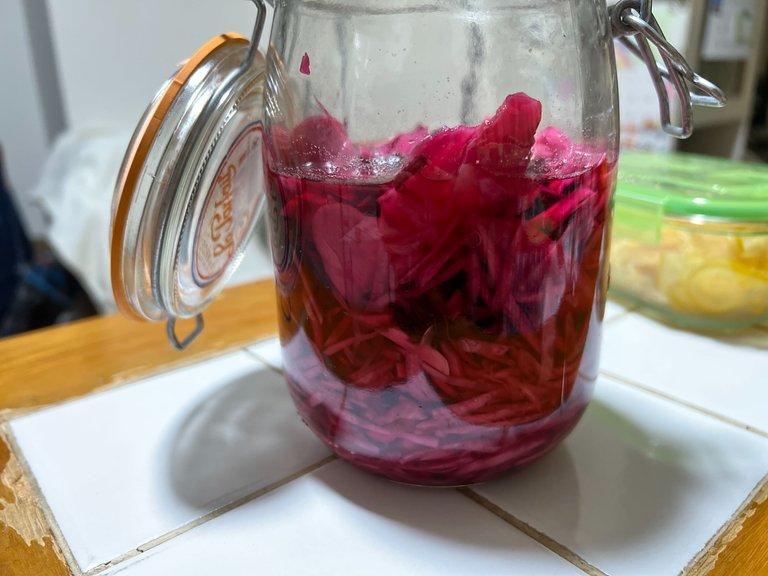
The colour from the side is also clear and beautiful red, and it seems to be coming along nicely.
The recipe I refer to says that sun-drying is recommended for red ginger as well as dried plums.
If it is well pickled in the plum vinegar, the quality basically does not change, but sun-drying increases the flavour and has a sterilising effect, so the preservation is even better.
I decided not to do the sun-drying process this time (as I had done enough salt pickling), so I cut the ginger into small pieces at the point of pickling, but if you expect to sun-dry it, "don't cut the ginger too small and pickle it in the plum vinegar in chunks" is a good way to get around.
When I tasted it, it was still not quite mellow and had quite a few corners.
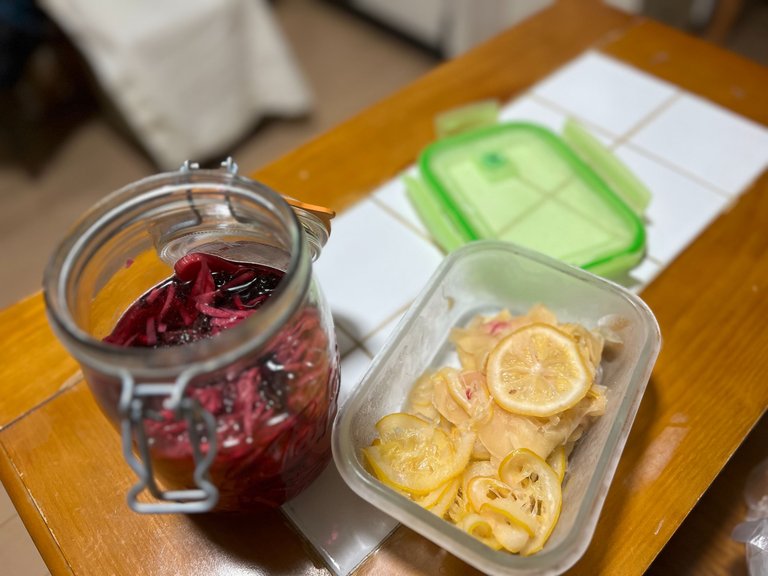
Shortly before making this red ginger, I had made ginger syrup and had frozen ginger slices and lemon slices soaked in glacial sugar to use as a sweet treat.
I added a small amount of this sliced ginger to the red ginger, thinking that it was moderately sweet and perhaps would give a good flavour to the red ginger.
The result has been a very good effect, and it has mellowed the pickled ginger with just salt and plum vinegar.
But this was only confirmed after more than half a year of pickling after this, and I wasn't sure immediately afterwards.
I enjoy making preserved food.
What I would like to do this year, if possible, is to make 'pickled green chillies'.
I would like to make something like the Spanish dish Guindilla or the Mexican dish jalapeno pickle.
Of course, Tabasco already made into a paste in a food processor or harissa made from slices would also be ideal, in short, I want to make spicy condiments to the optimum spiciness for me.

■diary with a few words
I am on a trip today for a refresher vacation.
I walked more than I thought I would, so I am posting an article that I had saved as a draft.
Tomorrow we are staying at a camp and trekking.


Japanese★ここから日本語でお送りいたします。
紅生姜作りの続きをお伝えします。
前回は洗った新生姜をスライスして、2日間塩漬けにしました。
取り出して塩を洗い流してから半日ほど乾燥させて、この後の工程へ進めました。
私が手を動かしたのはほんの少しで、後は、新生姜と梅酢と揉み紫蘇と塩と重力と密閉瓶が全てをやってくれたようなものです。

少し乾かした塩漬け生姜を刻んでいきます。
前回の記事にも書きましたが、こんなにカットして断面積を増やさなくても、十分梅酢も染み込むし、塩漬けの効果もあります。
でも、実際に漬け込んだ後で「使う時に毎回刻んで使う状態」と「もう保存瓶から取り出す時には食べやすくカットされている状態」を思い浮かべてみると、やっぱりもうカットした状態で出来上がった方が、私のようなせっかちには向いているのではないかと思い、細く刻んでおくことにしました。
日本では紅生姜は薬味として使われることが多いので、料理に添えて出すときは、通常このように細く刻んであります。もっともよく見る形です。
スーパーマーケットで購入する時も、ほとんどの場合はこれくらいの細さに刻んだ状態で梅酢につけて販売されています。
通常、自分が一番便利に使っている形にした状態で漬けることに決めました。

とは言っても、全て細かく刻んでしまうと、別の用途に使いたい場合に不便だとも考えられます。
せっかく自分の手で自分用に保存食を作っているのですから、全て均一に統一する必要はないので、カットしないものも残してみました。
刻んだものを密閉瓶に詰めるとこんな感じになりました。
この密閉瓶は1リットルサイズです。
生の新生姜で想定した大きさが1リットルだったのですが、2日間の塩漬けで余分な水分が排出されて、随分と容量が減りました。

梅酢を注ぎ込んで、上から蓋をするように揉み紫蘇を乗せました。
こうすることで空気を遮断して、安定した状態で梅酢に漬け込むことができます。
この時に蓋に達するところまでしっかり揉み紫蘇を詰めた写真を撮っていなかったので、このブログに掲載しているしたの写真はカリカリ梅を漬け込んだ時もの写真です。
このように赤紫蘇で蓋をします。
元々は梅の実と赤紫蘇を塩漬けにした時に得られる「梅酢」を使って新生姜を漬け込んだものが「紅生姜」で、紅生姜は「梅干し作りの副産物で得られた梅酢を無駄にしないためのものだった」のです。
「カリカリ梅」を漬けた時の記事は以下のとおりです。
1/2_Pickling crunchy plums/カリカリ梅を漬ける/[ENG/JPN]
2/2_Pickling crunchy plums/カリカリ梅を漬ける/[ENG/JPN]

現代では梅酢がたっぷり手に入るくらいまとまった量の梅干しを作る家庭も減っているので、梅酢や塩揉みされた紫蘇をスーパーマーケットで購入することができます。
少ない量の「自家製保存食」を作ることがこんなふうにサポートされていてとても嬉しいし便利だし、手作りの美味しさを楽しむことができます。
約2週間漬けたのち、試しに瓶を開けてみました。
これは、上に載せていた赤紫蘇を取り去って、中身が見えるようにしてから撮影したものです。
すごくきれいな紅色に染まっています。
横から見ても、透き通ったきれいな紅色で、順調に仕上がってきているようです。
紅生姜も梅干し同様、天日干しがお薦めだと、私が参考にしているレシピには書いてありました。
梅酢にしっかり漬け込まれていれば品質が変化することは基本的にないのですが、天日干しすると旨みも増しますし、滅菌効果があるので保存性がさらに良くなります。
私は天日干し工程は今回はやらないことに決めていたので(十分な塩漬けを行ったので)漬け込む時点で細切りにしましたが、天日干しすることを想定するなら「生姜をあまり小さくカットせず、塊の状態で梅酢に漬ける」のが取り回しが良いです。
試食したところ、まだまだまろやかな味にはなっていなくて、かなり角がありました。
この紅生姜を作る少し前にジンジャーシロップを作っていたのですが、その時に氷砂糖に漬け込んだ生姜のスライスとレモンスライスをスイーツとして利用するために冷凍保存していました。
このスライス生姜が程よい甘さで、もしかしたら良い風味を紅生姜に与えてくれるのではないかと考えて、少量足してみました。
結果としてとても良い効果を発揮していて、塩と梅酢だけで漬け込んだものがまろやかになっています。
でもこれはこの後半年以上漬け込んでから確認されたことであって、直後は自信がありませんでした。
保存食を作るのは楽しいですね。
今年、可能であればやりたいのが「青唐辛子の酢漬け」作りです。
スペイン料理のギンディージャ(Guindilla)や、メキシコ料理のハラペーニョピクルスのようなものを作りたいなぁと思っています。
もちろん、すでにフードプロセッサーでペースト状にしたタバスコや、輪切りの状態から作るハリッサも理想的で、要するに辛い調味料を、私にとって最適な辛さになるように作りたいなぁ、と思っています。

■ひとこと日記
今日からリフレッシュ休暇で旅行に来ています。
思ったより歩いたので、下書き保存していた記事を投稿します。
明日からキャンプ泊とトレッキングです。
Google Translate & DeepL, thank you as always.
I am glad that you read it :-)
今日も読んでくださってありがとうございます😊
This report was published via Actifit app (Android | iOS). Check out the original version here on actifit.io



紅生姜ってこんなにも手間をかけて作られているんですね!
こちらではお寿司は人気なので生姜の甘酢漬けは、良く見かけるのですが、紅生姜はあまり手にはいらないです。
前に主人が見つけて帰って来た時、薬味としての紅生姜の存在に感動したのを思い出しました。自分で作れるなんて素敵です!
紅生姜って手に入りにくいんですね!
日本だとお好み焼き、たこ焼き、カレー、チャーハン、冷やし中華、ラーメン…色んな食品に足して楽しむので、すごく一般的ですよね。
今休暇に来ている九州は豚骨ラーメンに紅生姜を入れる文化がしっかりあって、ラーメン屋さんではご自由にお取り下さい、の紅生姜がカウンターやテーブルに山盛り置いてあります😁
お漬物や発酵食品は海外だと手に入りづらいと聞いた事があります。海外遠征アスリートは皆さん梅干しとふりかけを持って行くと以前TVで見たけど、食べたくなりますよね。
Did you know that Actifit team has shared our growth plans for 2024, and we need your support by voting to our proposal?
Quick links to vote below. Thank you!
Vote on peakd
Vote on ecency
Vote on Hive wallet
Vote via hivesigner
You have been rewarded 65.8225 AFIT tokens for your effort in reaching 14994 activity, as well as your user rank and report quality!
You also received a 25.25% upvote via @actifit account. 25.00% of this upvote value is a result of an exchange transaction you performed for 200 AFIT tokens !
AFIT rewards and upvotes are based on your:
To improve your user rank, delegate more, pile up more AFIT and AFITX tokens, and post more.
To improve your post score, get to the max activity count, work on improving your post content, improve your user rank, engage with the community to get more upvotes and quality comments.
Chat with us on discord | Visit our website
Follow us on Twitter | Join us on Telegram
Download on playstore | Download on app store
Knowledge base:

FAQs | Whitepaper
How to signup | Maximize your rewards
Complete Actifit Tutorial
Actifit supports cross-chain decentralization. Support our efforts below by voting for:
とてもていねいな作業で見るのが楽しいです。写真からしょうがの香りがしてきそうです。とても美味しそう。カレーにのせて食べたいです。休暇中なのですね!楽しんでください;)
いつも私の手仕事を丁寧で楽しいと言ってくださって嬉しいです😆
私は凝り性というか始めると熱中してしまうので、今回もプロセスを最初から最後まで楽しみました。
紅生姜、カレーに合いますよね!しょっちゅう乗せて食べてます。酸っぱさも私の好みに仕上がって、すごく満足してます。
休暇、まだ始まったばかりですが、のびのびできてます😌
Congratulations @aitommylr! You have completed the following achievement on the Hive blockchain And have been rewarded with New badge(s)
Your next target is to reach 80000 upvotes.
You can view your badges on your board and compare yourself to others in the Ranking
If you no longer want to receive notifications, reply to this comment with the word
STOPCheck out our last posts: